Daten aus einer CSV-Datei importieren
Wenn du von anderen Tools zu Pumble wechselst, kannst du den Arbeitsbereichinhalt aus irgendeiner anderen Plattform (wie Slack oder Microsoft Teams) verschieben, indem du eine CSV-Datei mit dem Inhalt in Pumble importierst.
CSV-Datei in Pumble importieren #
Datei hochladen #
- Click on the three dots next to your workspace name
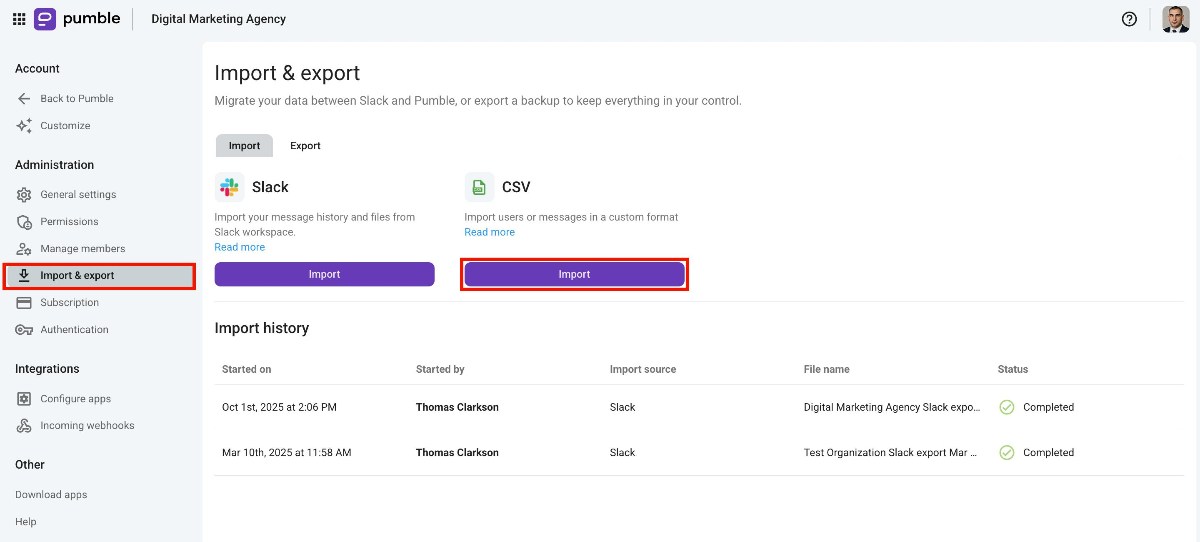
- Bewege den Mauszeiger über Arbeitsbereich settings
- Wähle Allgemeine Einstellungen aus dem Dropdown-Menü
- Open the Import & Export section
- Click Import in the CSV section

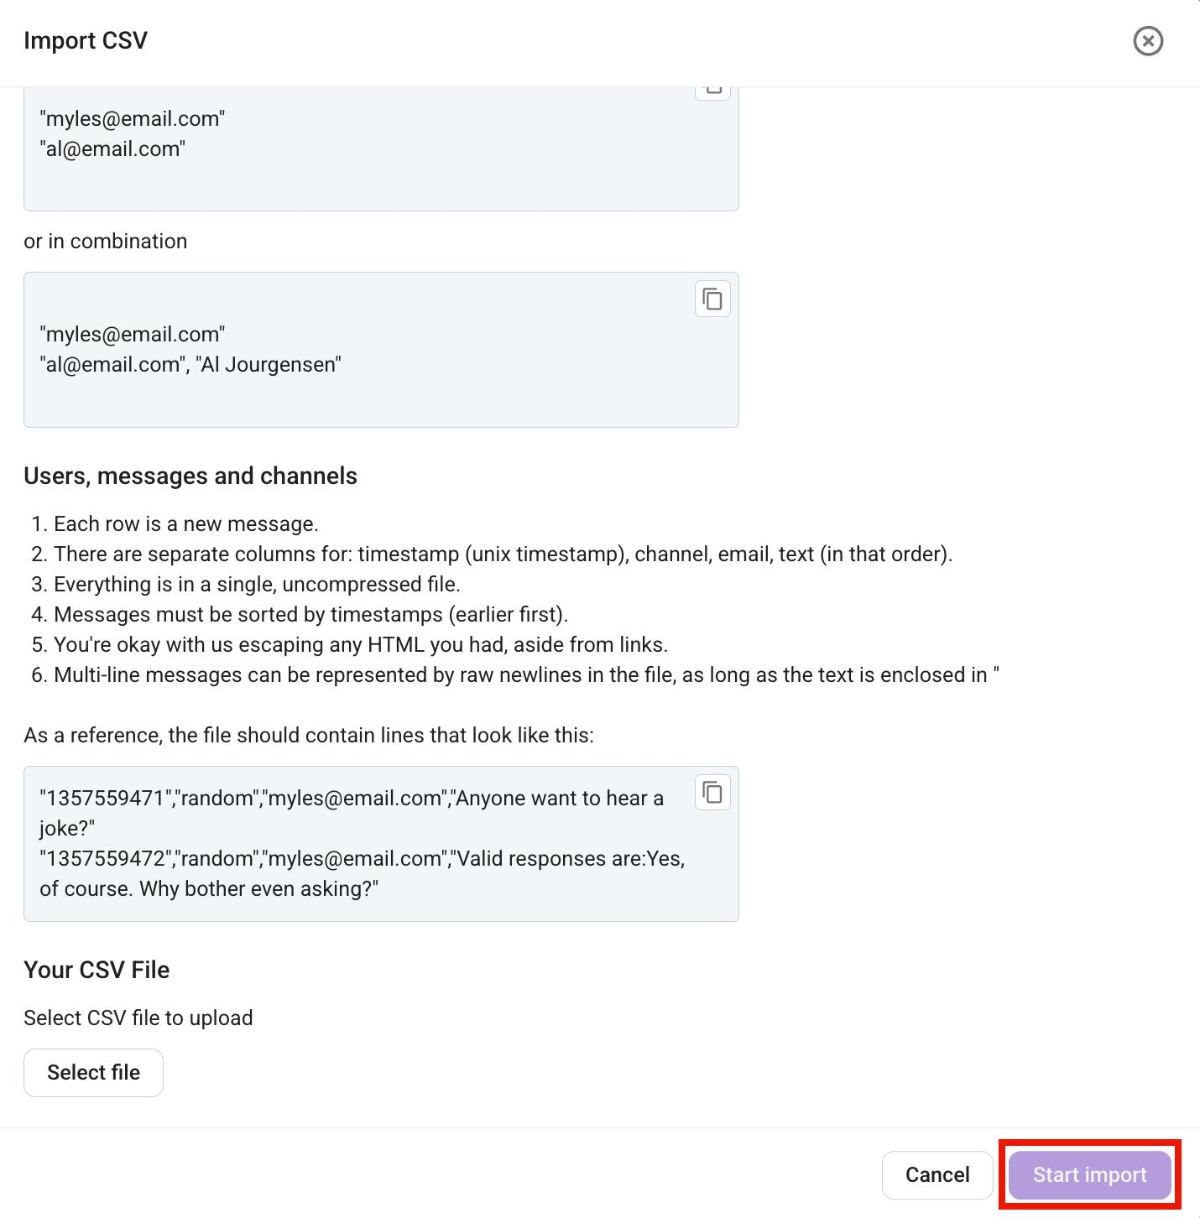
- Upload CSV file
- Click on Start import

If a user already has a Pumble account, the user in the file with the same email address will be automatically mapped to that existing user.
Daten zuordnen #
Um den Import aus einer CSV-Datei abzuschließen, solltest du Benutzer und Kanäle verknüpfen. So funktioniert’s:
Schritt 1: Klicke auf das Dropdown-Menü neben dem Benutzernamen im Abschnitt Zugeordnet und wähle eine der Optionen.
- Keine Aktion (Alles in Ordnung) - falls der Benutzername aus der CSV-Datei zur korrekten Benutzernamen zugeordnet ist, der bereits in Pumble vorhanden ist
- Diesen Benutzer überspringen - falls du diesen bestimmten Benutzer aus der CSV-Datei nicht importieren möchtest
- Zum anderen Benutzer zuordnen - zum Ändern des Benutzernamens, zu dem du den Benutzer aus der CSV-Datei zuordnest und zum Auswählen des Benutzers aus dem Dropdown-Menü
Benutzer, deren Benutzernamen in der CSV-Datei nicht übereinstimmen, werden im Abschnitt Unzugeordnet angezeigt. Es gibt die Option, eine Batch-Aktion an allen unzugeordneten Benutzern auszuführen oder jeden Benutzer individuell zu verwalten.
Schritt 2: Klicke auf das Dropdown-Menü neben Batch-Aktions und wähle eine der folgenden Aktionen, um auf alle unzugeordneten Benutzer anzuwenden:
- Benutzer erstellen und einladen - Benutzer erhalten eine Einladung, einem Pumble-Arbeitsbereich beizutreten
- Benutzer manuell zuordnen (keine Batch-Aktion) - Wähle Benutzer aus dem Dropdown-Menü, um sie manuell zuzuordnen
- Deaktivierte Benutzer erstellen, ohne einen einzuladen - Zum Hinzufügen aller Benutzer mit dem deaktivierten Benutzerstatus zu Pumble
- Keine Benutzer erstellen, Nachrichten als Bot-Nachrichten importieren –Nachrichten werden nur als Bot-Nachrichten importiert
- Benutzer überspringen, ohne ihre Nachrichten zu importieren - Überspringe den Import von Benutzern und ihren Nachrichten
Oder
Klicke auf das Dropdown-Menü neben dem Benutzernamen im Abschnitt Unzugeordnet und wähle eine der Optionen:
- Benutzer erstellen und einladen - Benutzer erhalten eine Einladung, einem Pumble-Arbeitsbereich beizutreten
- Zu vorhandenen Benutzern zuordnen - Wähle einen Benutzer aus dem Dropdown-Menü, um diesen manuell zuzuordnen
- Deaktivierte Benutzer erstellen, ohne einen einzuladen - Zum Hinzufügen aller Benutzer mit dem deaktivierten Benutzerstatus zu Pumble
- Do not create users, leaving messages as bot messages – import only messages as Pumble bot messages
- Benutzer überspringen, ohne ihre Nachrichten zu importieren - Überspringe den Import von Benutzern und ihren Nachrichten
Alle unzugeordneten Benutzer, die als deaktiviert erstellt, eingeladen oder hinzugefügt werden, müssen über eine E-Mail-Adresse verfügen, die mit ihnen verknüpft ist.
Ähnlich wie Benutzer werden Kanäle entweder als zugeordnet oder unzugeordnet angezeigt. Dies hängt von den vorhandenen öffentlichen Kanälen mit demselben Namen, der bereits in Pumble existiert.
Schritt 1: Klicke auf das Dropdown-Menü neben dem Kanalnamen im Abschnitt Zugeordnet und wähle eine der Optionen:
- Keine Aktion (Alles in Ordnung) – Kanal wird zum Kanal mit demselben Namen in Pumble zugeordnet
- Zum anderen Kanal zuordnen - Nachrichten aus diesem Kanal werden in einen anderen (öffentlichen) Kanal importiert, der aus dem Dropdown-Menü ausgewählt wird
- Kanal überspringen (Nicht importieren) - Import des Kanals überspringen
Kanäle, deren Namen in der CSV-Datei nicht übereinstimmen, werden im Abschnitt Unzugeordnet angezeigt. Es gibt die Option, eine Batch-Aktion an allen unzugeordneten Kanälen auszuführen oder jeden Kanal individuell zu verwalten.
Schritt 2: Klicke auf das Dropdown-Menü neben Batch-Aktions und wähle eine der folgenden Aktionen, um auf alle unzugeordneten Kanäle anzuwenden:
- Kanäle manuell zuordnen (keine Batch-Aktion) - Wähle Kanäle aus dem Dropdown-Menü, um sie manuell zuzuordnen (nur öffentliche Kanäle können ausgewählt werden)
- Neue öffentliche Kanäle erstellen
- Neue private Kanäle erstellen
- Keinen Kanal importieren
Oder
Klicke auf das Dropdown-Menü neben dem Kanalnamen im Abschnitt Unzugeordnet und wähle eine der Optionen:
- Neuen öffentlichen Kanal erstellen
- Neuen privaten Kanal erstellen
- Zum vorhandenen Kanal hinzufügen – Wähle die Kanäle aus dem Dropdown-Menü, um sie manuell zuzuordnen (nur öffentliche Kanäle können ausgewählt werden)
- Kanal überspringen (nicht importieren)
Schritt 3: Klicke auf Weiter, um mit dem Import fortzufahren
Schritt 4: Vorschaue alle zugeordneten Daten und klicke auf Mit Import fortfahren, um den Vorgang abzuschließen
Beschränkungen und Regeln zum Import aus der CSV-Datei #
Du kannst Daten je nach Bedarf mithilfe von .CSV- oder .TXT-Dateien in Pumble importieren.
Benutzer in großen Mengen importieren (Bulk-Import) #
Nutze diese Option, um mehrere Benutzer gleichzeitig hinzuzufügen, ohne Einladungs-E-Mails zu versenden. Dies ist ideal, um Kanäle und Gruppen einzurichten, bevor dein Team offiziell dem Arbeitsbereich beitritt. Erforderlich ist lediglich eine Liste von E-Mail-Adressen, Benutzernamen oder eine Kombination aus beidem. Zeitstempel, Kanäle oder Nachrichteninhalte werden hierbei nicht benötigt.
Gesamten Nachrichtenverlauf importieren #
Nutze diese Option, um bestehende Unterhaltungen zu Pumble zu verschieben. Deine Datei muss vier Spalten in dieser Reihenfolge enthalten:
- Zeitstempel: Muss vom ältesten zum neuesten Eintrag sortiert sein
- Kanal: Name des Kanals
- Benutzer: E-Mail-Adresse des Absenders
- Text: Inhalt der Nachricht
Tipps zur Formatierung #
- Alle Daten sollten in einer einzigen, unkomprimierten Datei vorliegen
- Schließe Texte bei mehrzeiligen Nachrichten in doppelte Anführungszeichen („) ein
- Vermeide die Verwendung von HTML in deinen Nachrichten (außer für Links)