Guia de integração para criadores e administradores de espaços de trabalho
O Pumble permite que você crie um espaço de trabalho onde pode se comunicar com seus colegas de equipe e colaborar. Os membros da equipe podem compartilhar mensagens, arquivos, mensagens de voz e muito mais ao ingressar no seu espaço de trabalho.
Neste guia, ajudaremos você a configurar seu espaço de trabalho e começar a usar o Pumble.
Registre-se e crie um espaço de trabalho #
O primeiro passo é criar uma conta e um espaço de trabalho no Pumble. Veja como fazer isso:
- Abra a página de inscrição do Pumble
- Continue with Google/Apple/Microsoft/email
- Digite o código de verificação enviado para o seu e-mail
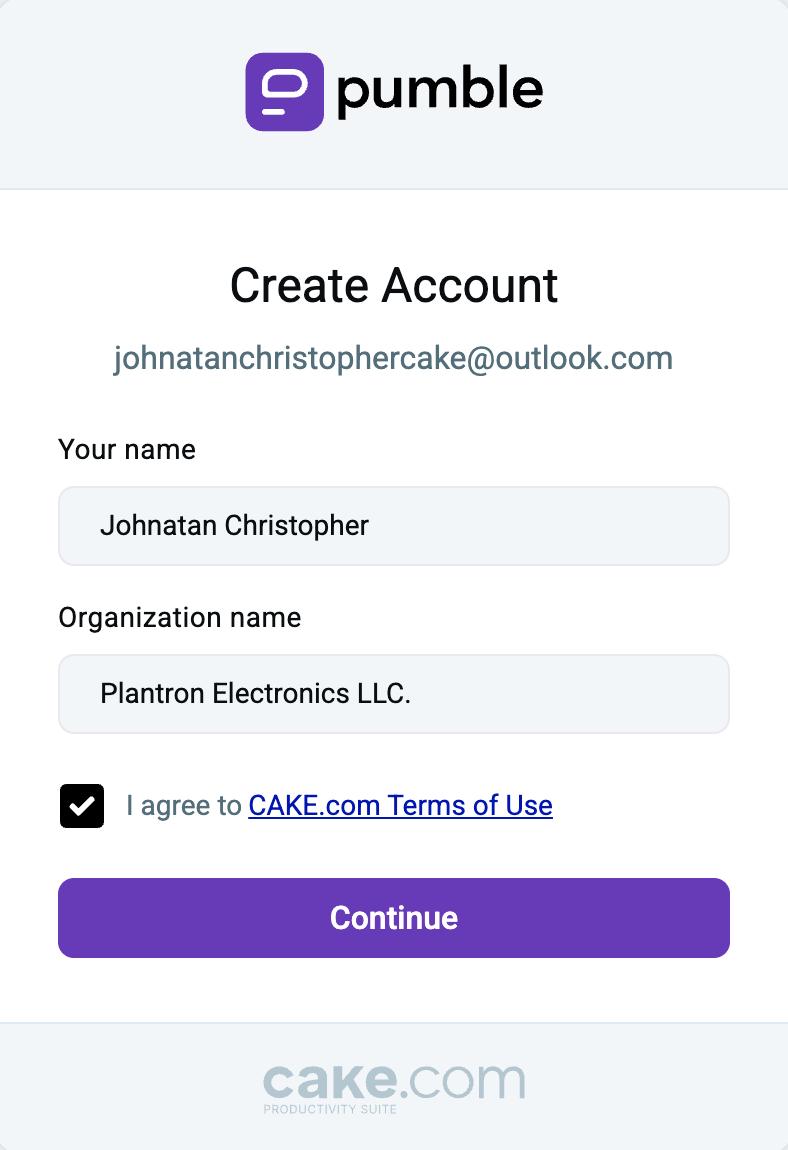
- Digite seu nome
- Digite o nome da sua organização (este nome será usado para o seu espaço de trabalho)
- Concorde com os Termos de Uso da CAKE.com
- Clique em Continuar para concluir o registro
Depois de se registrar com sucesso, você pode prosseguir para configurar seu espaço de trabalho.
Se você é novo no Pumble, confira nosso artigo sobre como usá-lo.
Configure as definições do seu espaço de trabalho #
O Pumble permite que você personalize seu espaço de trabalho de acordo com suas necessidades e oferece diversos recursos em todos os seus planos.
Você pode acessar Configurações gerais, Permissões, Gerenciar membros e Configurar aplicativos. Veja o que você pode fazer:
As configurações do espaço de trabalho só podem ser acessadas pelo aplicativo da web ou do computador.
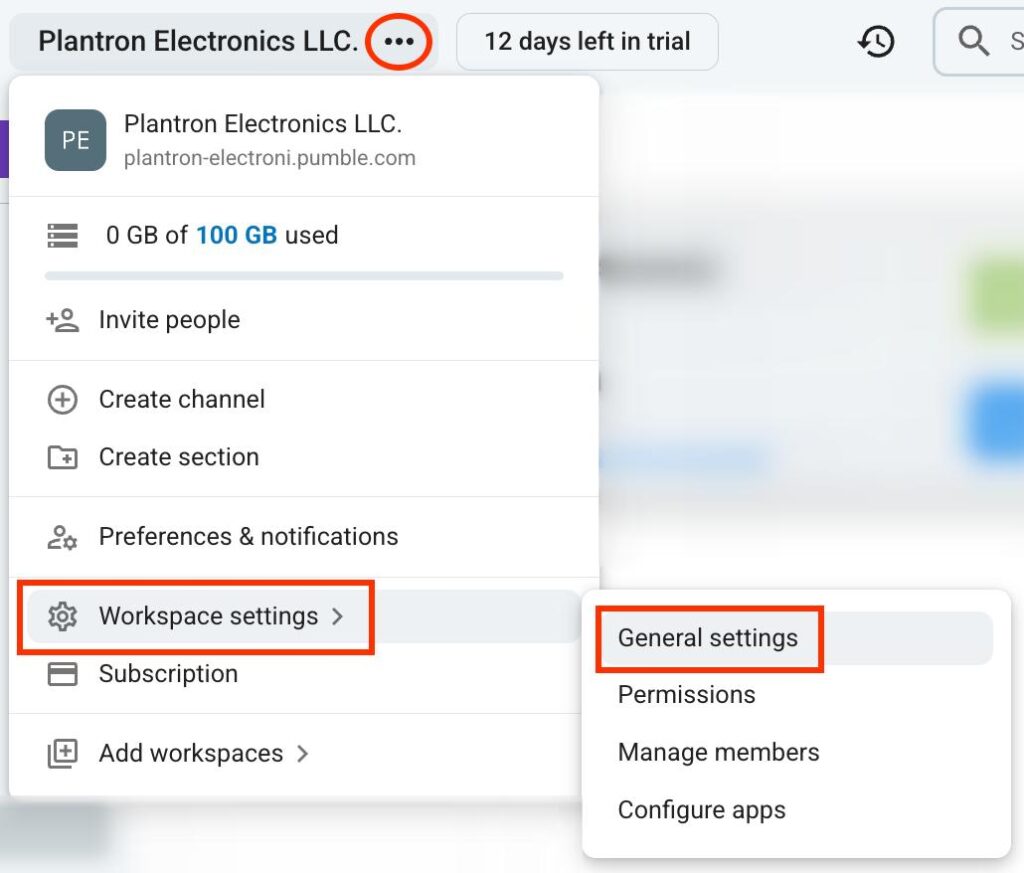
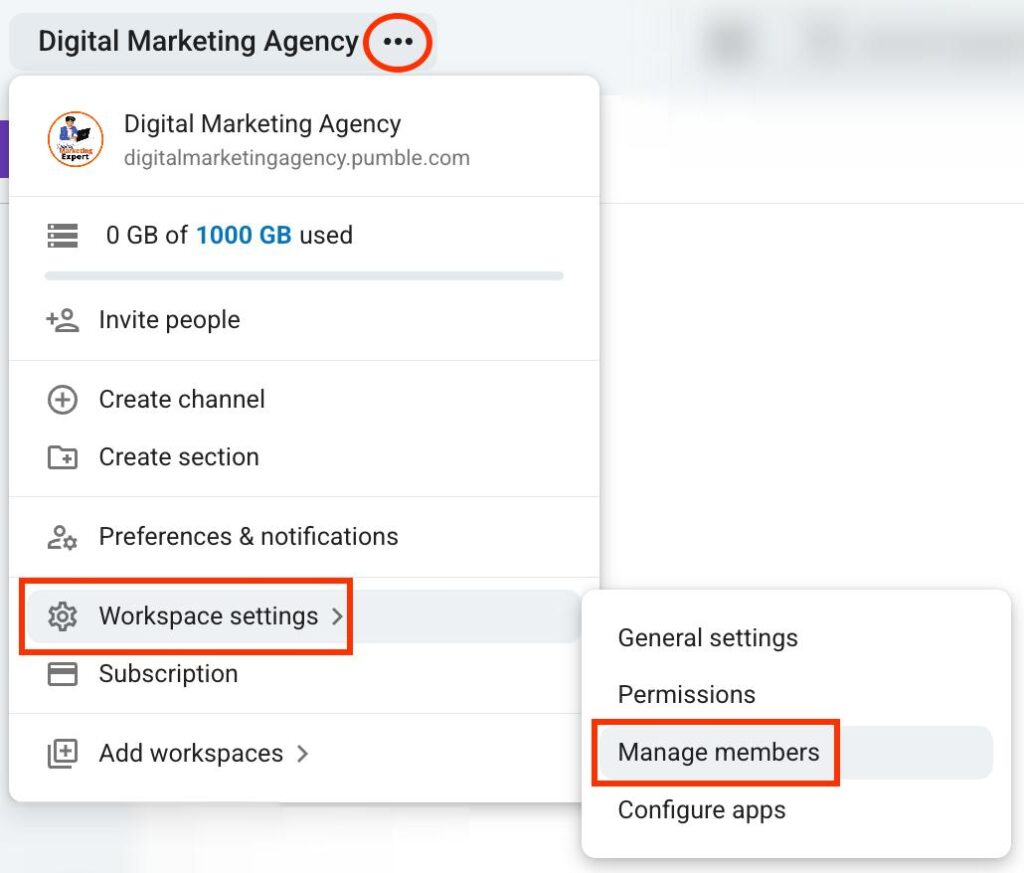
- Clique nos três pontos ao lado do nome do seu espaço de trabalho.
- Navegue até Configurações do espaço de trabalho
- Clique em Configurações gerais
Nas configurações gerais, você pode modificar:
- Canais padrão — defina os canais padrão nos quais os usuários entrarão automaticamente
- Gerenciar exibição de e-mail — defina se o endereço de e-mail do usuário será exibido no perfil
- Mensagens de entrada e saída do canal — envie mensagens quando um membro entrar ou sair de um canal
- Notificação sobre novos usuários — defina notificações para os membros quando um novo usuário entrar na equipe
- Histórico de arquivos — determine se os arquivos serão excluídos após algum tempo
- Ícone do espaço de trabalho — adicione um ícone para o seu espaço de trabalho
- Nome e URL do espaço de trabalho — altere o nome e a URL do seu espaço de trabalho
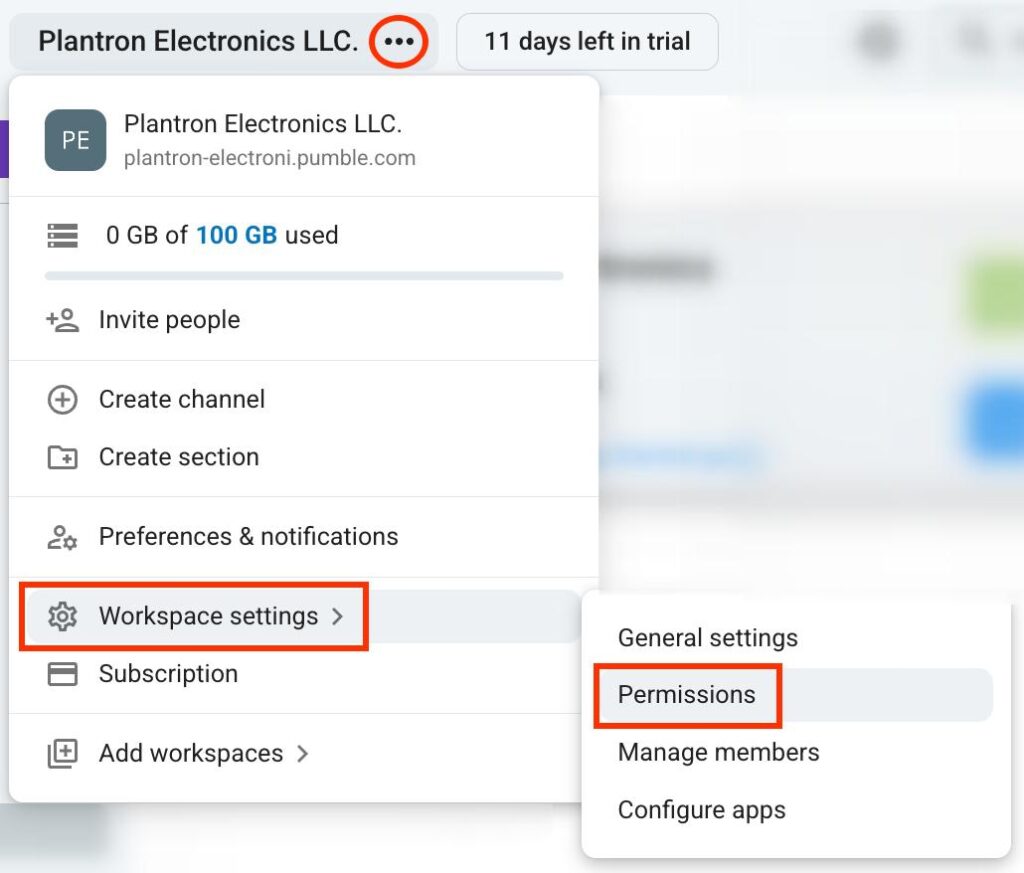
- Clique nos três pontos ao lado do nome do seu espaço de trabalho.
- Navegue até Configurações do espaço de trabalho
- Clique em Permissões.
As permissões possibilitam que você controle o que os usuários podem fazer no seu espaço de trabalho. Veja o que você pode modificar:
- Mensagens — defina quem pode publicar nos canais e enviar mensagens diretas
- Convites — defina quem pode convidar novos usuários para o espaço de trabalho
- Gerenciamento de canais — defina quem pode criar e gerenciar canais
- Grupos de usuários — defina quem pode criar e editar grupos de usuários
- Edição e exclusão de mensagens — defina se os usuários podem editar ou excluir mensagens
- Reuniões — ative ou desative as reações nas reuniões
- Emojis personalizados — defina quem pode criar emojis personalizados
- Clique nos três pontos ao lado do nome do seu espaço de trabalho.
- Navegue até Configurações do espaço de trabalho
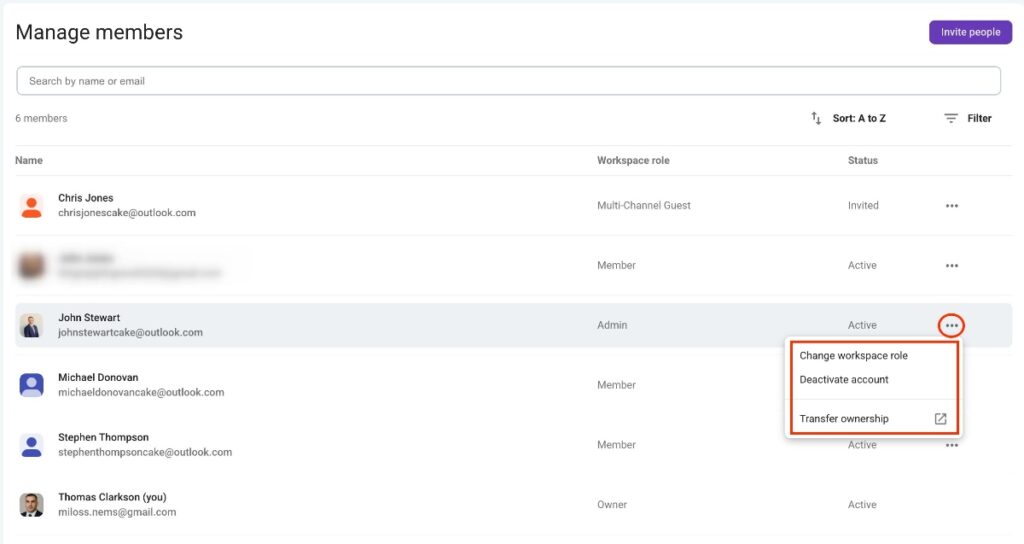
- Clique em Gerenciar membros.
Nesta seção, você pode alterar as funções dos membros e desativar suas contas. Além disso, você pode transferir a propriedade do espaço de trabalho para os administradores. Veja como fazer isso:
- Clique nos três pontos na coluna da extrema direita
- Selecione a ação desejada
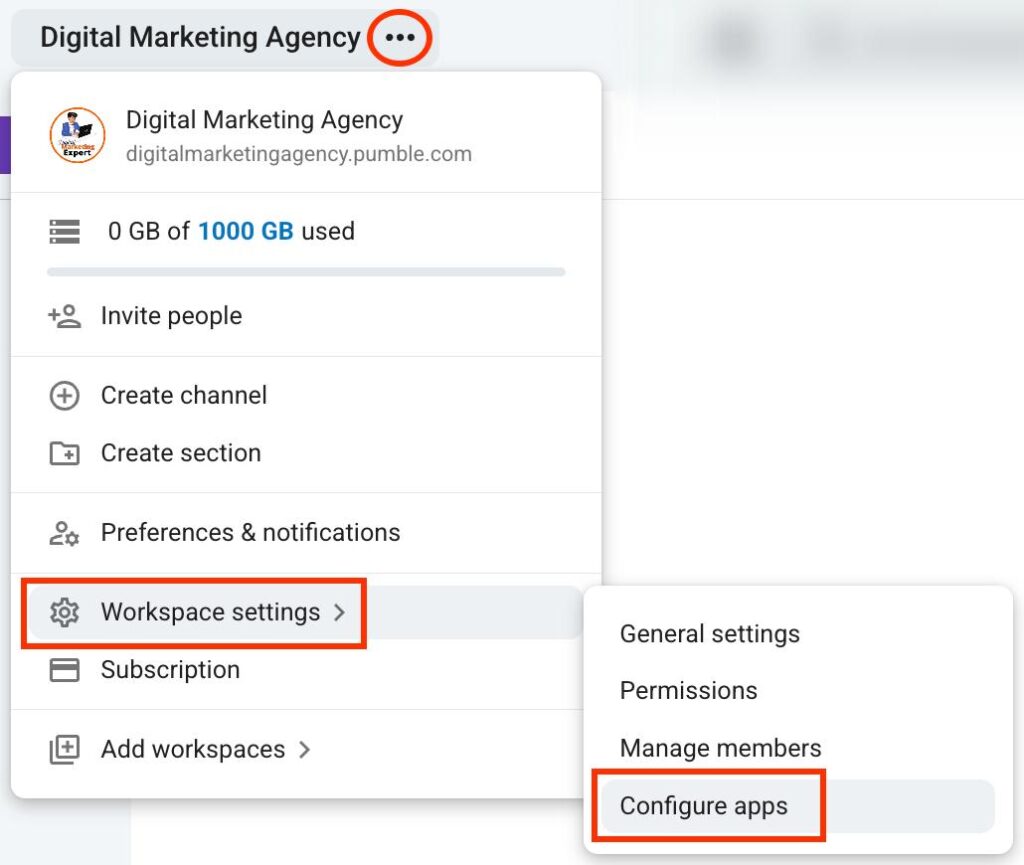
- Clique nos três pontos ao lado do nome do seu espaço de trabalho.
- Navegue até Configurações do espaço de trabalho
- Clique em Configurar aplicativos.
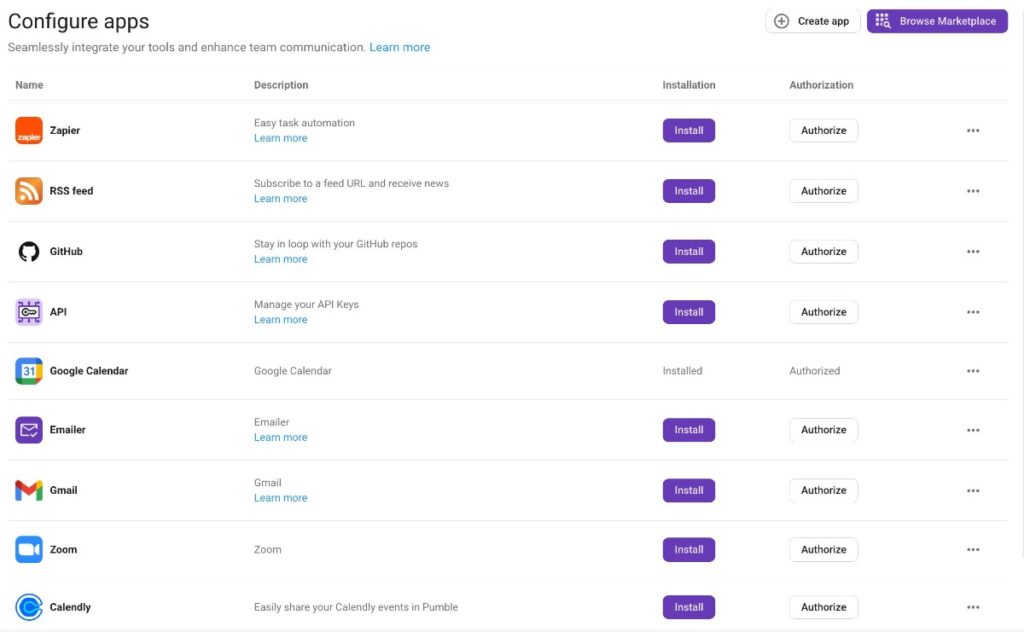
Aqui você pode configurar integrações e conectar diferentes ferramentas ao seu ambiente de trabalho do Pumble. Você pode criar integrações com ferramentas populares, como:
- Zapier
- GitHub
- Google Calendar
- Gmail
- Calendly
Convidar membros para seu espaço de trabalho #
Depois que as configurações do seu espaço de trabalho estiverem definidas, você poderá começar a convidar membros. Adicionar membros é essencial para uma colaboração eficiente, e você precisa garantir que todos os seus colegas de equipe estejam a bordo.
Veja uma maneira de convidar membros:
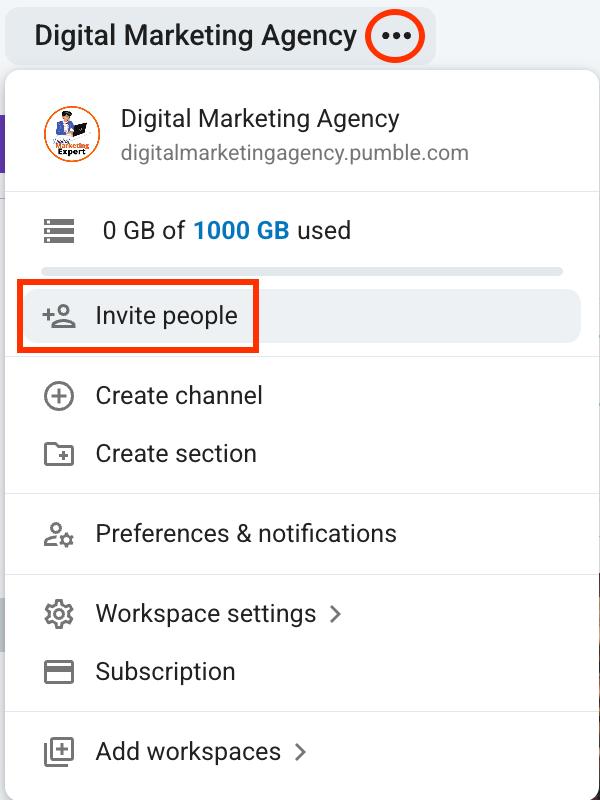
- Clique nos três pontos ao lado do nome do seu espaço de trabalho.
- Clique em Convidar membros
- Escreva o endereço de e-mail do usuário que deseja convidar
- Escolha a função dele na seção Convidar como
- Clique em Enviar convite para concluir a ação
Outra maneira de convidar membros é pela seção Pessoas e Grupos de Usuários. Veja como:
- Clique em Pessoas e grupos de usuários na barra lateral esquerda
- Clique em Convidar pessoas no canto direito
- Escreva o endereço de e-mail do usuário que deseja convidar
- Escolha a função dele na seção Convidar como
- Clique em Enviar convite para concluir a ação

Escolha um plano de assinatura #
Embora o Pumble ofereça muitas funcionalidades em seu plano GRATUITO, escolher um plano de assinatura pode desbloquear diversos recursos adicionais para você e sua equipe.
Veja como você pode atualizar sua assinatura:
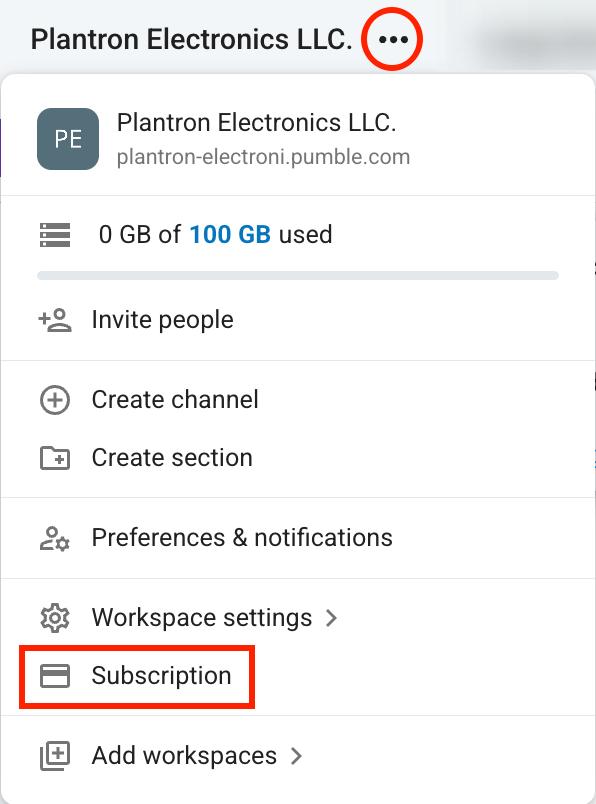
- Clique nos três pontos ao lado do nome do seu espaço de trabalho.
- Clique em Assinatura
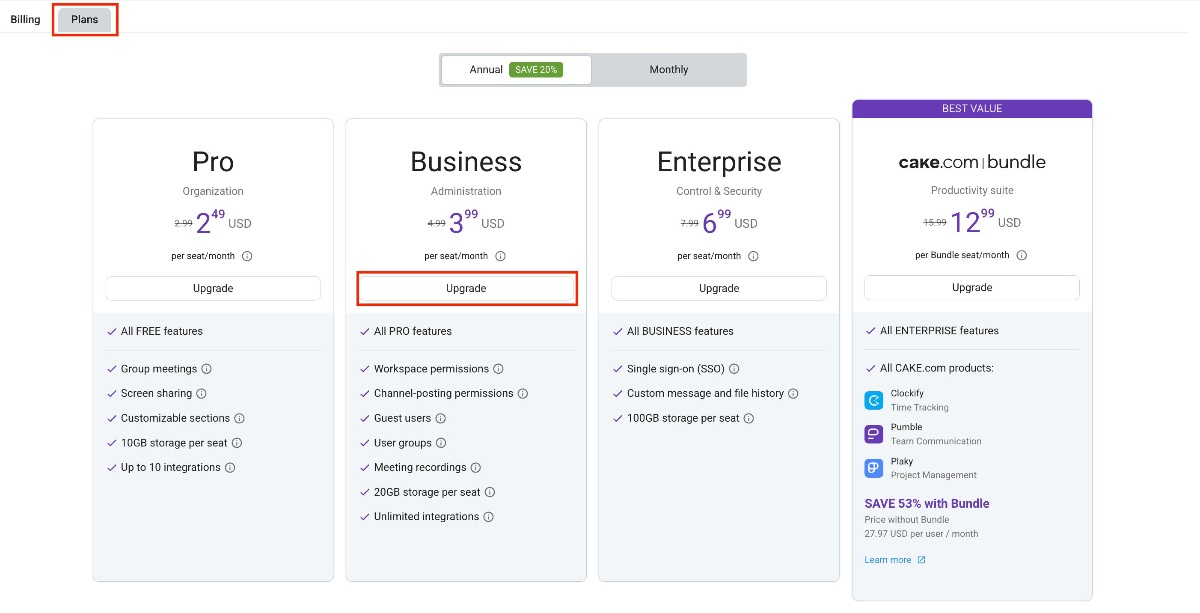
- Abra a aba Planos
- Clique em Atualizar no seu plano preferido
- Insira as informações do cliente, fatura e pagamento
- Clique em Concluir pagamento para finalizar o processo