Import Data from CSV File
If you are switching to Pumble from other tools, you can move your workspace content from any platform, like Slack and Microsoft Teams, by importing a CSV file with it to Pumble.
Import CSV to Pumble #
Upload the file #
- Click on the three dots next to your workspace name
- Hover over Workspace settings
- Select General settings from the dropdown
- Open the Import & Export section
- Click Import in the CSV section
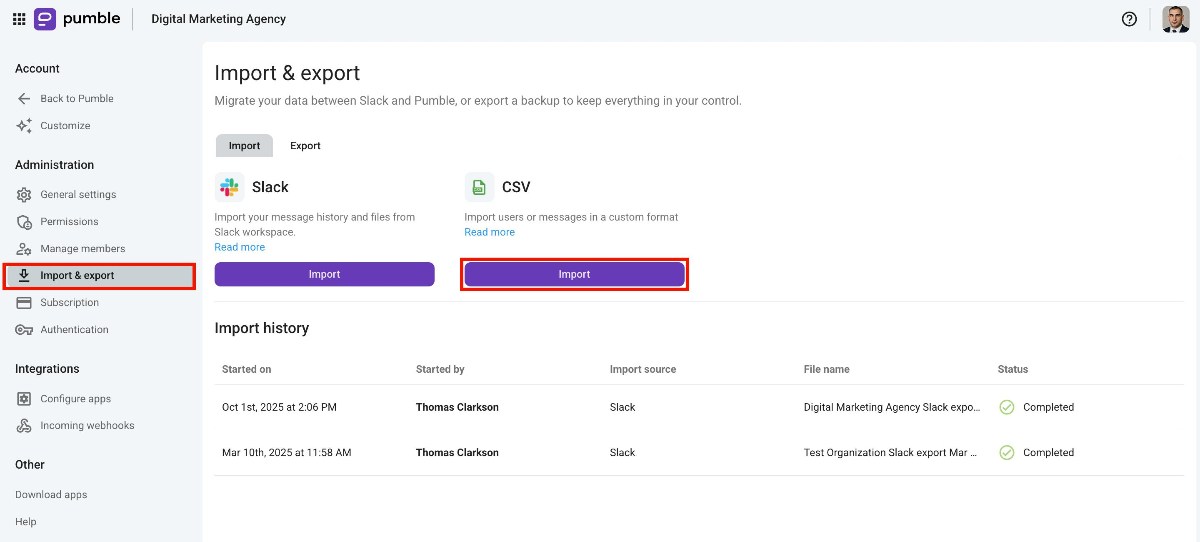
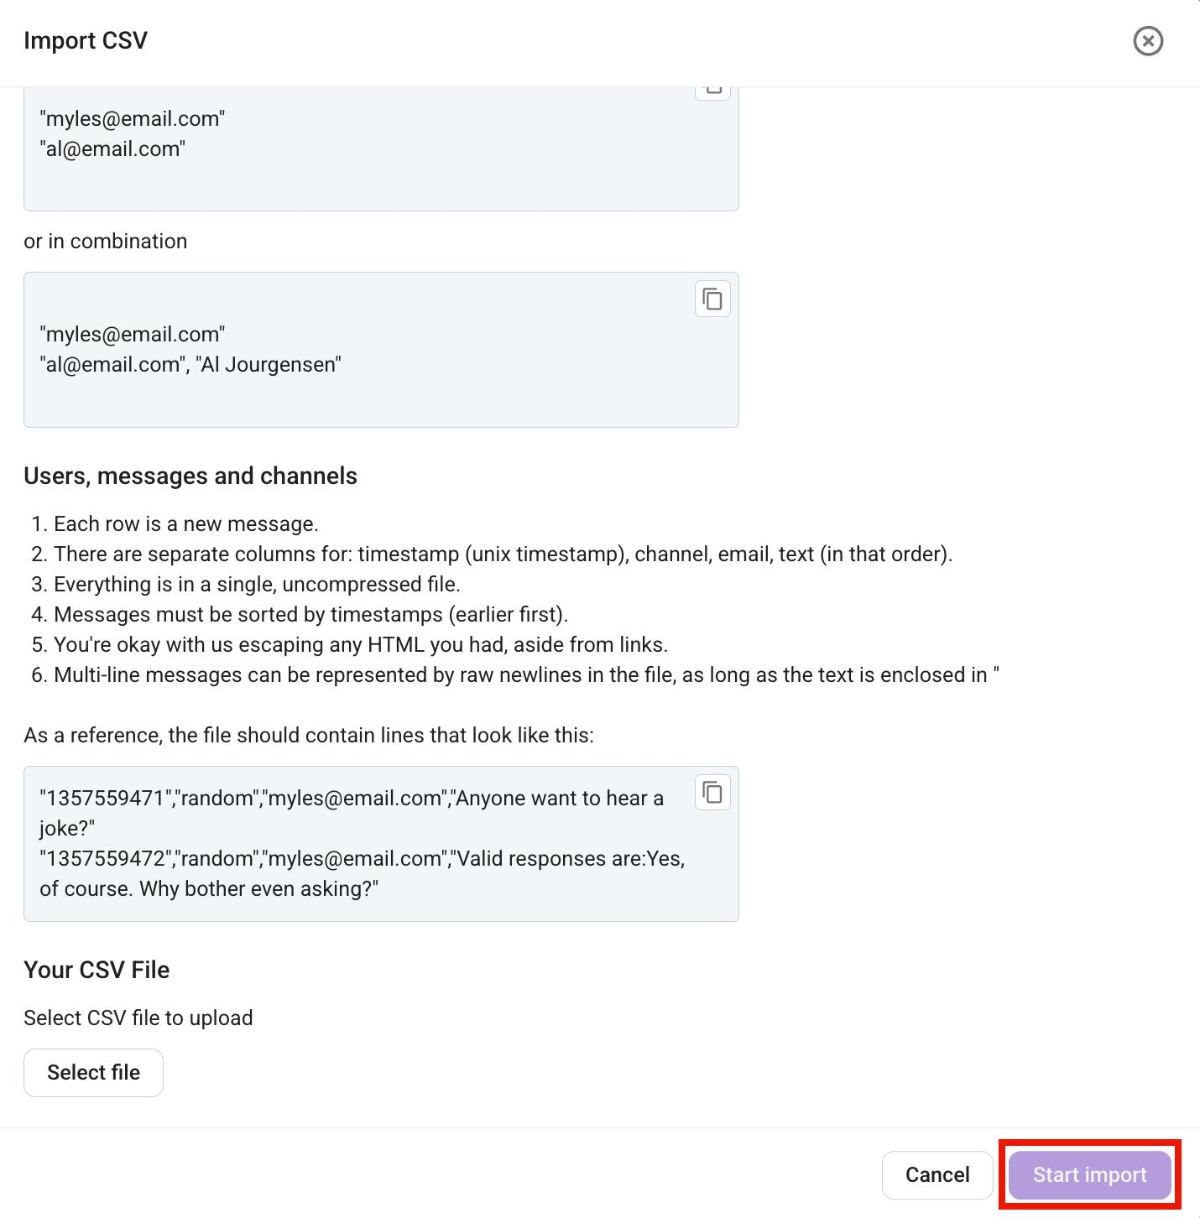
- Upload CSV file
- Click on Start import
If a user already has a Pumble account, the user in the file with the same email address will be automatically mapped to that existing user.
Map the data #
In order to complete the import from CSV, you need to Map users and channels. Here’s how to do it:
Step 1: Click on the dropdown menu next to the user name in the Mapped section and select one of the options:
- No action (All good) – if the user name from CSV file is mapped to a correct user name already existing on Pumble
- Skip this user – if you don’t want to import that particular user from CSV
- Map to a different user – to change the user name you’re mapping a user from the CSV to, and select the user from the dropdown
Users whose user names in CSV do not have a match will appear in the section Unmapped. There is an option to make batch action on all unmapped users or manage each individually.
Step 2: Click on the dropdown next to Batch actions and select one of the following actions to apply to all unmapped users:
- Create & invite user – the user will receive an invitation to join Pumble workspace
- Manually map users (no batch actions) – Select the users from the dropdown to manually map them
- Create deactivated users, without inviting anyone – To add all users to Pumble with deactivated user status
- Do not create users, leaving messages as bot messages – import only messages as bot messages
- Skip users, without importing their messages – skip importing users and their messages
Or
Click on the dropdown menu next to the user name in the Unmapped section and select one of the options:
- Create & invite user – the user will receive an invitation to join Pumble workspace
- Map to an existing user – Select the user from the dropdown to manually map them
- Create deactivated users, without inviting anyone – To add all users to Pumble with deactivated user status
- Do not create users, leaving messages as bot messages – import only messages as Pumble bot messages
- Skip users, without importing their messages – skip importing users and their messages
All unmapped users that are being either created, invited or added as deactivated must have an email address associated with them.
Similarly to users, channels are displayed as either mapped or unmapped, depending if there are existing public channels with the same name already on Pumble.
Step 1: Click on the dropdown menu next to the channel name in the Mapped section and select one of the options:
- No action (all good) – leave channel automatically mapped to the channel of the same name on Pumble
- Add to different channel – messages from that channel are instead imported to another channel (public) that you select from the dropdown
- Skip channel (don’t import) – skip importing the channel
Channels whose names in CSV do not have a match will appear in the section Unmapped. There is an option to make batch action on all unmapped channels or manage each individually.
Step 2: Click on the dropdown next to Batch actions and select one of the following actions to apply to all unmapped channels:
- Manually map channels (No batch actions) – Select the channels from the dropdown to manually map them (only public channels can be selected)
- Create all new public channels
- Create all new private channels
- Do not import any channels
Or
Click on the dropdown menu next to the channel name in the Unmapped section and select one of the options:
- Create new public channel
- Create new private channel
- Add to existing channel – Select the channels from the dropdown to manually map them (only public channels can be selected)
- Skip channel (don’t import)
Step 3: Click continue to continue with the import
Step 4: Preview all the data that you mapped and click Proceed with the import to complete the process
Limits and rules for import from CSV #
You can import data into Pumble using .CSV or .TXT files depending on your needs.
Import users in bulk #
Use this to add multiple users at once without sending invitation emails. This is perfect for setting up channels and groups before your team officially joins the workspace. It requires only a list of email addresses, usernames, or a combination of both, with no timestamps, channels, or message content needed.
Import full message history #
Use this option to move existing conversations into Pumble. Your file needs to contain four columns in this order:
- Timestamp — Needs to be sorted from oldest to newest
- Channel — Name of the channel
- Users — Sender’s email address
- Text — Message content
Import DMs from CSV #
Use this import if you want to move existing 1:1 and group DMs to Pumble. Your file needs to have the following structure:
- Timestamp — needs to be sorted from oldest to newest
- Direct message ID — every DM has a unique ID with a prefix (e.g., dm_01)
- User mail — sender’s email address
- Message text — message content in inline code
Or, if you are importing users only (when users haven’t sent any messages to the group DM they belong to).
- Direct message ID — every DM has a unique ID with a prefix (e.g., dm_01)
- User mail — sender’s email address
Important notes:
- Each row is a new message
- There are separate columns for: timestamp (unix timestamp), dm_1, email, text (in that order)
- Timestamp and message text are optional
- Users not listed in the CSV file won’t be imported and won’t be included in the imported DMs. Every user you want to add to DM must be added to the CSV file
- DM-1 is an identifier of the direct message group. If you want to import more DMs, each DM needs to have its own identifier, so DM-1 for one dm, DM-2 for the second, etc. All entries/messages in the CSV file with DM-1 will be added to the same conversation.
You can’t import DMs with more than 8 users.
Formatting tips #
- All data should be in a single, uncompressed file
- For messages with multiple lines, wrap the text in double quotes (“)
- Avoid using html in your messages (except for links)