Frequently Asked Questions
To delete your Pumble Workspace, follow the instructions below:
- Click on the Workspace switcher in the top left corner
- Click on your CAKE.com account
- Select the Workspaces tab on the left
- Click on the three dots next to a Workspace
- Click on Delete workspace
In order to delete a Workspace, all Workspace members must be deactivated first.
To add an Admin to your Workspace, you have to change a user’s Workspace role. Here’s how you can do this:
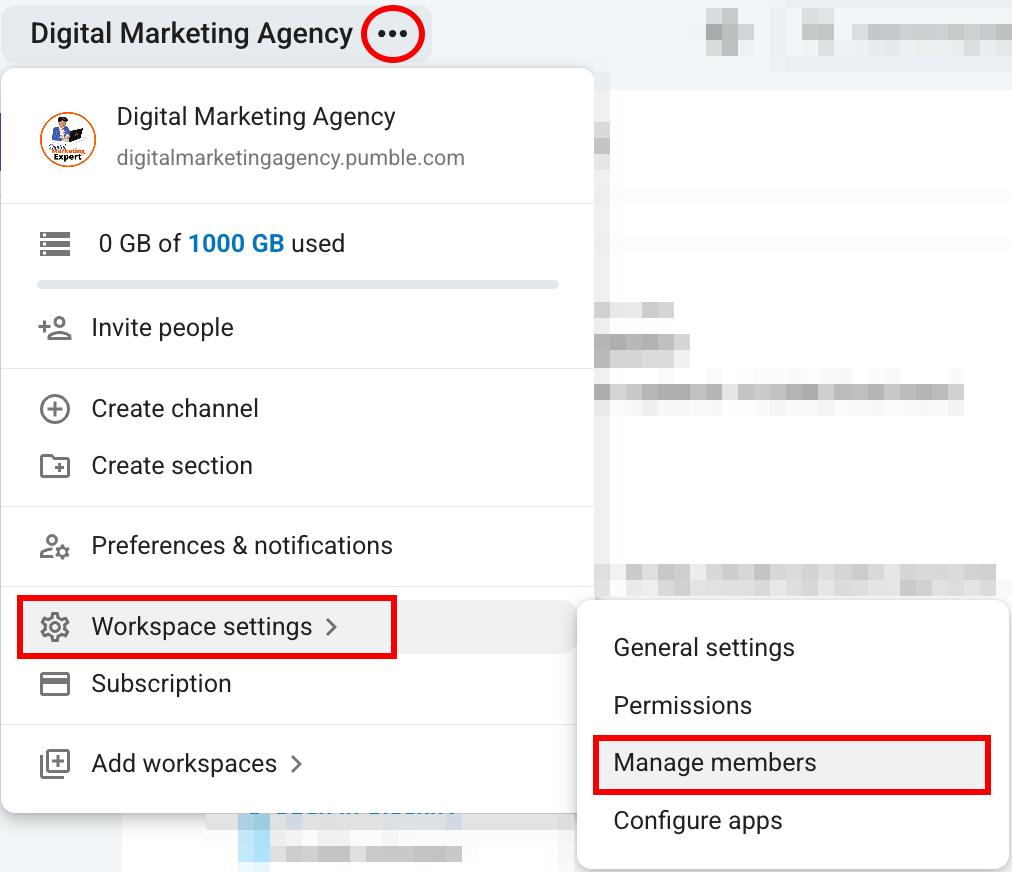
- Click on the three dots next to your Workspace name
- Hover over Workspace settings
- Click on Manage members
- Click on the three dots next to a user
- Select Change workspace role
- Select Administrator
- Click on Save to complete the action
To unarchive a channel on Pumble, follow these steps:
- Click on All channels in the left sidebar
- Click on Any channel type
- Select Archived channels
- Select the channel you want to unarchive
- Click on the information icon in the top right corner
- Click on More
- Select Unarchive [channel name]
Per seat pricing means that you will be charged for every user (seat) in your Workspace. Picture that every member of your Workspace has a seat in an office, the total number of members equals the total number of seats you will have.
If you’re not receiving verification emails, it might be due to an excessive number of unused OTP codes. To fix this, simply open the last verification email and click the click here button to start receiving emails again. Always use your login code within 30 minutes to avoid this issue in the future.
Yes, Pumble does have an affiliate program.
If you are interested in partnering with Pumble to promote our services and earn commissions, you can join our affiliate program through CAKE.com. The program offers an opportunity to monetize your audience by sharing Pumble’s team communication and collaboration tools.
For more information and to sign up for Pumble affiliate program, visit this page.
As a regular user, you can’t delete your Pumble account on your own. However, you can send a request to your workspace owner to have your account deleted. Here’s how you can do this:
- Click on your profile picture in the upper right corner
- Click on Manage CAKE.com account
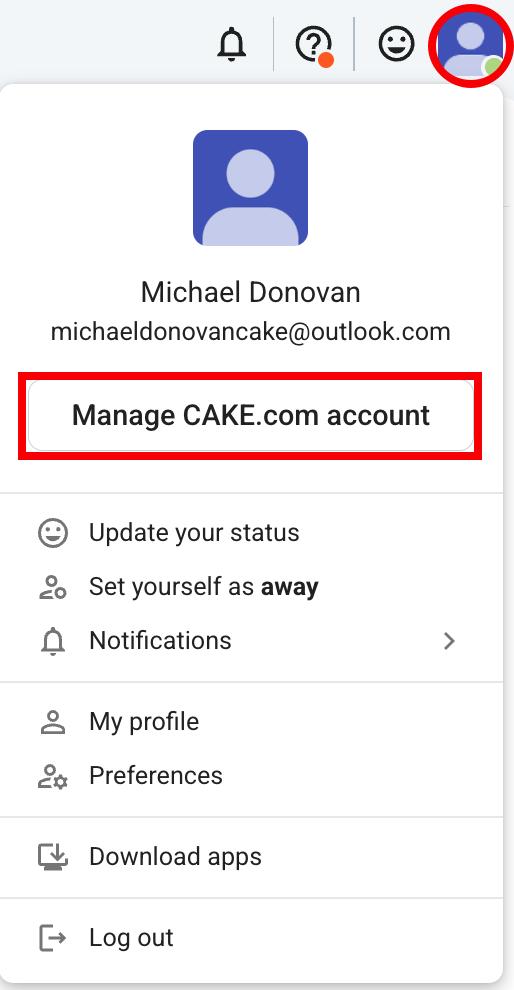
- Select the Close Account tab in the left sidebar
- Click on Request profile deletion
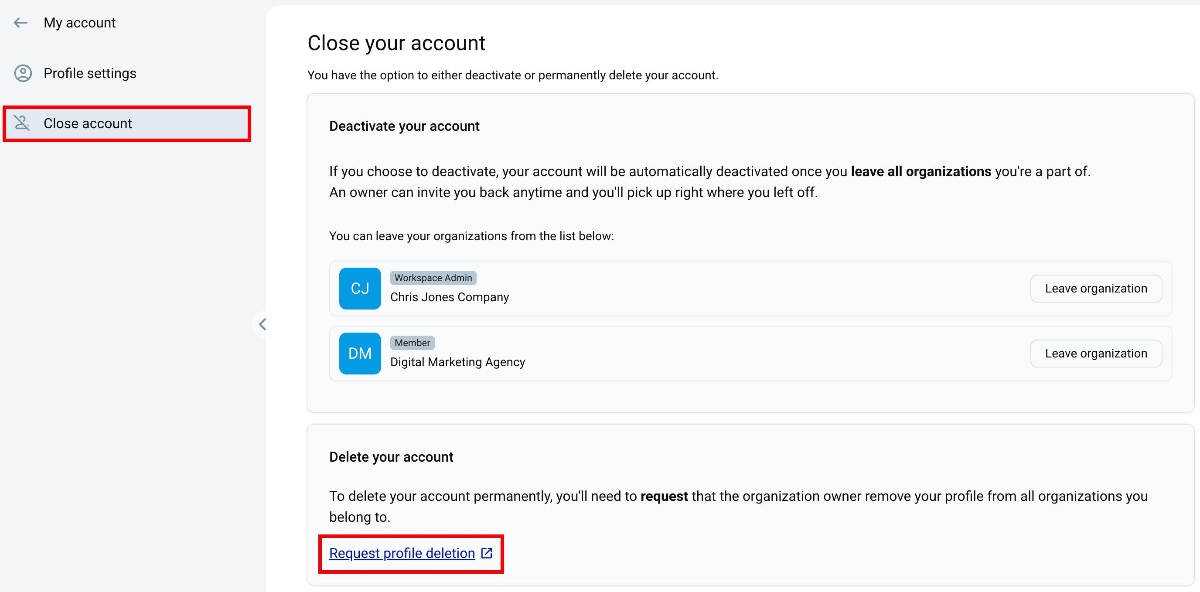
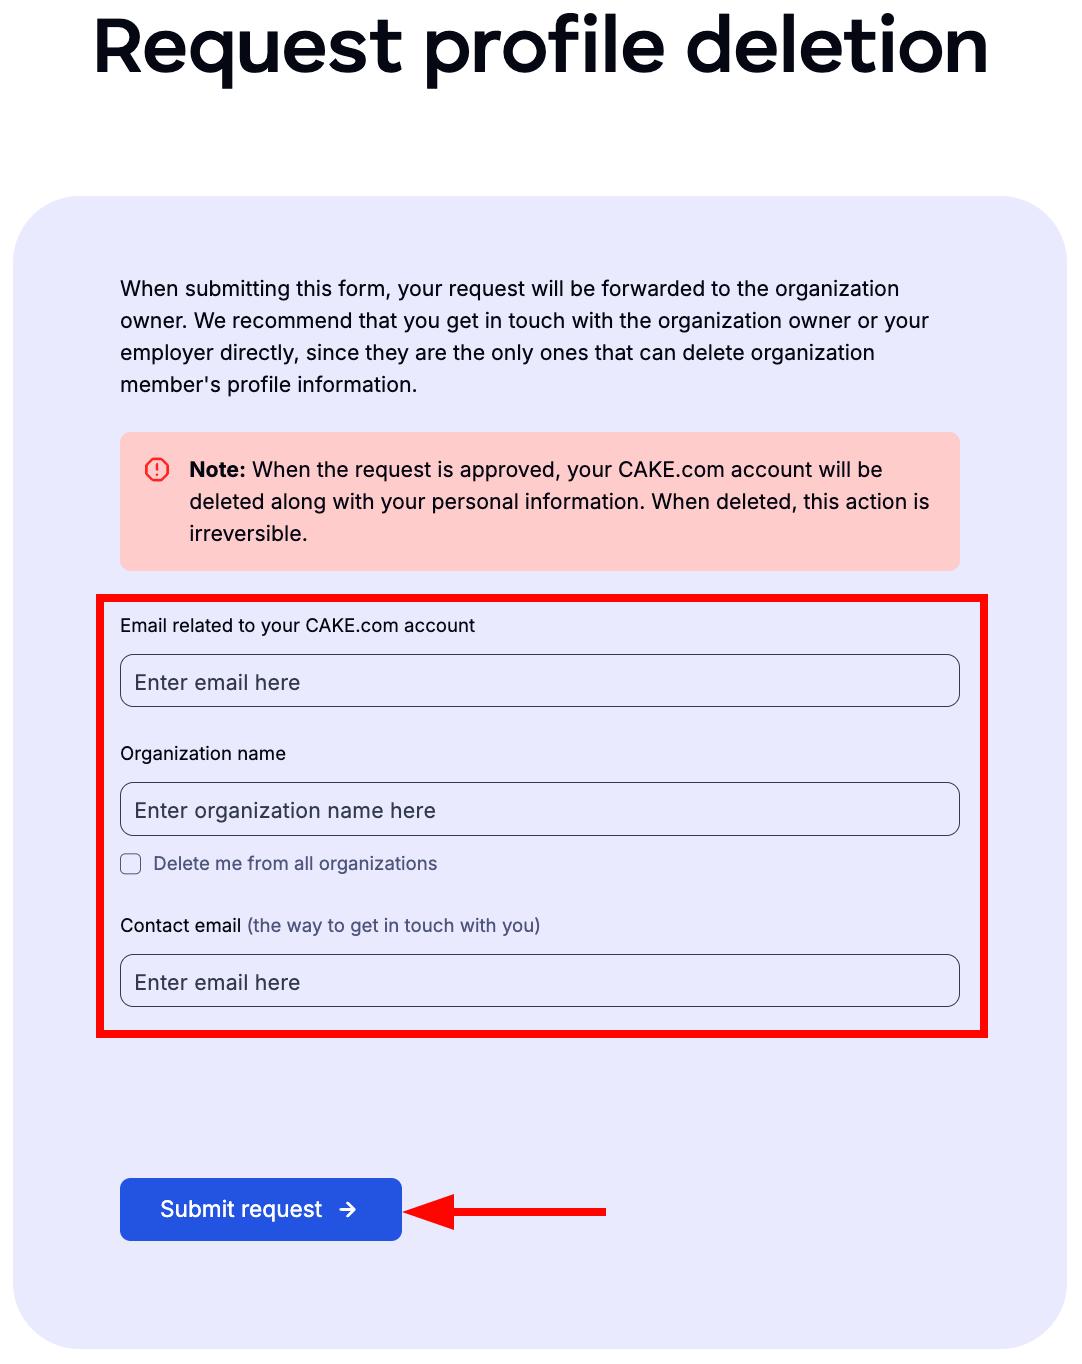
- Fill out the Request profile deletion form
- Click on Submit request to complete the action
Once you submit the request, the workspace owner will receive a notification and can delete your account.
If you are a workspace admin, you can request profile deletion the same way a regular user would. However, if you are a workspace owner, you must transfer ownership to another user before requesting profile deletion.
To remove someone from your team/workspace, you need to deactivate their account:
- Navigate to the workspace name at the top left corner
- Hover over Workspace settings
- Select Manage members
- Click on the three dots next to the user’s name
- Click on Deactivate Account
- Click Deactivate account to confirm the action

Deactivated accounts remain visible in the People & User Groups section of the app and in the Manage members section in Workspace settings.
Yes, Zapier integration allows you to connect Pumble with thousands of other applications, enabling you to automate repetitive tasks and streamline communication within your team. Check out this article to learn more about Zapier integration.
Pumble desktop app will automatically start when you turn on your computer as a default setting, but you can turn that setting off. To disable auto-start follow these steps:
- Windows: Access the Startup Apps and toggle the switch next to Pumble app to disable auto-start.
- MacOS: Access you Pumble profile icon in the top right corner, select Preferences, open Advanced tab and uncheck Auto-start application checkbox to disable auto-start
- Linux: Access Startup Applications and remove Pumble app to disable auto-start
At the moment, it is not possible to turn off messaging between all users in a Workspace. It is possible to make a sort of restriction, if you add users as guests. Guests can only initiate direct messages with users that belong to the same channel(s) as they do. However, be aware that all regular members in the workspace can initiate direct messages with guests, and that way guests can still communicate with other workspace users.
By default all regular members are added to the general channel when they join Pumble. In order to restrict a user from accessing the general channel, you can change their role to a guest (single-channel or multi-channel) and not include the general channel when choosing the channel(s) they can access. Also, when inviting a new user, you can invite them as a guest and choose not to add them to the general channel.
To unsubscribe from email notifications, click on your profile icon and select Preferences from the dropdown. Open Email tab, and uncheck the checkbox that says “Receive emails about product updates, or newest features, improvements and bug fixes”.
If you are not receiving notifications on your laptop, check if notifications are allowed in the system settings of your device. On mobile app, check if notifications coming from Pumble are allowed in permissions. Also, it is possible that you are not receiving your notifications due to your notification schedule.
Check the schedule following these steps: Click on your profile photo and select Preferences. If your notification preferences are set the way you want them to be, try restarting the app. These steps should help resolve any notification issues you might be facing.
Check your spam or junk folder. Occasionally, legitimate emails may end up in these folders. To make sure you receive our emails timely, it may be necessary for you to authorize specific IP addresses and domains associated with our services. If you are using an enterprise email system, it is recommended to reach out to your system administrator or IT department. They can assist you in whitelisting our domains and IP addresses at the system level, ensuring consistent email delivery. These steps should resolve the issue you might be facing.
At present, Pumble supports desktop and mobile notifications. While email notifications are available, they are specifically designed to update you on the latest features, product updates, improvements, and bug fixes.
To access your invoices, click on the downward arrow in the top left corner next to your WS name, hover over Workspace settings and select Billing, and then open Invoices tab. To download an invoice, click on Download invoice next to the billing statement you want to check, and the invoice will be downloaded in PDF format.
Your Pumble profile details come directly from your CAKE.com account. Any changes you make there will automatically apply to your Pumble Workspace.
To change your email in Pumble, follow these steps:
- Click on your profile picture in the top right corner
- Select My profile
- Click on Manage CAKE.com account to get redirected to your CAKE.com account and edit your email
- Tap Save to complete the action
To learn more about how to edit your CAKE.com account, check out this article.
No, at the moment it is not possible to see who viewed a message on Pumble.
Sections are visible only to the user that made the sections. What could possibly solve your issue is to agree with your team to create the same sections for yourselves.
Yes, they can. Users added to a channel can see the whole channel history.
It is not necessary for workspace users to have the same email domain.
Storage in Pumble takes into count all PDFs, documents, images, screenshots, and audio and video files (including audio and video messages) uploaded to a channel or direct message. Text messages and links shared in messages do not take storage space.
The amount of space available for a workspace varies by plan, and you can track available storage space by checking the storage indicator when you click on the arrow next to your Workspace icon. On Free plan, there is 10GB storage for the whole workspace. On paid plans storage is also shared across the workspace, but grows with the number of purchased seats. For example, if you have 10 seats purchased on PRO plan, your combined workspace memory will be 100GB.
All users (including Guests) can upload files. To free up storage, any user can delete the files they have uploaded to Pumble.
It’s important to note that within a single workspace, you cannot have a mix of subscription plans. The plan you purchase applies to the entire workspace, meaning that all users within that workspace share the same subscription plan.
However, you can have different subscription plans for each app. For example, you can use a FREE subscription on Pumble and a PRO subscription on Clockify.
Guests are a feature available on paid plans only. There are two types of guest users in Pumble:
- Single channel guests
- Multi-channel guests
Multi-channel guests are charged as regular users and they can be added to an unlimited number of private or public channels, but only to the channels you specify.
Single-channel guests can only be a member of one private or public channel, and you can invite up to 5 single-channel guests free of charge, for each paid seat on your Workspace. This means that for each purchased seat on a workspace, you get 5 single-channel guests for free.
Pumble currently supports English, German, French, Portuguese, and Spanish.
Pumble is secure to use. Pumble has S0C 2 compliance and ISO/IEC 27001:2013 security certificate.
To import data from Slack to Pumble you need to have a workspace created on Pumble.
First export the data from Slack. After you have successfully completed export from Slack, you can import public and private channels, messages from those channels, and users from Slack to Pumble. Make sure that you are the Owner of your workspace on Pumble, as only workspace Owners can import Slack’s information. To do the import:
- Navigate to Workspace settings
- Select General settings from the dropdown
- Open Import & Export section, Import tab
- Click Choose zip file
- Choose the zip file you previously downloaded
- Ensure that the file was not edited
- Confirm the file and click Start import
Depending on the amount of information in your import, it might take some time to complete. You’ll receive an email when your workspace is fully ready.
For more detailed assistance, refer to our Onboarding Guide for Workspace Creators and Admins.
First you need to download Pumble mobile app from Google Play store/App store.
When downloaded, start the app, tap on Get started, and then you can choose to login with your email, with Google, Apple or with the workspace URL.
Log in with email
- Enter your email address and tap Continue
- Find the email with a verification code in your inbox
- Enter your verification code
- Select which workspace you’d like to log in to/accept pending invitations
- Tap Log in to complete the action
Log in with Google
- Tap on Continue with Google
- You’ll be redirected to your email account
- Select the Workspace you want to log in to
- Tap Log in to complete the action
Log in with Workspace URL
- Tap on Log in with Workspace URL
- Enter the workspace URL
- Tap Continue
- Tap on Continue with Google/Continue with [custom SSO name] or Log in with password
if you choose to Log in with password: - Enter your email address
- Enter your password
- Tap Log in to complete the action
No, Pumble doesn’t currently support a seen feature. Therefore, members can’t see who has viewed their message.
No, you can’t export direct messages in Pumble.
Yes, if you are on the Business plan, you can set who can send DMs. You can do this by going to Workspace settings > Permissions.
Storage in Pumble is used only by files. Messages don’t take up your storage space.
You can delete multiple files at once in Pumble. Currently, the maximum number of files you can select and delete is 40.