Add and Manage Guests
This feature is available on Business and Enterprise plans.
With the guest role feature, you can collaborate with contractors, freelancers, vendors, or clients on Pumble while providing them with limited access to specific channels.
Types of guest users #
- Single Channel Guests: These guests can only be members of one private or public channel. You can invite up to 5 single-channel guests free of charge for each paid seat on your Workspace.
- Multi-Channel Guests: They can be added to an unlimited number of private or public channels, but only to the channels you specify. Multi-channel guests are charged as regular users.
For a comprehensive overview of guest users’ permissions, check out this article.
Before adding new guest users to your workspace, ensure that you have available seats.
Add guests to your workspace #
Owner and admins can switch regular users to guest users.
To invite a guest to a workspace, follow these steps:
- Click on your workspace name in the top left corner
- Choose Invite people
- Enter email addresses of the user(s)
- Choose to invite the user as a single-channel or multi-channel guest
- Select channels where you want the user to be invited
- Select the time limit for how long a guest will have access to the workspace (optional)
- Click Send invite to complete the action

If a time limit is set for the guest’s access, the workspace owner or admin receives an email alert two days before deactivation, and the guest is notified about the deactivation by the Pumble bot.
Manage guest users #
Admins and workspace owners can also manage the channels their guests are part of and set time limits for workspace access.
Here’s how you can do it:
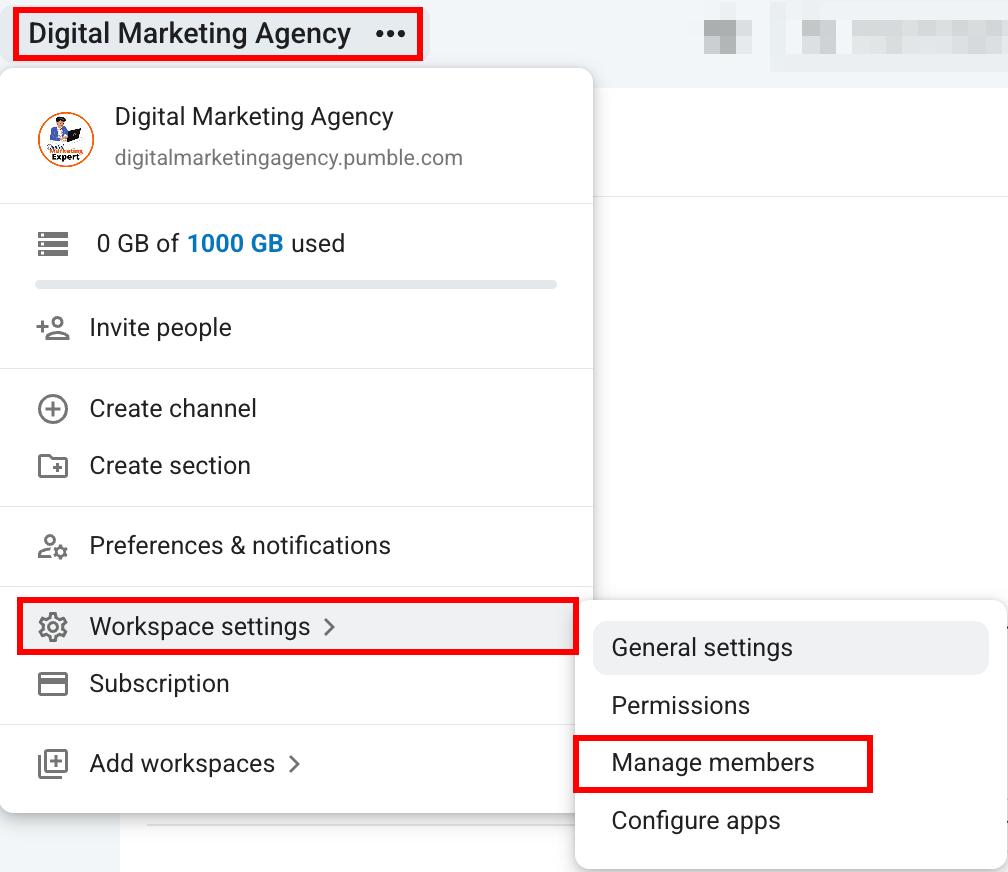
- Click on your workspace name in the top left corner
- Hover over Workspace settings
- Click on Manage members
- Click the three dots icon next to the guest name
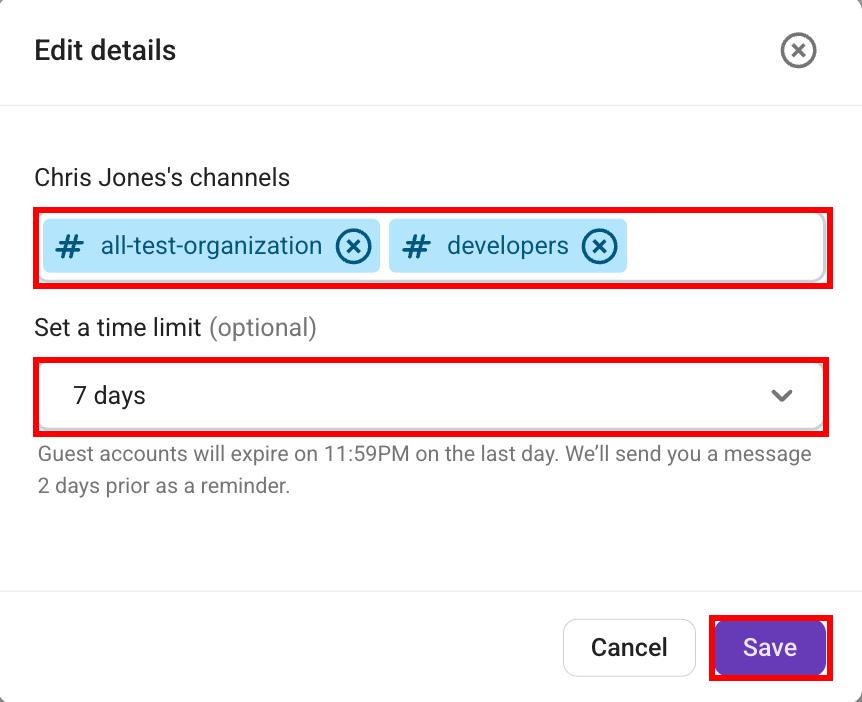
- Select Edit details

- Choose the channel(s) the user will have access to, or remove them from channels they no longer need access to
- Select the time limit for how long a guest will have access to the workspace
- Click Save to complete the action
To maintain confidentiality and ensure that sensitive conversations remain private, set up isolated guest access:
- Create a private channel
- Invite the single-channel guest to join this channel
This setup gives the impression that the entire workspace is just that one channel with the two of you as users. If you need to involve another team member in a conversation with the guest, simply add them to the same private channel.
Convert guest users #
You can convert single-channel guest users to multi-channel guest users, and vice versa. Moreover, you can convert guest users to regular users.
Here’s how you can do this:
- Click on your workspace name in the top left corner
- Hover over Workspace settings
- Click on Manage members
- Click the three dots icon next to the guest name
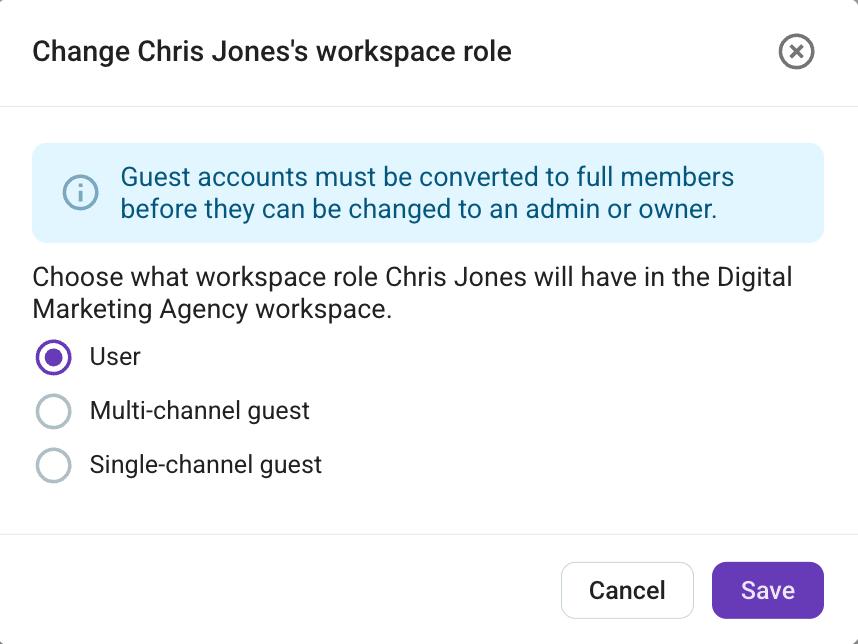
- Select Change workspace role

- Select a new workspace role for the user
- Click Save to complete the action