Connect Zoom to Pumble with Zapier and Webhooks
Zoom integration with Pumble via webhooks provides a way to post messages from Zoom into Pumble. This way, you can, for example, get a message notification in one of the Pumble’s workspace channels about the upcoming meeting.
Alternatively, you can link your Pumble workspace with Zoom through the Zapier integration.
Webhooks make this type of communication between the two systems possible. Simply speaking, they are user-defined HTTP callbacks (or small code snippets) triggered by specific events. When the trigger event occurs in the source site, the webhook sees the event, collects the data, and sends it to the URL specified by the user in form of an HTTP request.
With Pumble’s Incoming Webhooks feature, you can easily post messages from other apps into Pumble.
For more information on how Pumble handles webhooks, check out this article: Incoming Webhooks for Pumble
Step 1: Downloading Pumble app and creating workspace #
For more information, check out this article: Register at Pumble
Step 2: Creating Zoom account #
For more information, check out this link and follow the instructions.
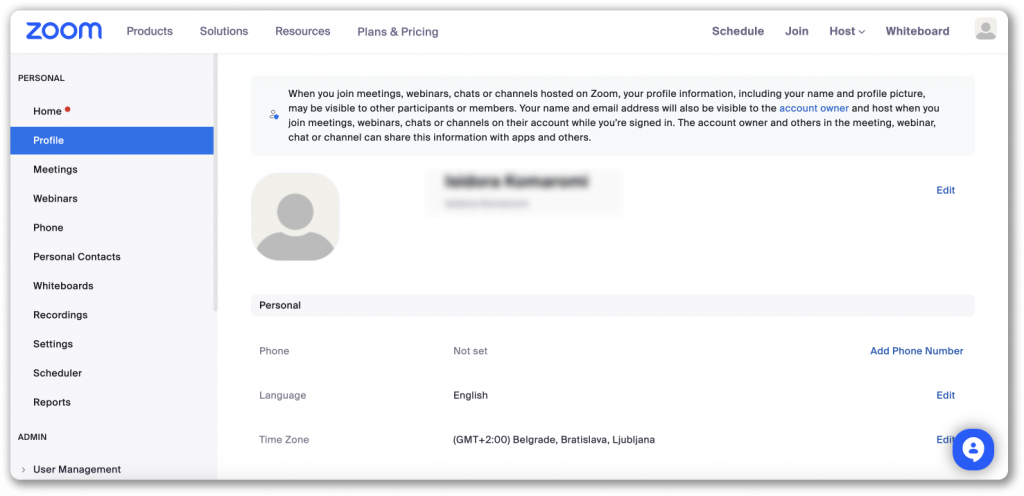
Once your account is set up and ready to use, the Zoom homepage should look like this:
Step 3: Creating Zapier account #
Zapier is one of many automation tools that help users integrate applications they’re using. Regardless of the tool in case, the workflow is the same.
Use the same email you use for Pumble and for creating a Zoom account.
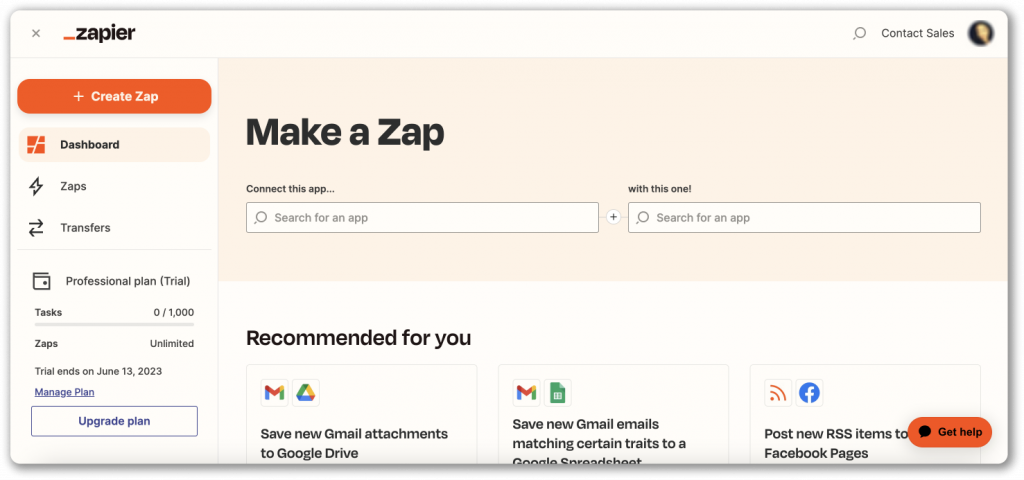
Once you created your account, the Zapier homepage should look like this:
Now, you can proceed by creating the webhook in Pumble.
Step 4: Creating webhook in Pumble #
- Navigate to Company’s name in your Pumble account
- Hover over Workspace settings
- Select General settings from the dropdown
- Open Incoming Webhooks section
- Click NEW WEBHOOK and enter the following: Choose a channel: Choose from the dropdown the channel in Pumble in which the webhook messages will be posted (e.g. #general)
- Click ADD INCOMING WEBHOOK
- Click SAVE SETTINGS to complete the process
You’ve successfully created your webhook in Pumble.

Proceed with connecting Zoom and Pumble with Zapier.
Step 5: Connecting Zoom and Pumble with Zapier #
- Click Create Zap in Zapier homepage
- Follow the workflow and complete the forms presented
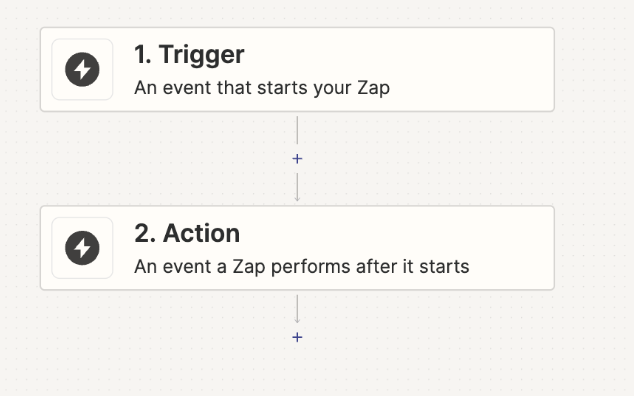
5.1 Creating trigger #
Here, you create a trigger for sending and displaying the message. In order to do that, you need to choose the app that will provide the trigger and the event that will be the trigger.
- Search for Zoom in Search apps… field
- Choose trigger event in the Trigger Event section
- Choose New Meeting from a dropdown (this way, the trigger will be activated when a new meeting is created)
- Click Continue to choose the account that will create the Zoom meeting
- In the Choose an account… field choose the account (if there is one previously created) or choose the +Connect a new account option
- If you chose the second option, Zapier will connect to the account created in Zoom
- Click Continue
- Choose Meeting as Meeting Type to set up the trigger
- Click Continue
- Test the trigger to see if it works properly
Make sure you are still logged in to your Zoom account.
If the test was successful, you’ll get something like this:

Continue with the next step.
5.2 Creating action #
You need to configure the event that will occur after the trigger. Find Webhooks by Zapier in the Search apps… field and define the action.
- Choose POST in Choose an event field (i.e. action that occurs as a result of an activated trigger is a POST request)
- Click Continue
- In the form that appears enter URL: Webhook URL (copy webhook URL from Integration settings in Pumble)
- Choose json as the Payload Type
- In the Data field below, enter text as type and an actual text that will be displayed in form of a message (e.g. The meeting [meeting name] starts at [time], please join via [zoom link])
When populating text field, use previously created entities instead of placeholders.
Continue and test the webhook to check if the connection works, or skip this step all together.
Now you can Turn on Zap and if everything is ok, you will see this screen:
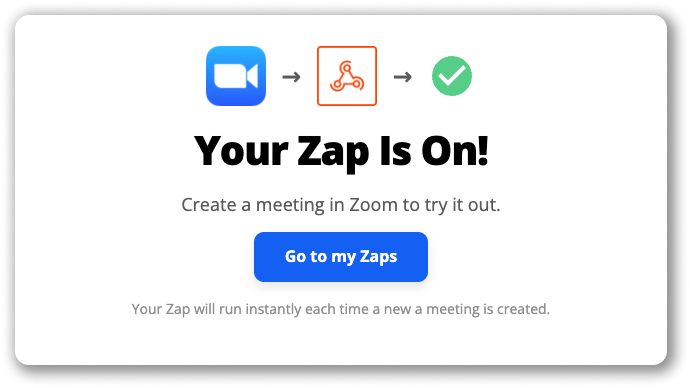
And in Pumble, you’ll get a message in the channel with the link redirecting you to your Zoom meeting.

To connect Pumble with Zoom via Zapier integration, it is necessary to Install Zapier app on Pumble and create your first Zap. To do it follow these steps:
- Click on the arrow next to your Workspace name
- Select Workspace settings
- Choose General settings
- Open Configure apps tab in the Integrations section
- Click on Install button next to the Zapier app
Note: By clicking on Install, you’ll be immediately redirected to Zapier website. - Log in/Sign up on Zapier
- Click on +Create
- Select New Zap from the dropdown
- Click on Trigger and choose Pumble
- Choose the Event from the dropdown
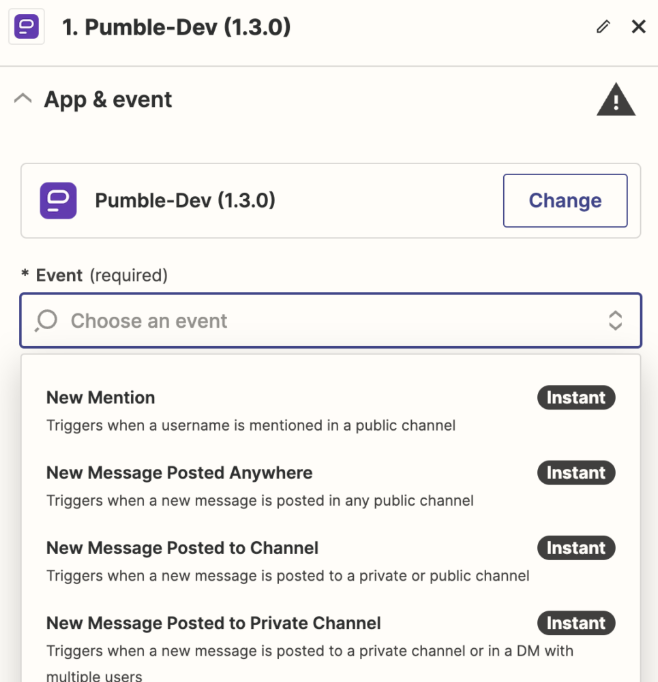
Note: Choose a trigger event that will initiate the automation. Trigger events for Pumble can be new messages, reactions, new mentions, etc. - Click Continue
- Click Sign in to Pumble to connect your account
Note: It is necessary that you use the same email address for signing in to Pumble and Zapier. - Select Pumble workspace from the dropdown
- Choose the Trigger value(s) from the dropdown
- Click Continue
- Click Test Trigger
Note: If no value is found during the Trigger test, click on Skip Test to proceed or change applied settings and retest the step - Click Continue
- Select Zoom from the dropdown to create an action
- Log in to your Zoom account
- Choose an event from the dropdown
- Click Continue
- Fill in the Action details
- Click Continue
- Click on Test step
- Click Publish to complete the action
