Guide to User Seats at Pumble
This user guide provides a clear understanding of how user seats function at Pumble on paid subscription. We have explained all you need to know about seats, how to add and remove them, and effectively manage your users.
User seats #
A user seat represents either an active user or an invited user within your workspace. Both active users and users with pending invitations count toward your total seat allocation.
An active user is every user in the Workspace, regardless of their role and the features they use.
When subscribing to a paid plan for the first time, you must purchase a seat for each active user. For more information on how to upgrade your plan check out this article. Additionally, you have the option to buy additional user seats if you plan to invite more users in the future.
Bundle seats represent a number of active members on Pumble, Clockify and Plaky workspaces purchased with Bundle subscription plan within CAKE.com productivity Suite. For detailed instructions on how manage Bundle seats, check out this article.
Adding and removing user seats #
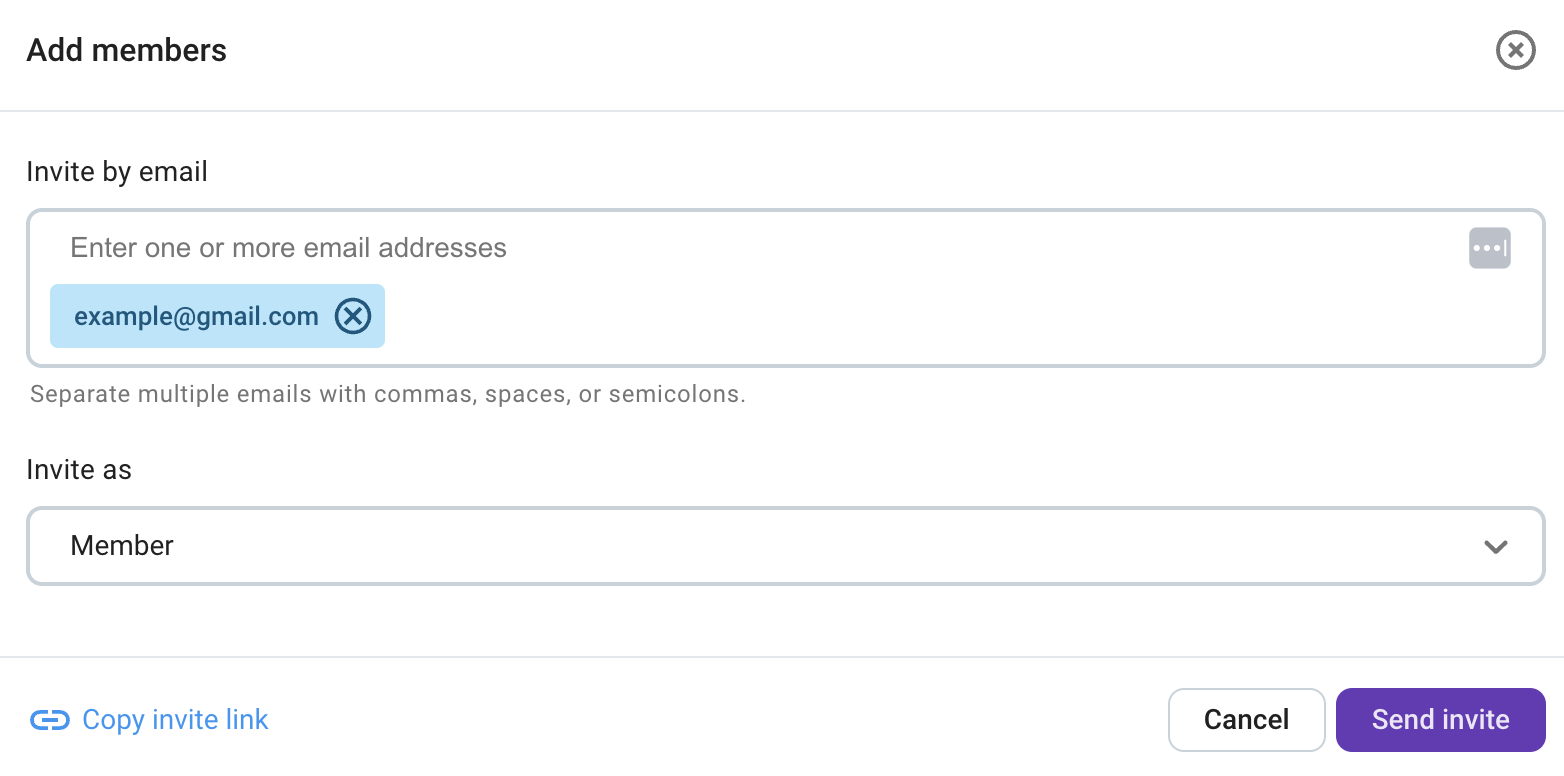
Only the workspace owner and admins have permission to add and remove seats.
To add seats:
- Navigate to your workspace settings and open the Billing page
- Click Add

The progress bar indicates the number of available user seats on your workspace.
- When the pop-up window appears specify the number of user seats to add
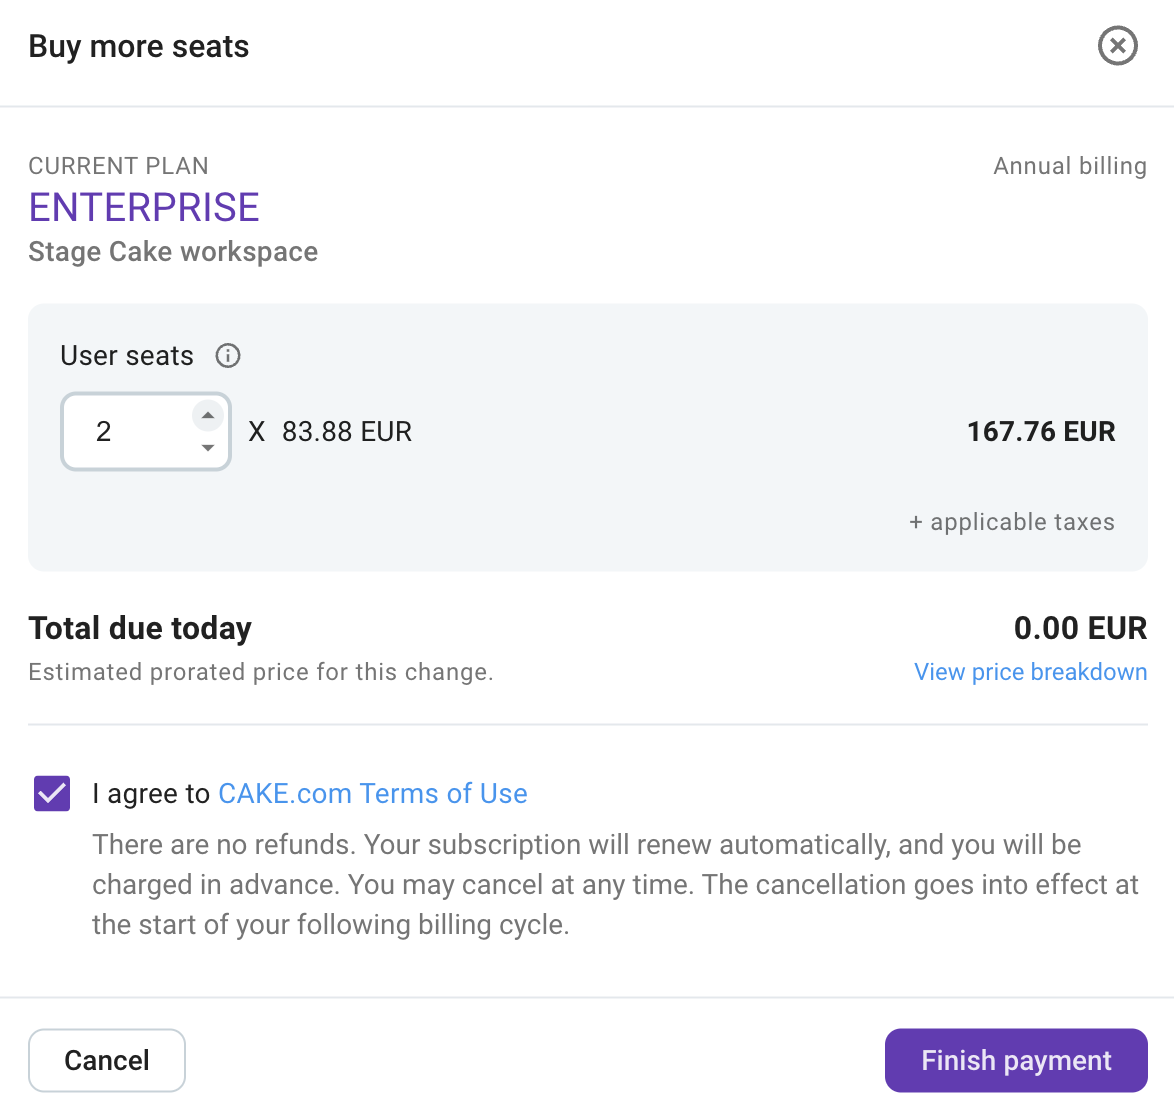
If your country applies VAT/TAX, the VAT and subtotal will be specified. - Agree to the Terms displayed
- Click Finish Payment
You have successfully added new seats!
To remove seats:
- Navigate to your workspace settings and open the Billing page
- Click Remove
- When the pop-up window appears specify the number of user seats to remove
- Click Save to remove seats.
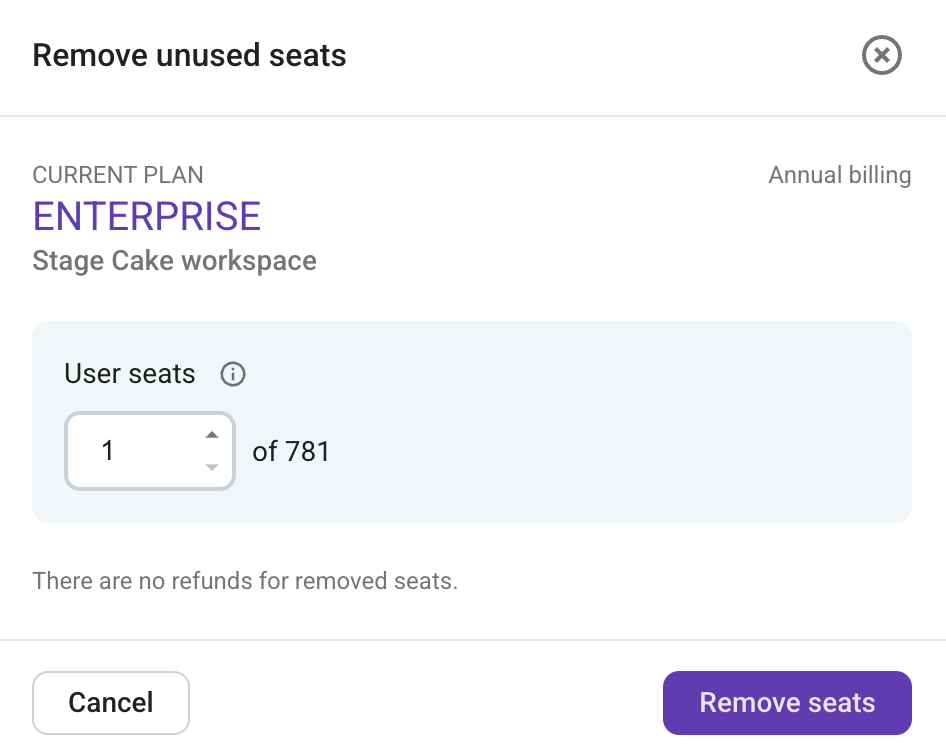
You have successfully removed seats!
Available and used seats #
Any active or invited user occupies one user seat. If no seats are available, you will not be able to invite new users to your workspace. Each invitation requires an available seat. To invite more users, you’ll need to ensure you have enough available seats in your workspace.
You will be charged each billing cycle for the total number of user seats you have.
Empty seats in your workspace will still be charged, regardless of whether the seats are populated or not. There are no refunds available. In order to avoid being charged for empty seats at the next billing cycle, you need to manually remove the seats as instructed earlier in this article.
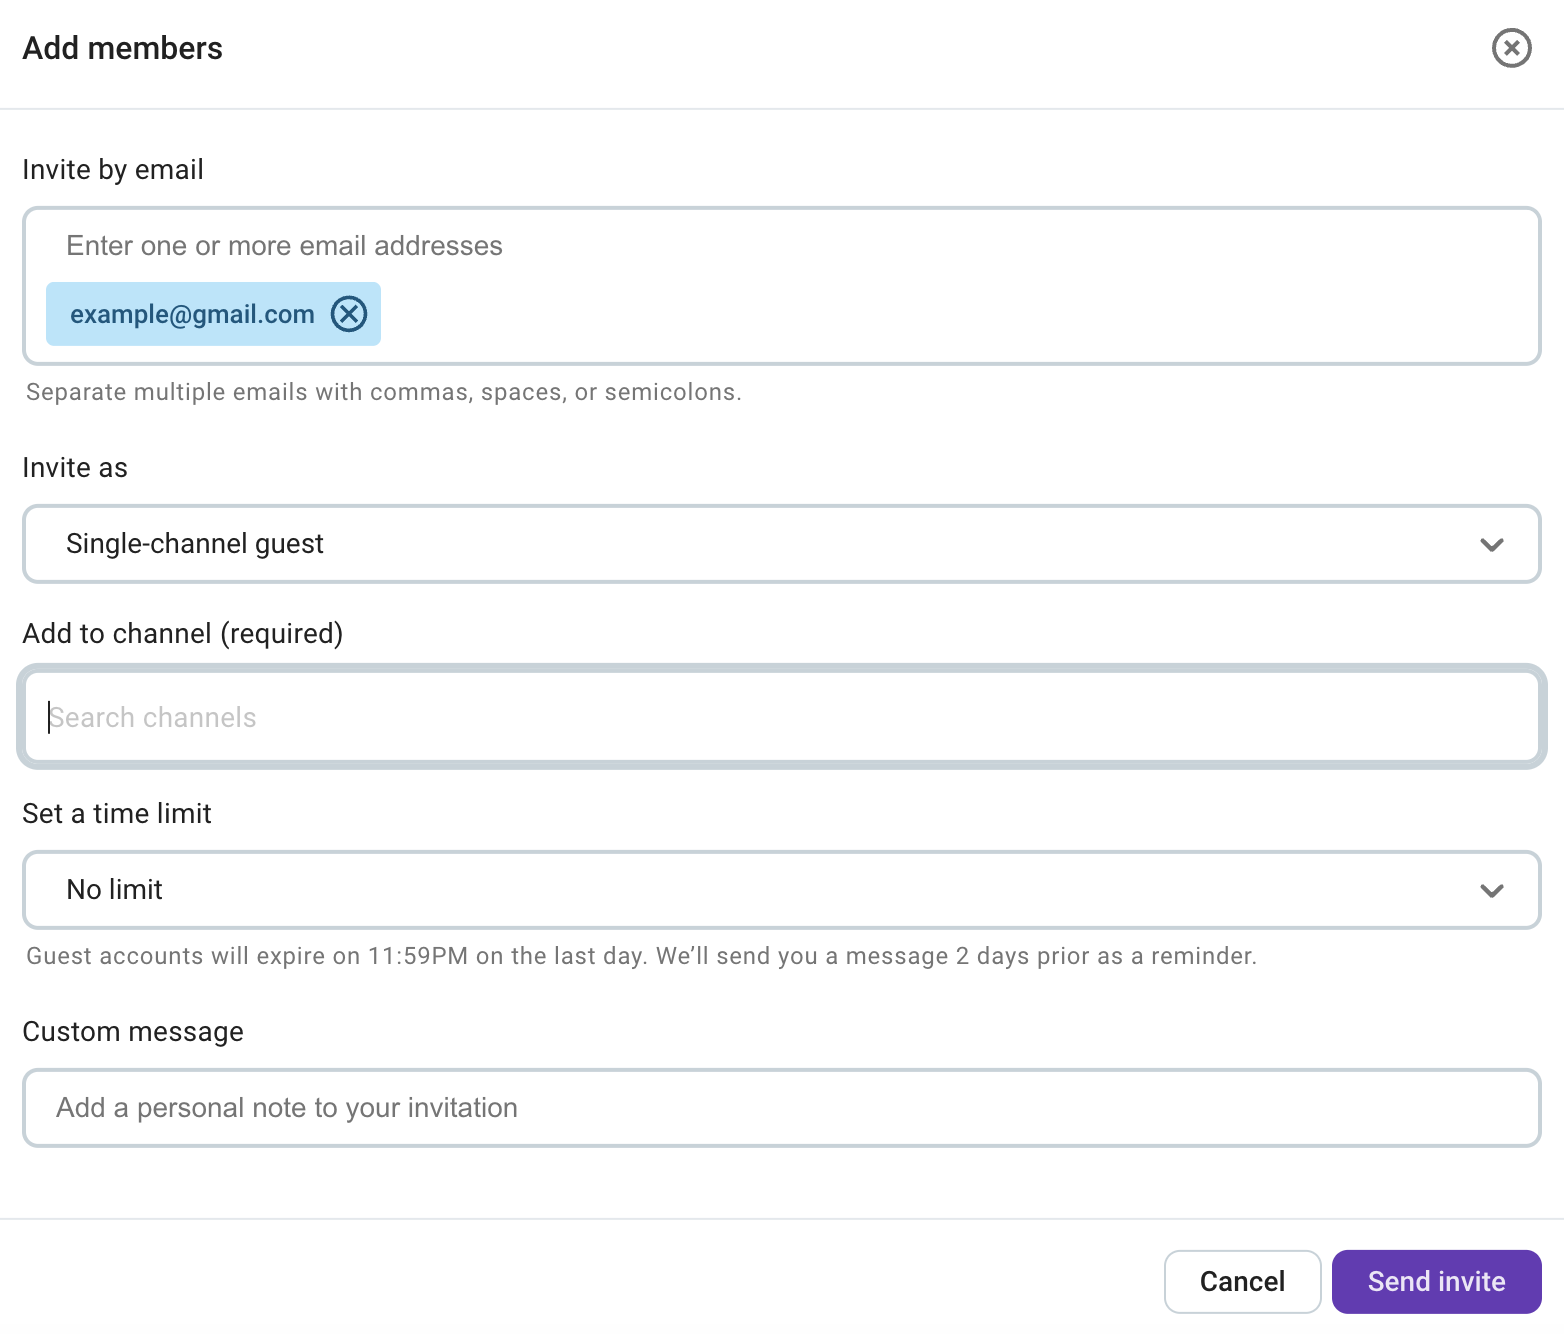
Single channel guests #
Single channel guests are free. Each paid seat (for a multi-channel guest or for a regular member) in your workspace allows you to invite up to five single channel guests at no additional cost. Purchasing 10 user seats allows you to invite up to 50 single channel guests. Multi-channel guests are charged the same way as regular members. One multi-channel guest user equals one paid seat.
When inviting new users, the Invite users screen will display the remaining number of Single channel guests that can be added to your workspace.