Pumble Workspace
A Pumble workspace is a place where all communication happens. It’s a place where your collaboration shines. Workspace is a virtual space made up of channels, where you can communicate with your team members in channels, direct messages or audio/video calls. When you first register at Pumble, you’ll automatically create a Pumble workspace and your CAKE.com Account with an organization in it. You can also join a Pumble workspace in an existing CAKE.com organization. A workspace contains all the channels, teams, individual users, and settings, and is a place where all communication happens.
Learn more about CAKE.com Account here.
A workspace is the highest level unit on Pumble. You can create or join multiple workspaces with one email address. These workspaces are separate entities, each with their own unique set of users, channels, and settings applied, and cannot be accessed by people who are not part of the workspace.
By creating a workspace, you automatically become the owner of that workspace.
Pumble workspace layout #
Explore the layout of your Pumble workspace on Desktop and Web apps:
Pumble workspace contains the left sidebar where you can see:
- List of channels you joined and your direct messages
- Notifications for specific conversations
- Option to compose new messages
- Option to start new meeting/create a meeting link
- Files shared in the workspace
- People and user groups
- Option to add teammates
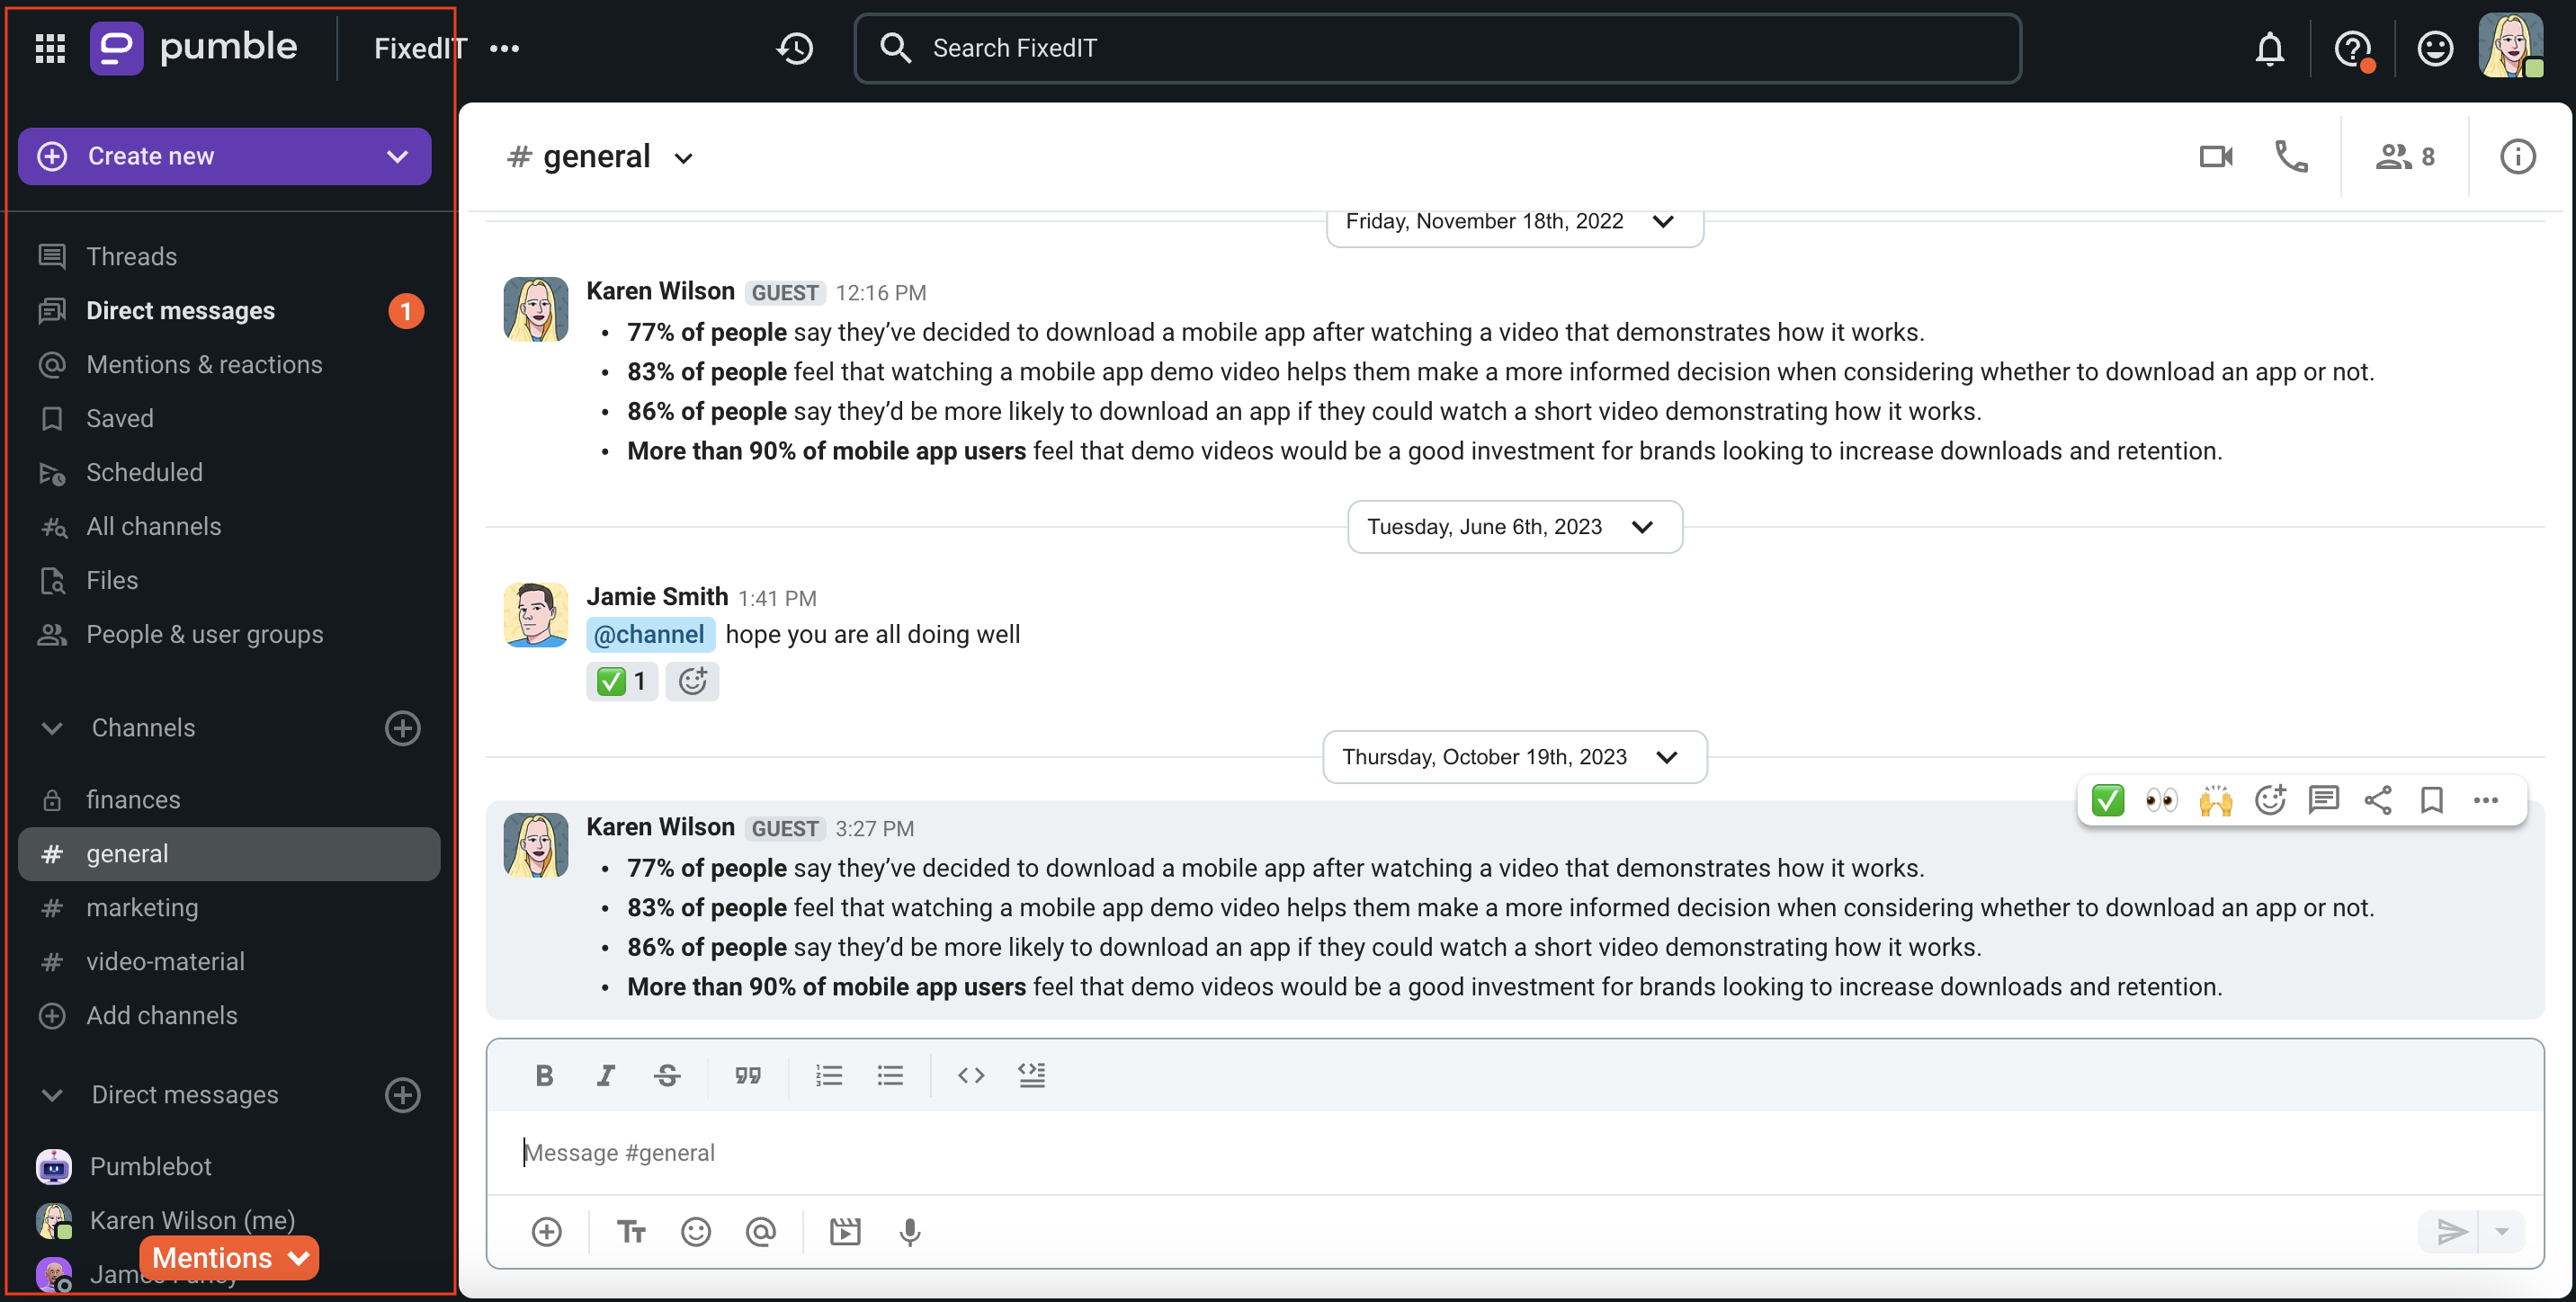
Double-click on the side-bar to restore it to its default size.
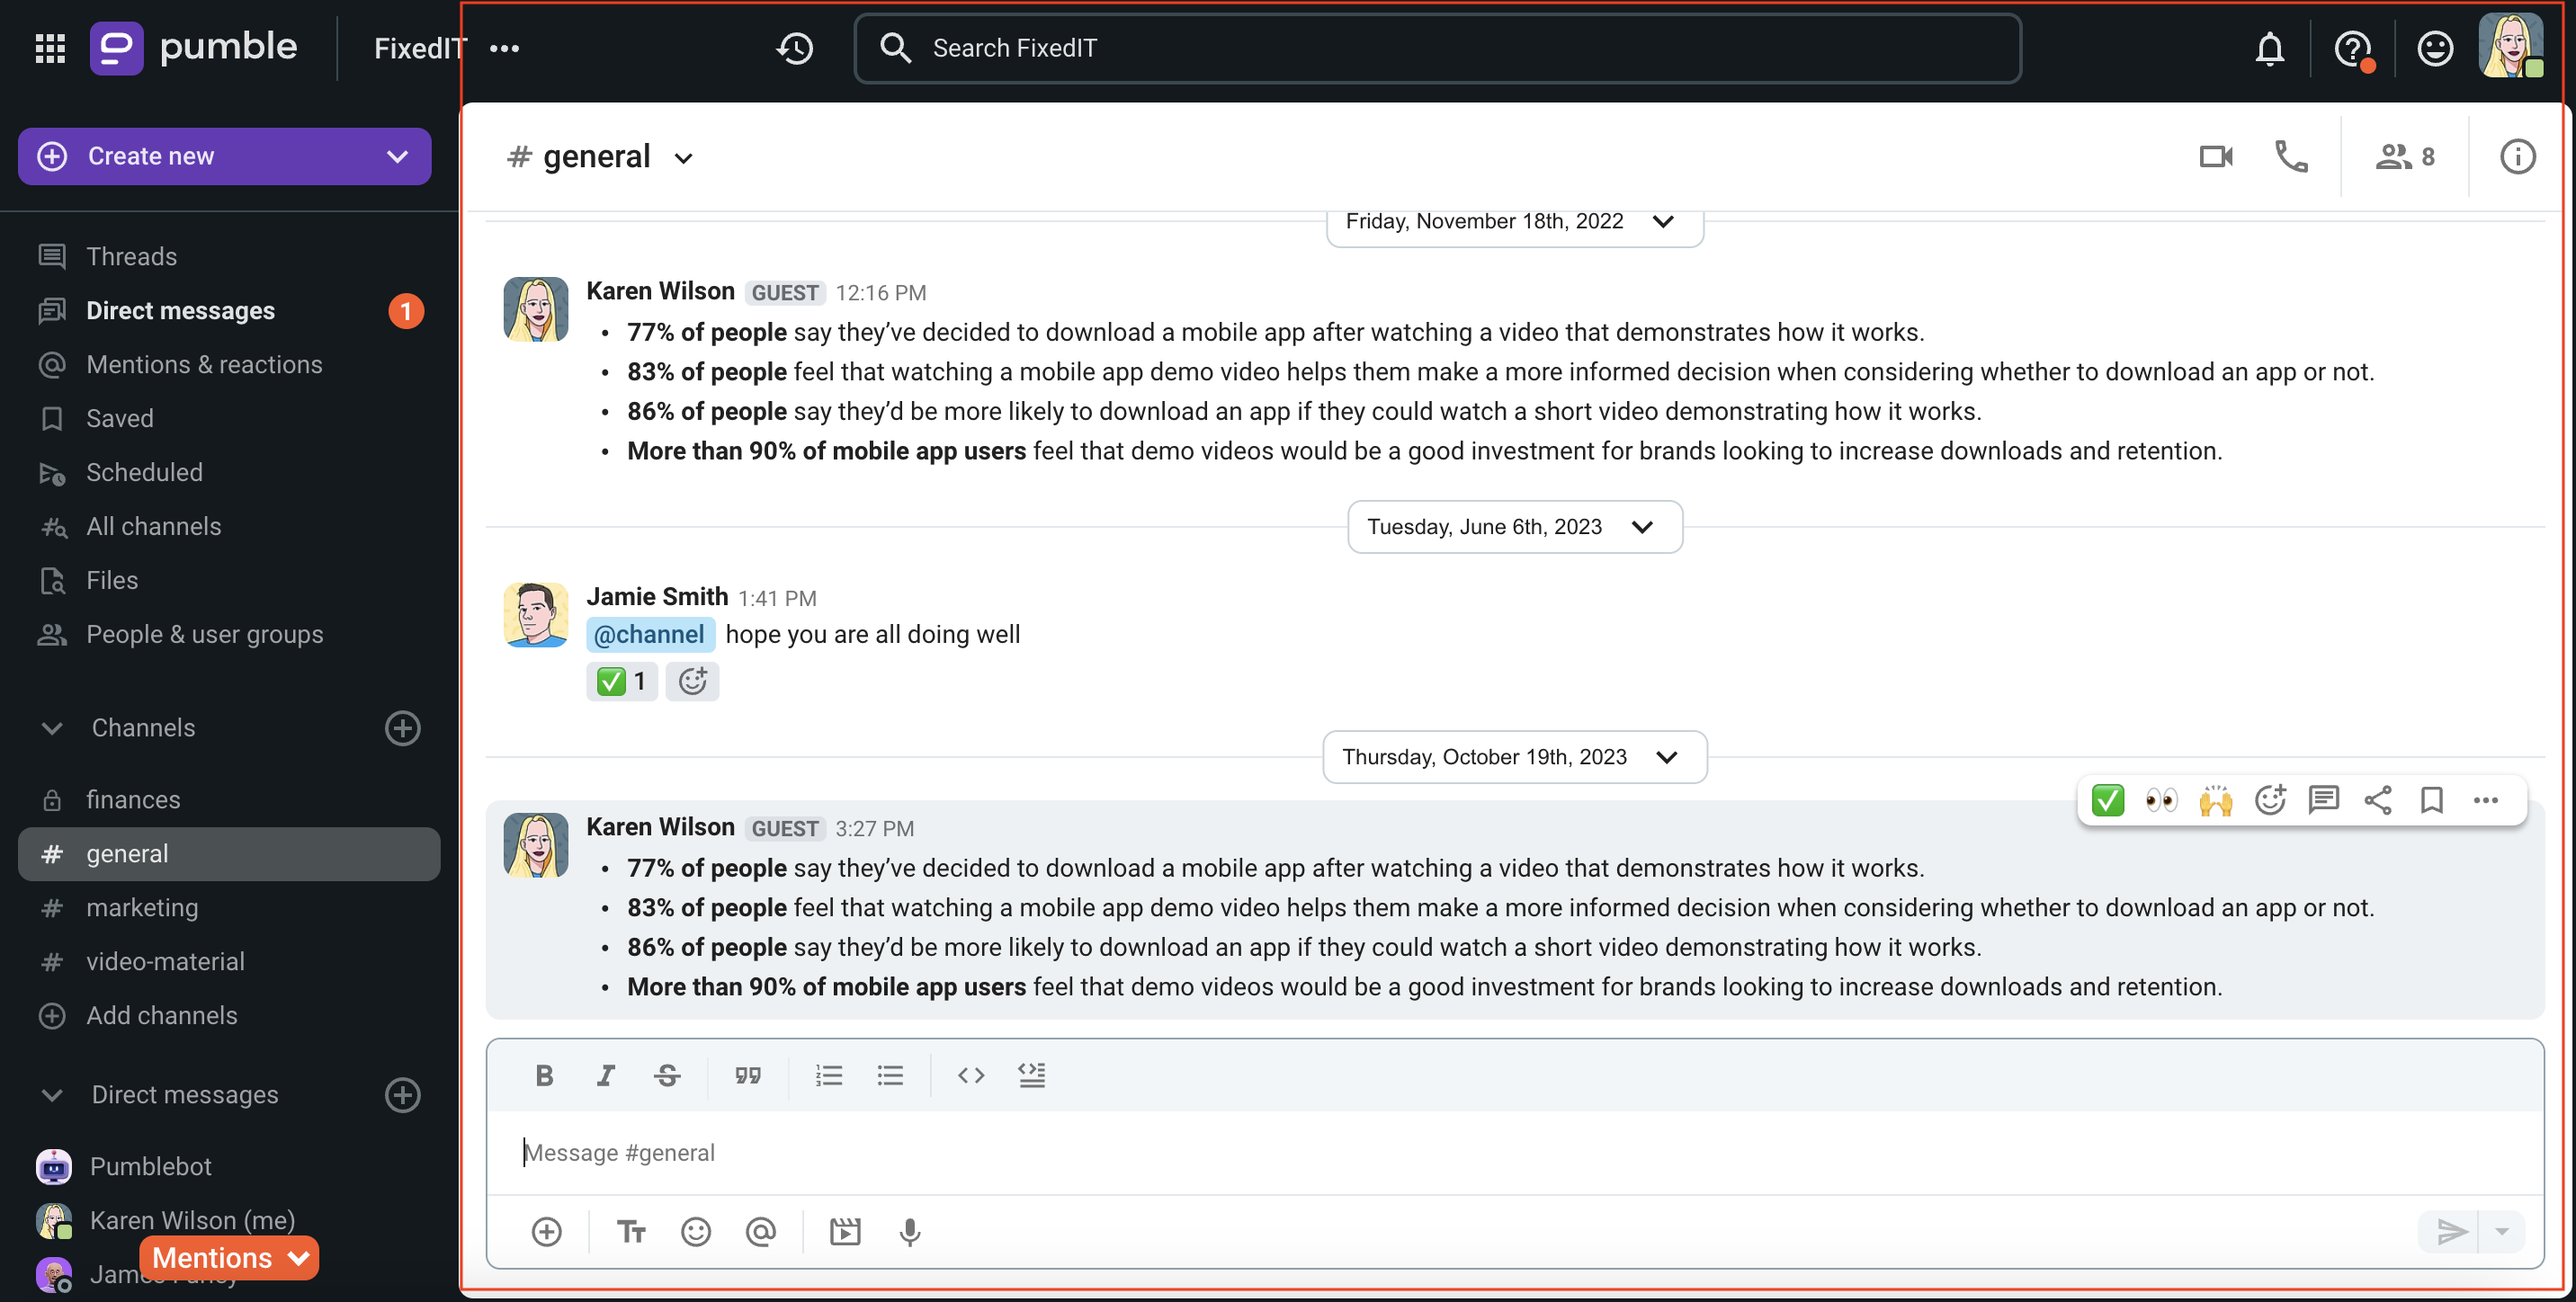
The central section consists of:
- Space for texting messages, chatting and initiating calls
- Option to see the number of channel members and add channel members
- Search bar
- History
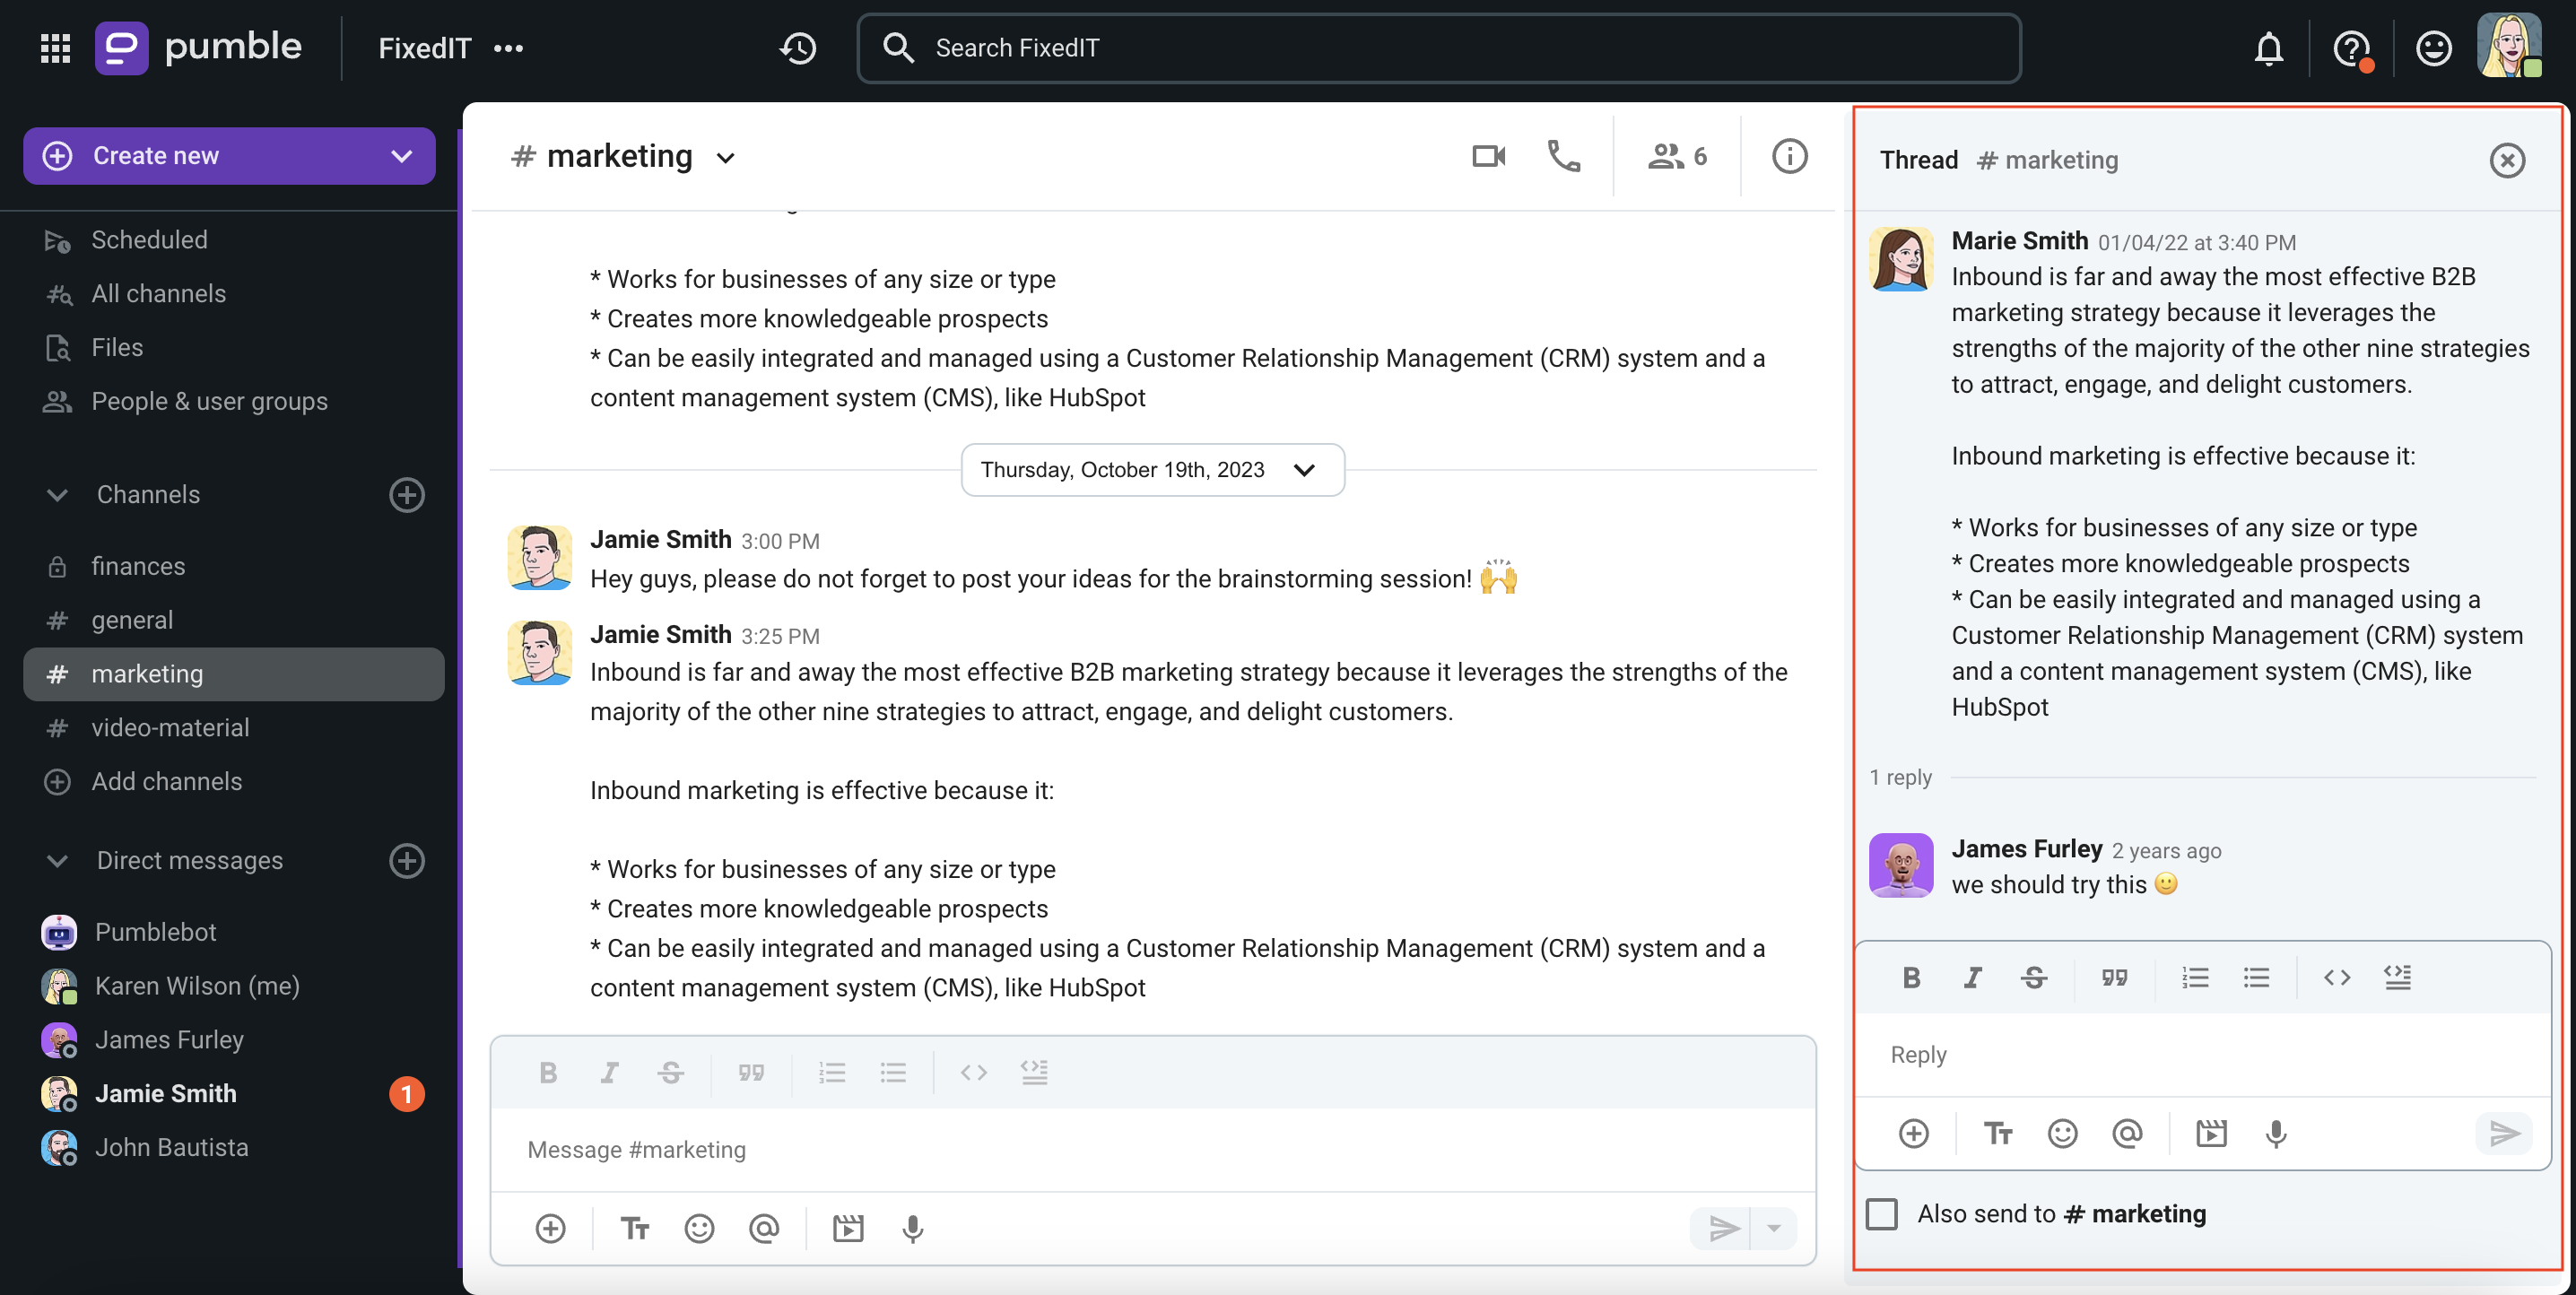
The right sidebar contains:
- Threads
- Details about you and your colleagues
- Channel details
Create or join Pumble workspace #
The first thing you should do to create your first Pumble workspace is go to the Registration page, or accept an invitation sent by your teammate to join a Pumble workspace. Check out this article to learn more about registration at Pumble.
In case you already have a Pumble workspace, you can create another one following these steps:
On desktop app:
- Click on the workspace switcher button
in the left sidebar
- Click on + icon
- Select Manage workspaces
- You’ll jump to your organization’s Workspaces page where you can complete this action
or
- Click on + icon in the left sidebar
- Select Manage workspaces
- You’ll jump to your organization’s Workspaces page where you can complete this action
On web app:
- Click on the three dots next to your active workspace name
- Select Add workspaces
- Click on Manage workspaces
- You’ll jump to your organization’s Workspaces page where you can complete this action
- Tap on your workspace icon in the top right corner
- Tap on Add workspace
- Select Create a new workspace
- Enter your email address and tap Continue
- Check your inbox for the 6-characters verification code
- Enter verification code
- Type Workspace name
- Check Terms and Conditions
- Tap Create workspace to complete the action
or
- Tap on Continue with Google/Apple
- Choose the Google Account to sign up with/Enter your Apple ID
- Select Create new Workspace
- Type Workspace name
- Check Terms and Conditions
- Tap Create workspace to complete the action
- Tap on your workspace icon in the top right corner
- Tap on Add workspace
- Select Create a new workspace
- Enter your email address and tap Continue
- Check your inbox for the 6-characters verification code
- Enter verification code
- Type Workspace name
- Check Terms and Conditions
- Tap Create workspace to complete the action
or
- Tap on Continue with Google
- Choose the Google Account to sign up with
- Select Create new Workspace
- Type Workspace name
- Check Terms and Conditions
- Tap Create workspace to complete the action
Manage Pumble workspace #
Only workspace admins and owner can see and edit workspace settings.To learn more about Workspace permissions (who can do what), check out this article.
Switch between workspaces #
If you’re a part of more than one workspace (either as admin or a regular member), you can switch between them anytime you want. To do it:
On web app:
- Make sure you are logged in that other workspace as well
- Navigate to the Navigation menu at the top left part of the screen
- Expand the Pumble app
- Choose an active workspace you’d like to switch to from the ones listed
On desktop app:
- Click on the workspace switcher button
- Select the workspace
Only the workspaces you are logged in to will be displayed. To sign in to another workspace, click on the + icon after opening the workspace switcher and select Sign in to another workspace.
- Make sure you are logged in that other workspace as well
- Tap on the current workspace icon in the top left corner
- Select the workspace from the list
Only the workspaces you are logged in to will be displayed. To sign in to another workspace:
- Tap on your workspace icon in the top right corner
- Tap on Add workspace
- Select Sign in to another workspace
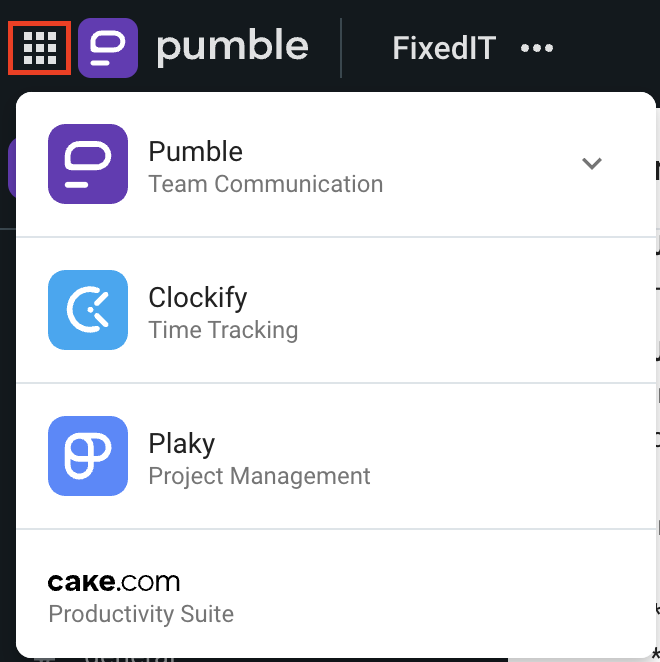
Switch between CAKE.com apps #
From Pumble web and desktop apps, part of the CAKE.com productivity suite, you can quickly access other CAKE.com apps – Plaky and Clockify. To do it:
- Click on the workspace switcher icon
- Click on the app you want to access in the bottom left corner to complete the action
This action will prompt a new tab to open in your browser, directing you to the product’s page where you can proceed to register or log in.
- Click on the app switcher icon positioned in the top left corner
- Click on the app you want to access to complete the action
This action will prompt a new tab to open in your browser, directing you to the product’s page where you can proceed to register or log in.
Transfer workspace ownership #
If you’re leaving the company or for any other reason want to transfer the owner’s role to someone else, you can do this at any time. Follow the steps from this article to appoint someone workspace owner.
Leave workspace #
If you’re ready to leave a workspace for good, you can easily have your account deactivated at any time. Check out this article to learn more about account deactivation.
Archive workspace #
Although it’s not possible to archive a workspace, you can limit access to it without losing the data.
To do it, deactivate all users (except for yourself) on the workspace, and then, users won’t be able to log in to the workspace anymore, and you’ll still be able to access all the data any time you need.
Delete workspace #
If there is a workspace you don’t want to use anymore, or there is no longer the need to use it, you can delete it.
Check out this article to learn how to delete a workspace on Pumble.