Updated: September 18, 2025
 At first glance, communication in education is simple, right?
You have a lecturer and you have students, and they listen to each other.
But, that’s not always the way things go.
When it comes to education communication, it can be achieved by using several means.
Firstly, it can be verbal, which includes:
- Lectures,
- Follow-up on points of confusion,
- Seeking clarification,
- Discussing personal interests beyond lectures.
Secondly, it can be written — most commonly via email. This type of communication can happen anytime, and it includes:
- Asking about grades,
- Deadline extensions,
- Follow-up on missed assignments, or
- Schedule clarifications.
However, there are two main problems with this type of communication:
- Managing multiple communication channels takes time.
- Students are more comfortable using instant messaging and different chat platforms.
More and more teaching and learning institutions are embracing communication platforms as a popular way to connect, collaborate, and share knowledge in real time. Pumble by CAKE.com is one of the best tools for this purpose, helping educators and students communicate without limits, stay organized, and foster stronger collaboration.
In the following sections, we’ll explain what Pumble is and how it can be used in all means in education communication.
Without further delay, let’s jump in.
- Pumble by CAKE.com helps educators and instructors consolidate communication and resources into an easy-to-use platform, keeping students fully engaged and connected.
- Once you’ve set up your workspace, create private or public channels for students, teachers, subjects, and guest lecturers.
- Recreate that in-classroom feeling with video conferencing, complete with in-call messaging, hand raising, and emoji reactions.
- Pumble’s unlimited message history, along with file sharing and unlimited users, transforms the app into a searchable knowledge base for both students and educators.
What is Pumble by CAKE.com?
Pumble is a free team communication and collaboration app perfect for schools, universities, and educational teams.
It helps students, teachers, and lecturers to stay connected, organized, and productive, whether they’re in the classroom or in a remote learning setting. They can work together, share, discuss, and engage in deeper learning.
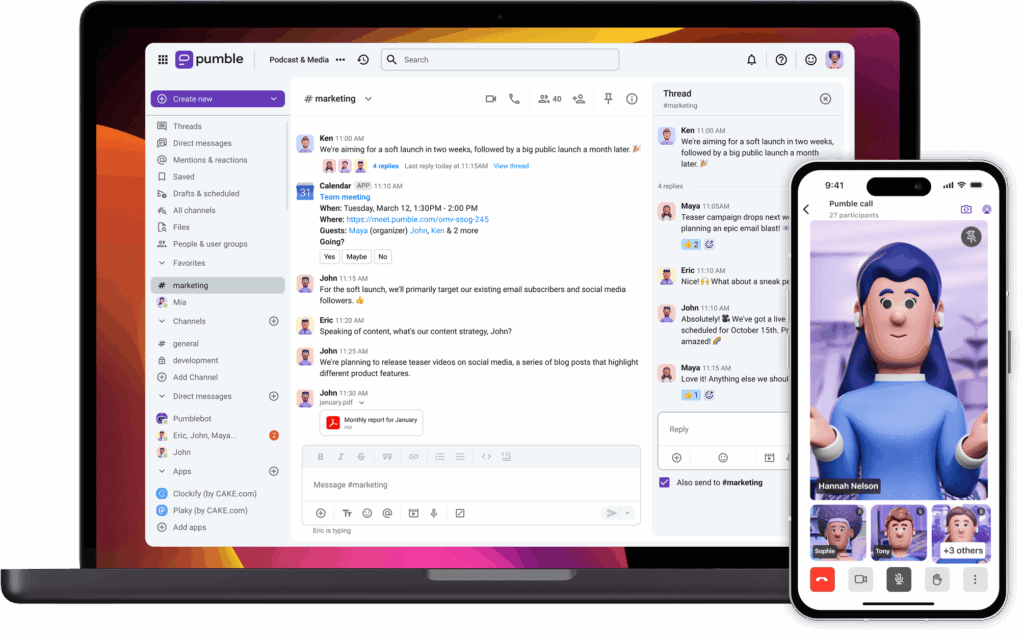
Pumble can be accessed through a browser, a desktop app, or as an iOS or Android application.
How to use Pumble for education?
Like with every app, you’ll have to make a few steps to set up everything for a successful start of your Pumble journey:
- Create Pumble workspace within your CAKE.com account,
- Set up the channels you need,
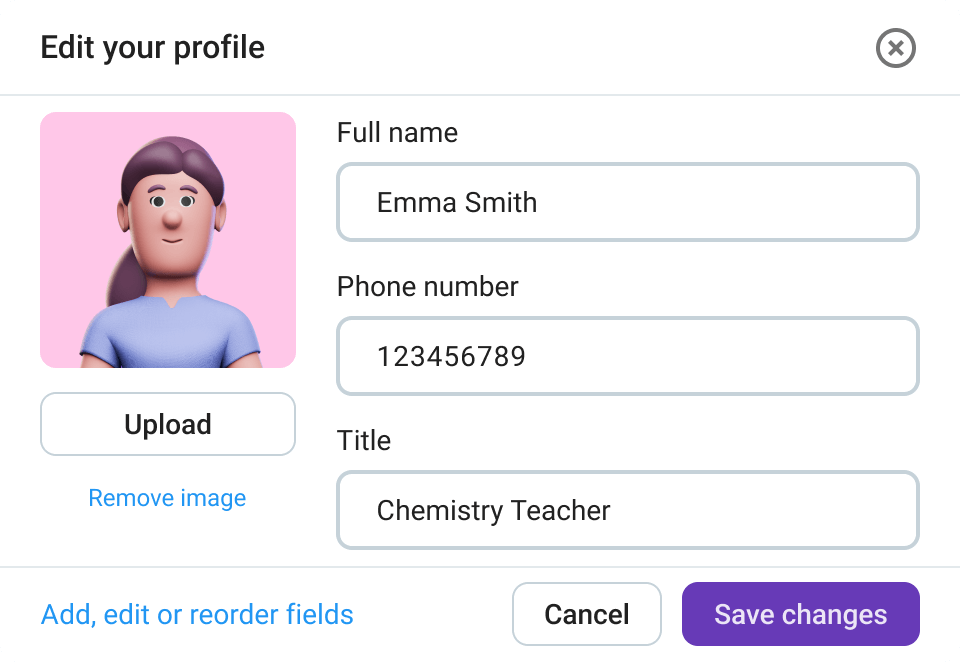
- Make sure to upload your profile photo,
- Invite students and other lecturers,
- Set up roles and permissions for members and guest users, and
- Send a welcome message to everyone and set up some ground rules.
Set up the channels you need
In your new Pumble workspace, you’ll see the default channels named #general and #random.
However, you can create channels suited to your needs and separate them into categories dedicated to:
- Students,
- Teachers,
- Subjects, and
- Guest teachers/educators.
Other types of channels you can create include:
- Channels dedicated to giving educators more information, conducting studies or participant groups,
- Channels that provide availability hours, and
- Spaces for students to talk to one another.
Within each category, you can create more channels.
For example, you can set up the channels for teachers to be private, so the students can’t access them and see what teachers are discussing.
Examples of channels you can create for teachers and students
Here are some examples of channels you can create for your students:
- # books-and-materials — for giving access to extra resources and materials,
- # feedback — for providing feedback,
- # exams — for announcing exams dates,
- # homework — for discussing homework,
- # ask-teacher — for asking questions during the lectures.
Next up are the channels that serve to keep things organized:
- # tech-club — for technology industry announcements,
- # student-events — networking for students,
- # movie-club, #books-lovers — clubs where students can be involved,
- # tech-events, #math-events, #language-events — events that may interest groups of students,
- # internships — internship opportunities,
- # jobs — job postings, and
- # career, # career-advice — career resources.
Examples of the channels you can create for teachers:
- # chemistry-class, # math-class — channels for different subjects,
- # students-engagement, # students-grades — discussion about students,
- # teachers-books — a book club for teachers,
- # classes-problems, # classes-ideas — discussion about student behavior,
- # teachers-questions — important questions, or
- # teaching-ideas — ideas for innovative ways of teaching.
Students, teachers, and educators now have a place to chat.

Use video conferencing
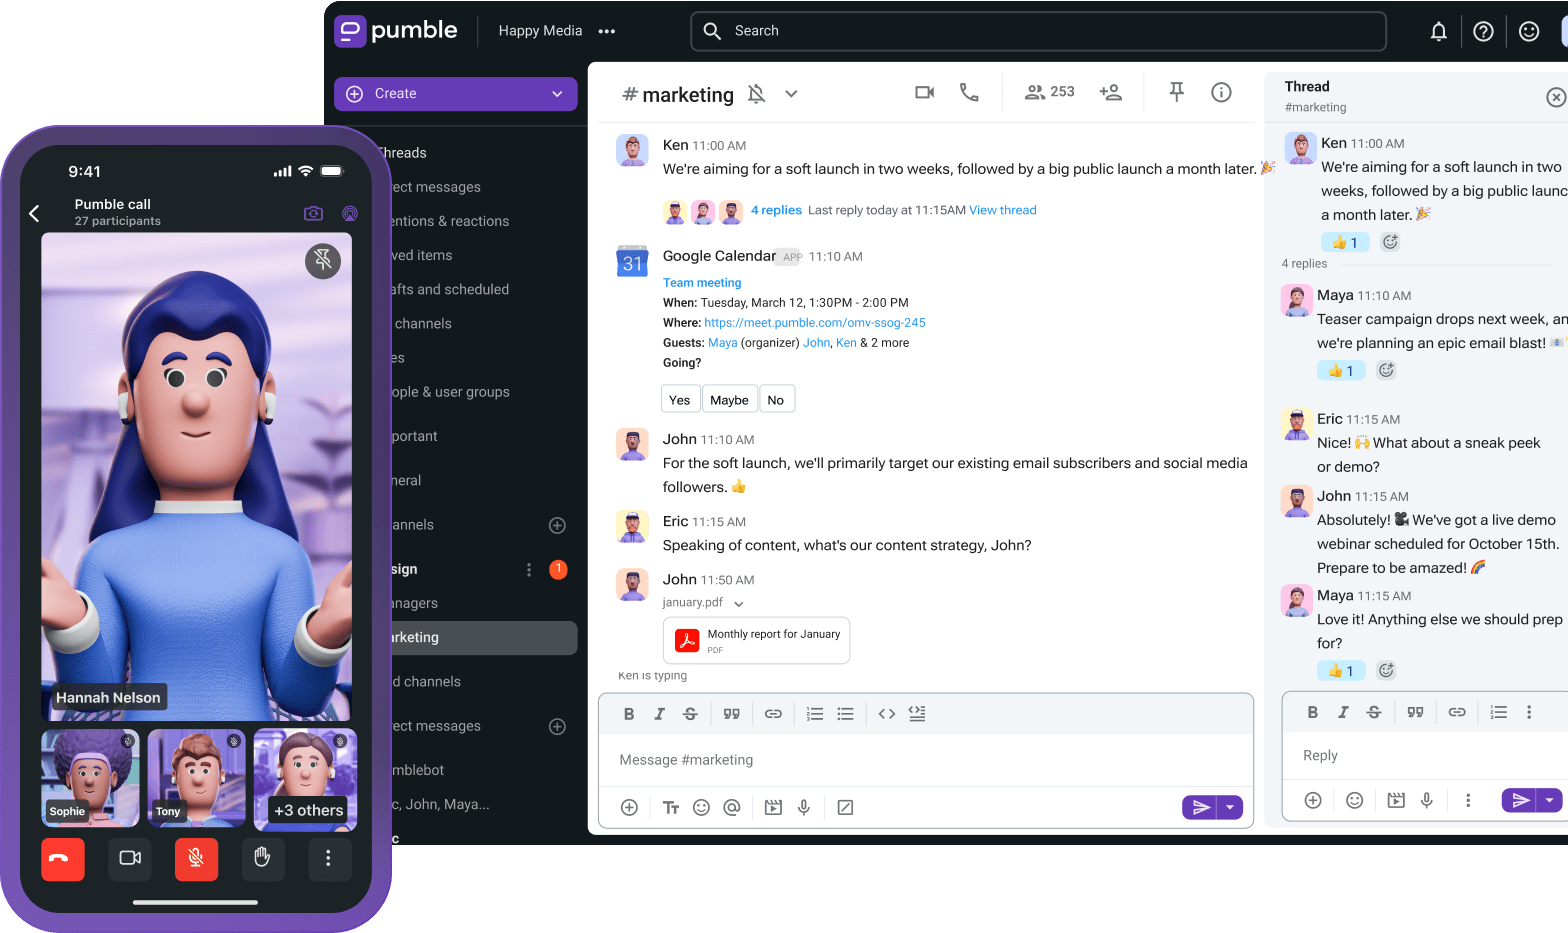
Designed to streamline communication, Pumble allows teachers and students to initiate video calls directly within channels or private messages, making it easy to host virtual classes, one-on-one consultations, or group study sessions.
The built-in video conferencing helps recreate a classroom experience in a digital space, supporting remote learning, real-time collaboration and different education models.
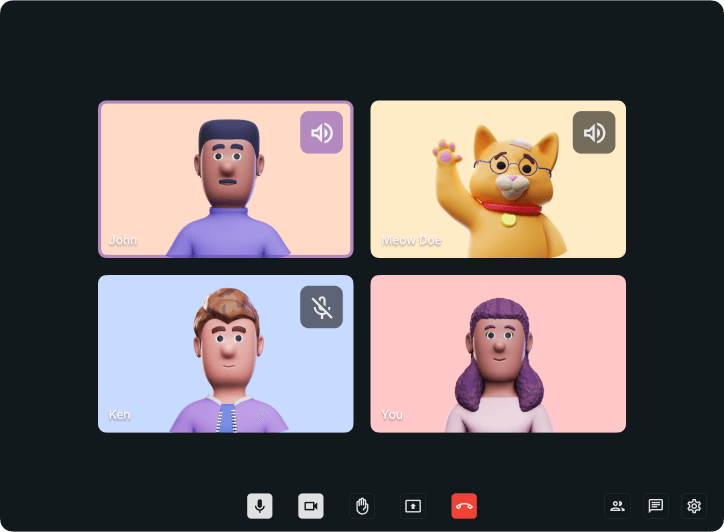
In educational settings, Pumble’s video conferencing capabilities foster greater collaboration and engagement.
Students can easily connect with professors to ask questions and receive guidance or feedback, while teachers and educators can hold virtual office hours, lead discussions, or facilitate group projects.
Integrate with other tools
Beyond messaging and video conferencing, Pumble’s value lies in its integrations that help streamline academic workflows.
By connecting with tools like Google Calendar, Google Drive, Polls, and a project management app such as Plaky, Pumble by CAKE.com helps educators and students stay organized, collaborate efficiently, and participate more actively in their learning communities.
In addition to Plaky, Pumble has native integration with the time tracker Clockify as part of the CAKE.com ecosystem. You can access all of these tools through the CAKE.com Productivity Suite, which gives you enterprise-level access for all 3 apps under a single, affordable subscription.

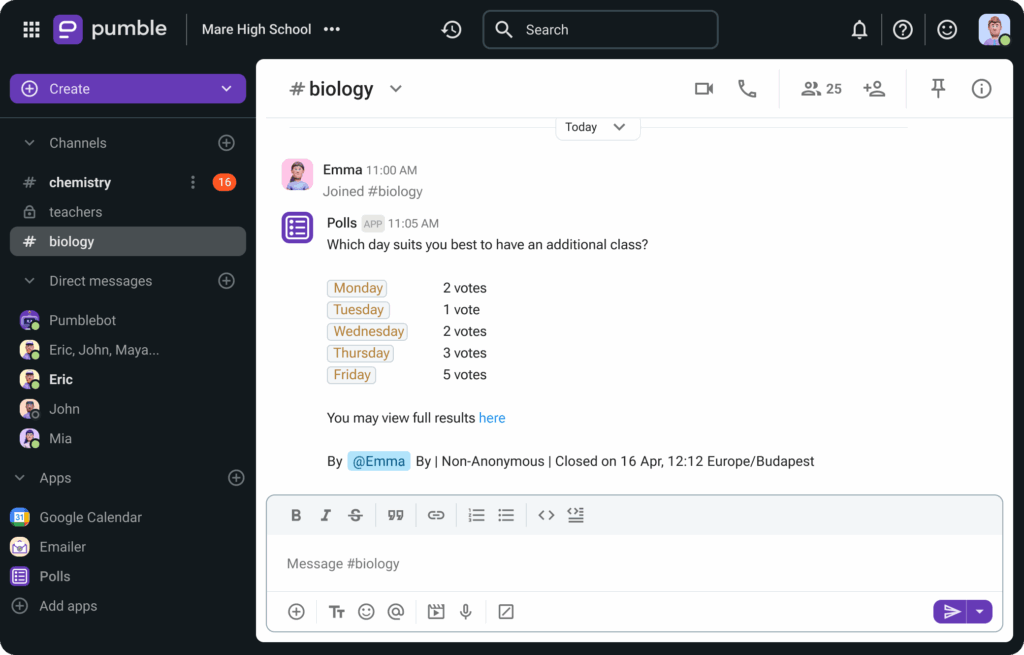
Polls
Integrating polls into Pumble is a simple yet powerful way to increase student engagement and collect feedback in real time.
Educators can use polls to:
- Check understanding after lessons or discussions,
- Conduct quick quizzes or knowledge checks,
- Allow students to vote on project topics or class activities,
- Collect feedback on teaching methods or course content.
Polls promote active learning and help educators identify gaps in understanding or areas that need further attention. In hybrid or remote learning, polls also give quieter students a chance to have their voices heard without putting them on the spot during live discussions.
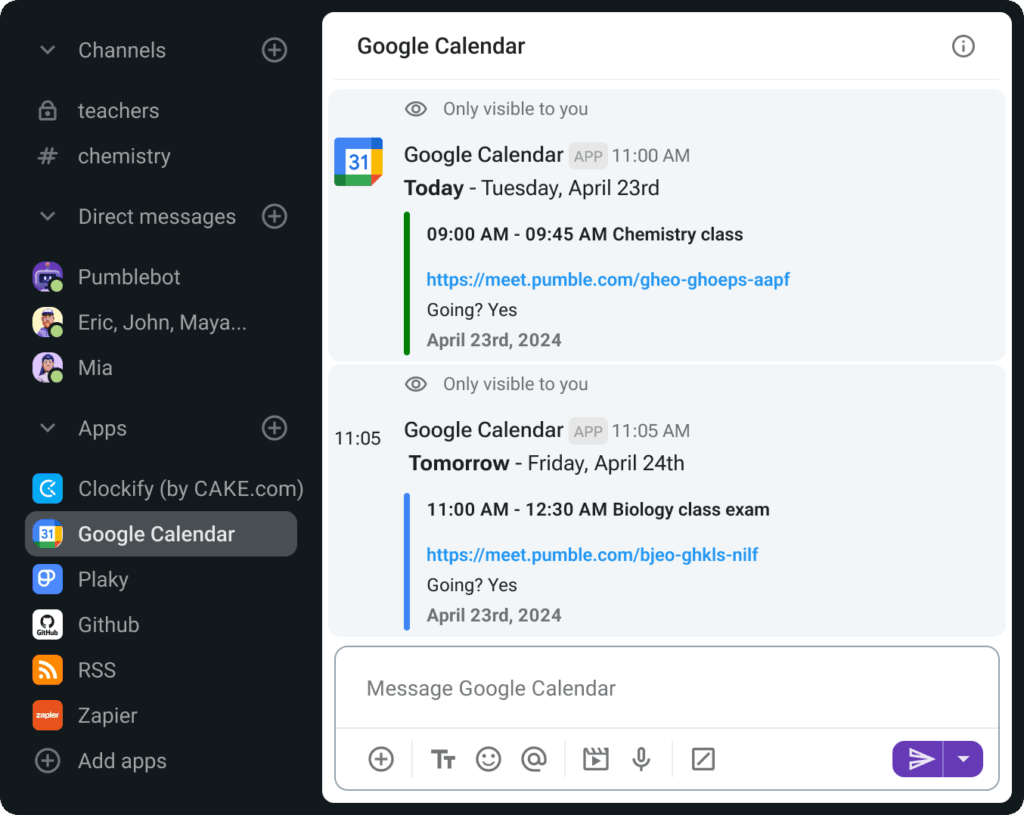
Google Calendar
The integration of Google Calendar with Pumble is particularly useful for keeping students and teachers aligned on schedules, deadlines, and upcoming events.
Events can be easily dragged from one day to another, so teachers can adjust their schedule in one click.
The Google Calendar integration within Pumble helps educators:
- Share lesson schedules, exam dates, and assignment deadlines, and
- Coordinate virtual or in-person office hours and group sessions.
By keeping calendars visible and integrated into daily communication, students are more likely to stay on track, while teachers save time managing reminders and updates.
This is especially beneficial for managing multiple classes or coordinating with co-teachers and support staff.
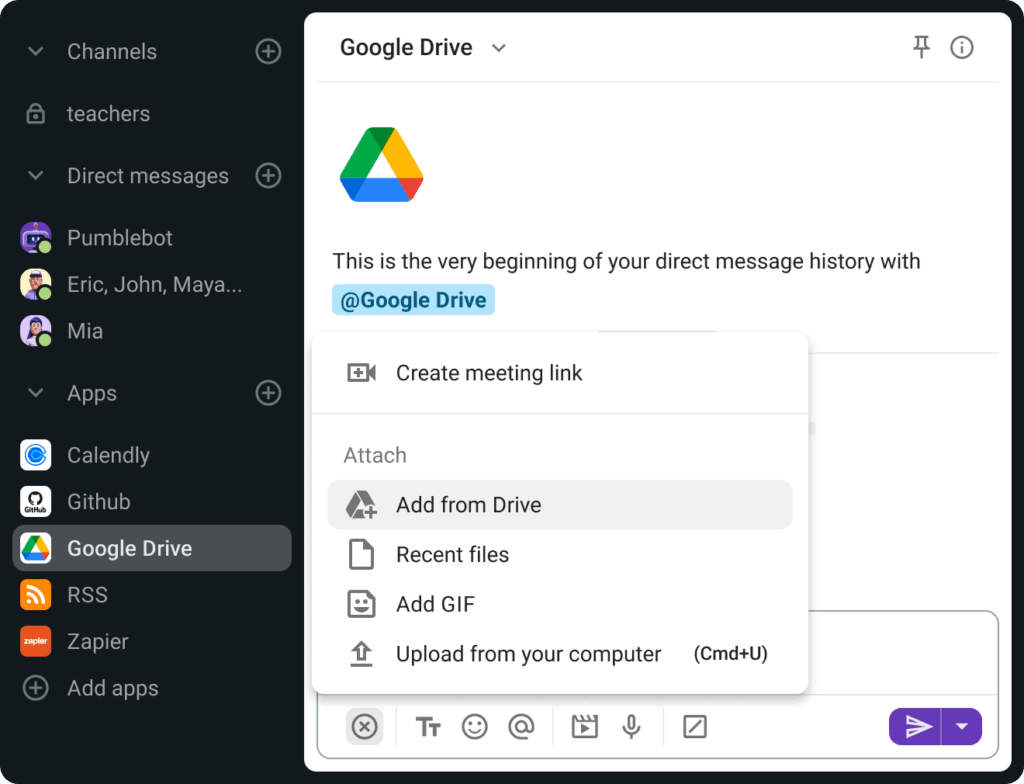
Google Drive
Google Drive gives you the ability to store all learning materials such as lecture notes, assignments, slides, and readings.
Within any Pumble channel or direct message, teachers can:
- Share lessons plan, handouts, and multimedia resources,
- Collaborate on documents in real time, and
- Manage file permissions without leaving the platform.
This document sharing encourages collaboration on group projects, peer reviews, and collective note-taking. It also ensures that all students have equal access to material, whether they are learning in-person or online.
For example, as a teacher you can create a list of resources that your students might find helpful and share it with them or you can create a document that they can access to research further into a topic. You can even share images or graphics, such as charts or detailed photos, if they want to learn more about a complex subject matter.
Plaky
Every educator needs to use project management tools to stay on top of tasks and group projects.
In educational context, this means:
- Organizing group assignments with clear roles and deadlines,
- Tracking student progress on long-term projects,
- Managing curriculum development or school-wide initiatives, and
- Ensuring accountability in collaborative work.
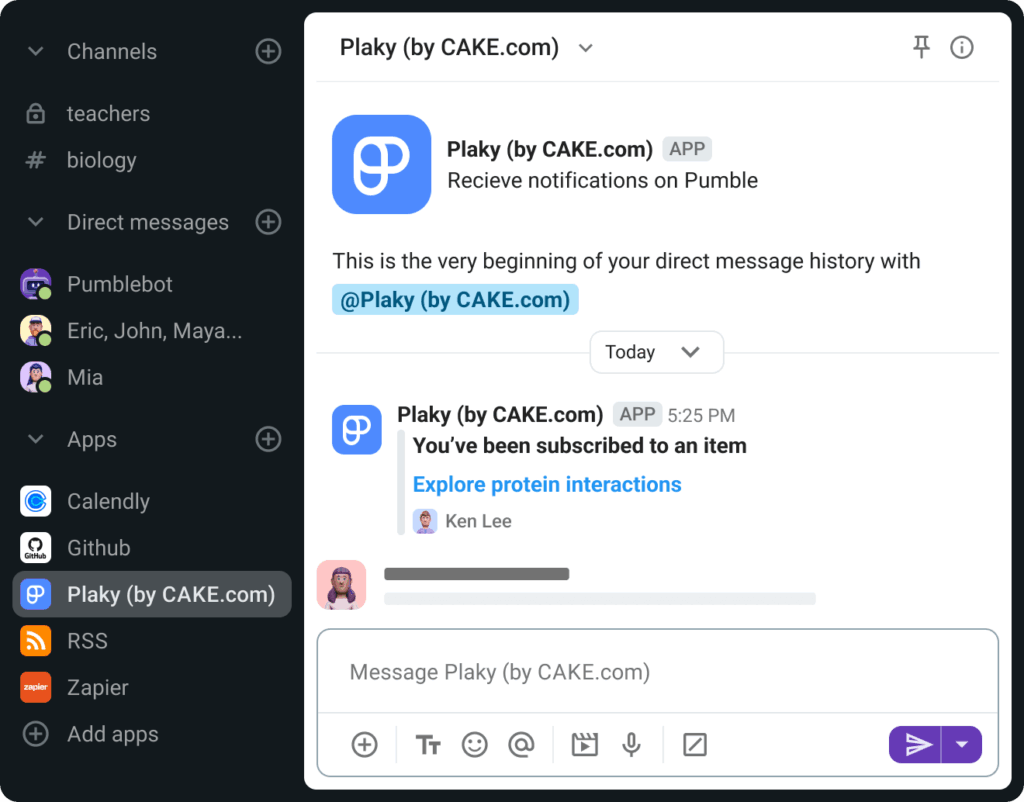
For educators, Plaky also serves as a back-end tool for planning units, tracking grading deadlines, or managing department-wide tasks. The visual nature of project boards helps make complex work more manageable and transparent.
How to use Pumble by CAKE.com for teaching
With Pumble, you can create an environment where your students will be engaged and connected in a remote-first world.
This is an environment where classes, meetings, and assignments are all in one virtual place.
For instance, you can use # general or # announcements channels and class-based channels (# math, # chemistry, # biology, # robotics, # programming) to keep students informed and allow them to ask questions from wherever they are located.
Moreover, you can hold online lectures and virtual office hours with Pumble to:
- Keep your students engaged, and
- Share important announcements (# announcement channel) and updates more effectively.
Pumble allows teachers and students to consolidate information into a central repository.
No more emailing and texting students — switch to Pumble.
Students, instructors, and teaching assistants can organize themselves into groups quickly. Channels can mirror real-world places, like lecture halls and classrooms, offices, and even areas for socializing.
In terms of coursework, some of the common examples of channels are set up for:
- Online office hours: An # office-hours channel, where students can drop in with questions just as they would during in-person office hours, is a great resource teaching staff can offer students. Be sure to set and follow expectations around availability — note that questions posted outside of office hours will be addressed at a later time.
- Small group discussions: A private channel between an instructor and a small group of students may be just the thing to help you create a safe space to ask questions and share thoughts, ideas, and assignments. You can also use DMs (direct messages) to privately communicate with up to 8 workspace members.
- Project-based learning and lectures: Gather students, instructors, and TAs into the project- or lecture-based channels, and you’ll be opening up a space for discussion. Thanks to features like search and pinning messages to channels, students can learn from the questions their peers have posted before them, saving educators time, at the same time ensuring that students are getting the information they need.
Encourage students to stay connected via channels dedicated to clubs and various communities — e.g. different sports societies.
In short, Pumble creates a place where students can meet and hang out all year.
Why should you use Pumble by CAKE.com for teaching?
Teachers should consider using Pumble for the following reasons:
- It is a great email alternative — Pumble can greatly reduce email clutter and help teachers avoid sifting through long email chains.
- It is useful for sharing documents — Sharing docs through Pumble is a great alternative, especially if you’re always hitting your storage limit in your email.
- No phone number necessary — With Pumble, a phone number is not necessary. Instead of asking students for cell phone numbers, you can message them on Pumble. All you need is their email address and you can add them to your workspace.
How to use Pumble by CAKE.com in a writing community
This type of community can be composed of bloggers, editors, friends who like to write, or writers/game designers.
For example, a writing community can create the following channels in Pumble:
- # looking-for-work,
- # blog-owners,
- # writing-podcasts,
- # useful-books,
- # movies-shows,
- # memes,
- # gamers,
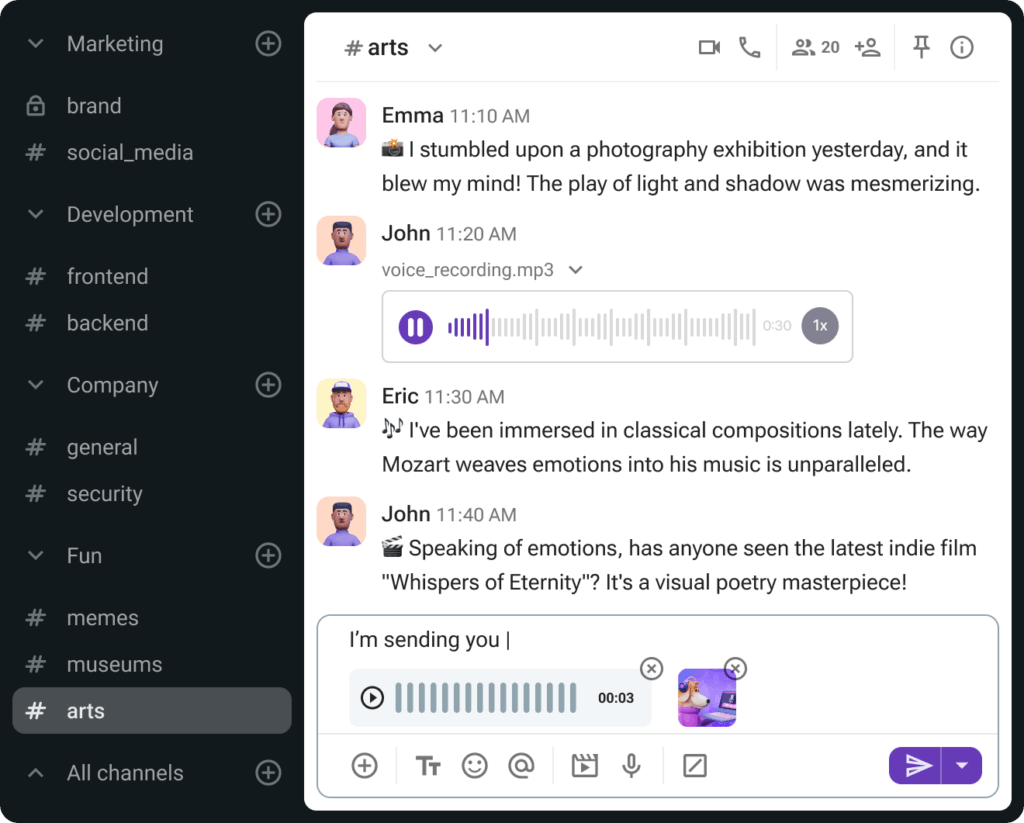
- # arts, or
- # digital-nomads.
Writers can use these channels to:
- Run timed writing sessions or collaborate on fiction or game designs.
- Discuss podcasts, books, TV shows, movies, or games.
- Share art, games, and memes with one another.
Pumble workspace can also be the key social resource for many writers who feel stuck while writing an article, blog, or book. Being a part of an online writing community on Pumble can really spark their creative juices.
Why should you join the Pumble writing community?
If you’re considering joining a Pumble writing community, here are the main benefits:
- Networking – Pumble can be a great way to connect with like-minded professionals, exchange ideas, or get a new perspective on your writing.
- Less spam – By joining a channel specific to your needs, you can be relatively sure that the questions and content posted there will be more helpful and less spammy.
How to use Pumble by CAKE.com for online conferences
When you’re at an online conference, you can create or join special channels for different parts and participants of the event.
If you’re one of the organizers, you can create channels like:
- # announcements — for every important announcement,
- # intros — for attendees to share a brief bio,
- # pumble-tips — for people to share their best practices for using Pumble at online conferences.
- # discussion — for discussing the conference topics further,
- # support — for all questions attendees might have,
- # coffee-break — for coffee between two talks, and
- # feedback — for general feedback and more information.
Add all your participants at the beginning of the conference, so they can be in sync with all the important info, all the time.
Here are a few initiatives to create connections between participants within your # announcements channel:
- Encourage participants to fill out their Pumble profile with their full name, job title, email, and any relevant contact information.
- Suggest emoji status based on what the attendee is looking to get out of the conference.
For example:
- 🎧 — Here to Listen,
- 🤝 — Looking to make connections,
- 📖 — Here to Learn, or
- 💼 — Looking for a job/Looking to hire (depending on your audience and type of the event).
- Provide ice-breaker questions in the channels to encourage discussions between like-minded people.
- Provide introductions or connections via direct messages.
To make sure key messages aren’t lost in the clutter, be sure to pin key instructions.
Your Pumble workspace can also provide channels to prep for talks and workshops.
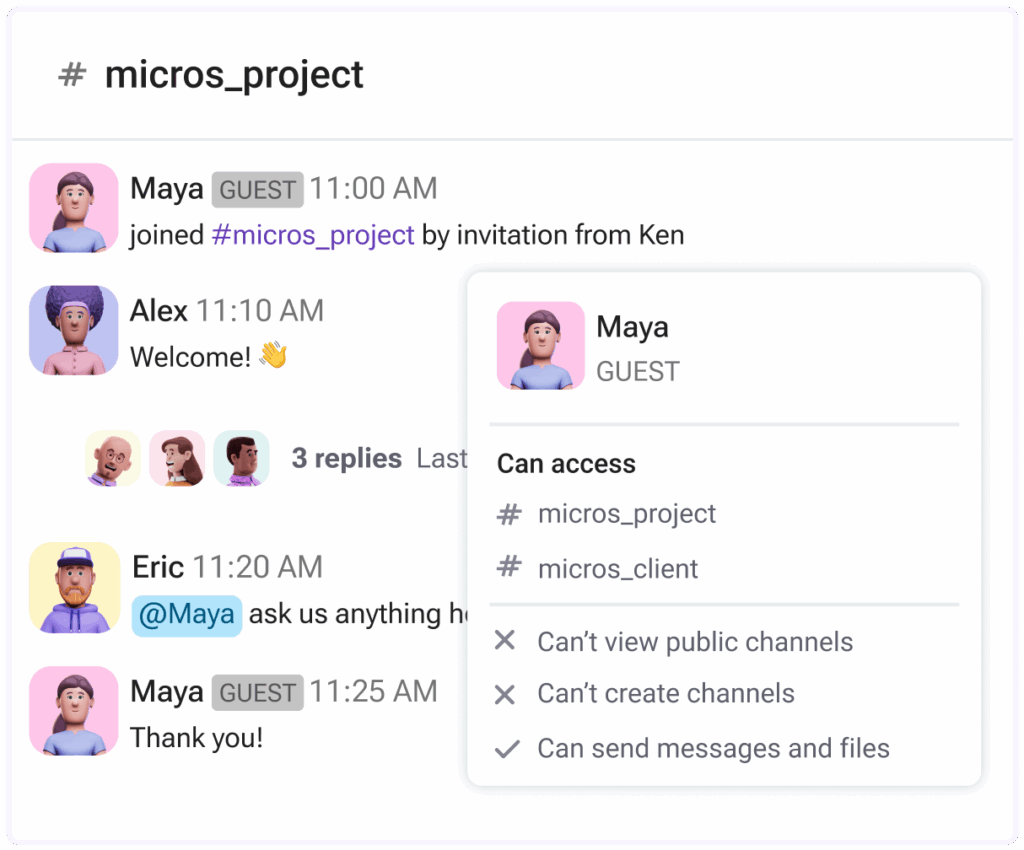
If you want to separate speakers and participants, you can add speakers to your Pumble workspace as guests.
They will have access only to the channels you add them to, so they won’t be bothered with numerous messages from all other channels.
You can:
- Add your guests using the guest access feature,
- Have conversations with your guests via video or voice call, and
- Create special channels for your guests and participants of their talk.
Why should you use Pumble by CAKE.com for online conferences?
Here are just some of the ways you can use Pumble to improve your online conferences — you can:
- Encourage internal collaboration — Along with a chat function with an internal directory, you can set up specific channels for various aspects of your event:
- Marketing (# marketing),
- Technology (# tech-side),
- Food & beverage (# coffee, # lunch, # break), and
- Event organizing (# organizers, # planning, # finances).
- Better communication with speakers and sponsors — Pumble can be useful as a place to organize channels for communicating with:
- Speakers (# speakers),
- Sponsors (# sponsors),
- VIP guests (# VIP-guests), and
- Other important stakeholder groups (# investors, # communities, # suppliers).
- Enhance attendee engagement — Pumble is a great place to foster engagement before, during, and after an event for special interest groups among your attendees. Create a channel and invite these attendees to keep the conversation going in between events:
- # participants
- # after-party
- # expectations
- # feedback
- # sessions
Transform teaching and learning with Pumble by CAKE.com
In today’s evolving educational landscape, effective communication is the backbone of successful teaching, learning, and collaboration.
Pumble offers educators a flexible, easy-to-use platform that adapts to a variety of educational contexts, whether you’re managing a virtual classroom, coordinating a writing community, or hosting an online conference.
With features like real-time messaging, built-in video conferencing, and powerful integrations, Pumble helps streamline workflows, support student engagement, and foster a stronger sense of community among learners and educators alike.
As schools, universities, and educational groups continue to embrace hybrid and digital-first models, tools like Pumble are becoming essential, not just for staying connected, but for creating meaningful, collaborative, and organized learning experiences.
Ensure great student-teacher communication and improve your teaching — try Pumble by CAKE.com for free today!
How we reviewed this post: Our writers & editors monitor the posts and update them when new information becomes available, to keep them fresh and relevant.