 Updated: November 4, 2025
 Getting started with a new team communication tool can be overwhelming, but Pumble by CAKE.com makes it fast, simple and intuitive.
In this Pumble guide, we’ll walk you through the 5 essential steps to set up your workspace, invite your team, and start collaborating right away.
Think of it as your first 15 minutes in Pumble, your quick start guide to building a productive digital HQ.
By the end you’ll know how to:
- Create your workspace and invite teammates,
- Organize conversations with channels,
- Keep discussions focused with threads,
- Customize your profile and notifications, and
- Start your first call or share a file.
Let’s dive in!
- Set up your Pumble workspace and bring your colleagues onboard. The workspace is your team’s shared hub for communication, collaboration, and productivity.
- Organize conversations with channels — spaces where your team conversations happen and the best way to escape messy email threads.
- Keep conversations focused with threads. Channels in Pumble keep communication organized, but threads keep it clean.
- Set up your profile and notifications to make your workspace feel personal, professional, and manageable.
- Start a call or share a file to see Pumble transformed from a simple chat app into a real collaboration hub, a place where communication and work come together.
Tip 1: Create your workspace and invite your team
Pumble is designed for teamwork, so your first step is setting up your workspace and bringing your colleagues onboard. The workspace is your team’s shared hub for communication, collaboration, and productivity.
When you first register at Pumble, you’ll automatically create a Pumble workspace and your CAKE.com account with your organization in it. By creating a workspace, you automatically become the owner of that workspace. Once you do that, you’ll be redirected to the workspace you created, and encounter a modal prompting you to invite users to your newly created workspace.
How to invite your team
Your teammates are the most important part of your workspace.
To invite them, there are two ways:
- Via email, and
- Via shared link.
Here’s how to do it:
- Click on the workspace name in the upper-left corner

2. Go to “Invite people”
3. Enter email addresses of your teammates
4. Click “Send invite” to confirm
To invite via shared link, you don’t have to enter the email addresses. Just click the “Copy invite link” option and share it via any chat platform or app.

Your teammates will get an invitation and they’ll be able to join your workspace by entering their name and agreeing to CAKE.com Terms of use.
🎓 Pumble Pro Tip
On Business and Enterprise subscription plans, you can set who can invite new members to your workspace in the workspace settings.
Tip 2: Organize conversations with channels
Channels are where your team conversations happen and the best way to escape messy email threads. Each channel is dedicated to a topic, team, or project, keeping discussions organized and searchable.
When you create a workspace in Pumble, you’ll have two default channels created for you — #general and #random.
Workspace admins can set more default channels to ensure new members are automatically added to essential channels.
Since only public channels can be set as default, consider making key information easily accessible to all team members.
Organized channels make it simple for everyone to know where to communicate. So the whole team can use #marketing for campaigns, #general for announcements, and #random for casual conversations. This way, organized channels help your team focus, stay aligned, and reduce miscommunication.
Proper channel setup also improves transparency. Everyone can see what’s happening, contribute when needed, and stay informed even when they aren’t part of the discussion.

How to create and organize channels
Pumble has two types of channels: public and private. Public channels are open to everyone in the organization, while private channels are restricted to selected, invited members.
As we already mentioned, you’ll get two default public channels, #general and #random. But, you can create however many channels you need. And while creating them, you can choose if you want them to be public or private.
There are a few ways you can create a channel in your workspace. Let’s start from the beginning.
The first place for creating channels is at your top-left corner. You’ll see the option +Create new in your sidebar. From there, just choose Channels, and you’re done.
The second and the third one are right at the listed channels in the sidebar. You’ll see a sign + next to the Channels where you can create a new channel, or you can do it by clicking + Add channels right below the listed channels.
The fourth way is to go to the All channels tab in your sidebar. You’ll see a button in your right-hand corner with a text “Create channel”.
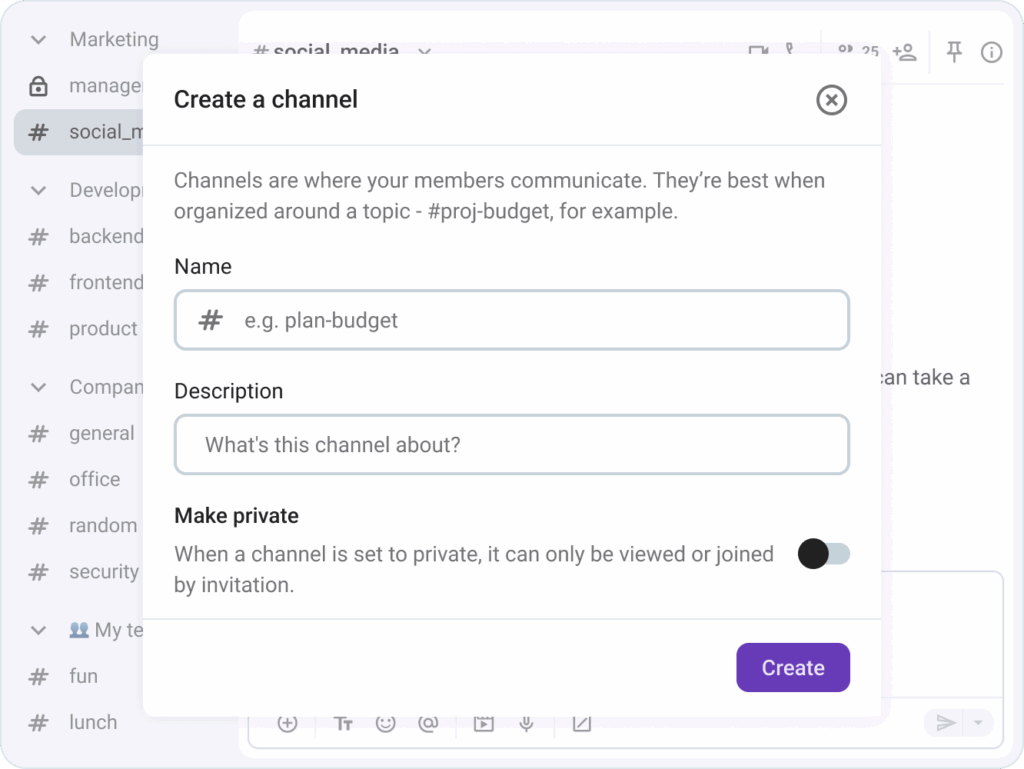
All of these methods will open the same modal for creating channels. There you’ll have to add a name of the channel, choose if it’ll be private or public, and add a description, so everyone knows what it’s about.
Creating a public channel is the best way to share information and stay transparent with your teammates. That way, all relevant team members can join the channel and see all communication.
On the other hand, if the information is classified, you can create a private channel or send a direct message to one or more colleagues.
So, to stay organized when setting up channels in Pumble, it’s important to keep their purpose clear.
For example, you can create a channel for:
- Team’s conversations and updates — #marketing, #sales, #design, etc.
- A new project kickoff — #halloweeen_campaign, #relaunch_website, #new_year_campaign, etc.
- Helping interns — #interns_qa, #interns_onboarding, #interns_ppc.
Tip 3: Communicate with your team
Keep conversations focused with threads.
Channels in Pumble keep communication organized, but threads keep it clean. Without threads, even the best-organized channel can quickly become a wall of messages. Threads let you reply directly to a specific message, keeping side discussions in context and preventing clutter.
This small habit makes a big difference in how teams communicate. Threads help maintain focus, especially in busy channels where multiple topics may overlap. When replies are contained within a thread, everyone can easily follow the main discussion while still engaging in detailed side conversations.
Using threads also improves knowledge sharing. When someone revisits a project discussion weeks later, they can quickly find all relevant replies in a single thread instead of searching through hundreds of unrelated messages.
How to start a thread
You can start a thread from any message to organize discussions in your channels and/or direct messages.
Here’s how to do it:
- Send your message.
- Hover over the message you’d like to reply to.
- Click on the reply in the thread icon.
- Enter your reply.
To send your reply back to the channel or to the main view of direct messages, simply tick the Also send to [channel name] checkbox located below your message.
🎓 Pumble Pro Tip
Encourage your team to use threads whenever they respond to a message that needs follow up.
Tip 4: Customize your profile & notifications
When you’re getting started in Pumble by CAKE.com, setting up your profile and notifications is an important step toward making your workspace feel personal, professional, and manageable.
A well set up profile helps your teammates recognize you and understand your role, especially in larger teams or remote settings. Meanwhile, properly adjusted notification preferences help you stay informed about important updates without being overwhelmed. Together, these two steps make your communication more human and your workflow more focused.
Customize your profile
Your Pumble profile is how you present yourself to your team. A profile photo, name, and role give a face to your messages and help others connect with you on a more personal level. In remote teams, this visual identity strengthens relationships and builds trust.
It also makes collaboration smoother. When everyone’s profiles are complete, it’s easier to identify who’s responsible for what, saving time and reducing confusion. A few minutes spent personalizing your profile can go a long way toward creating a professional and friendly team environment.
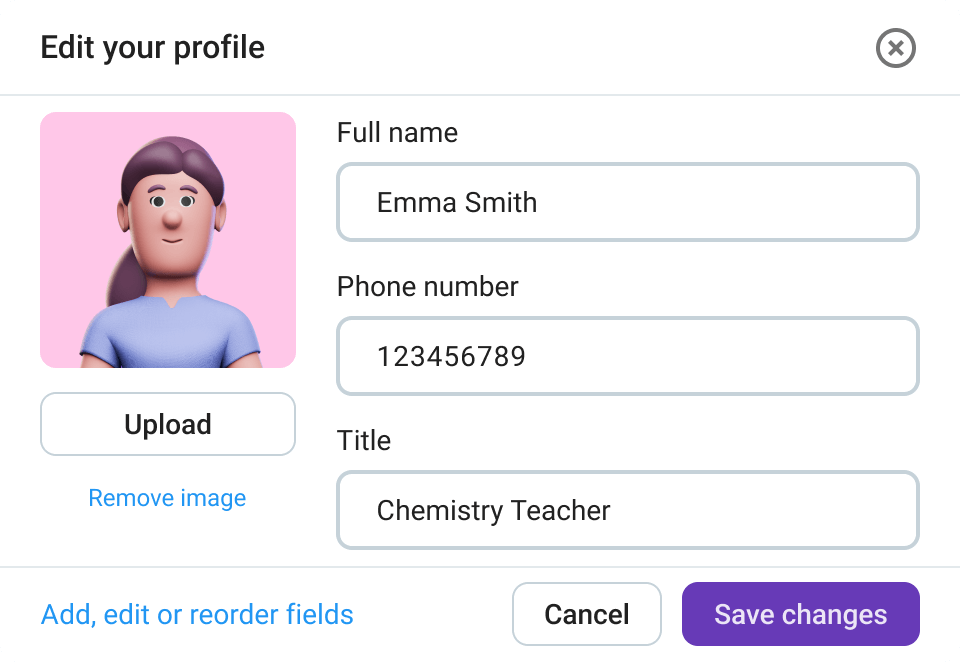
How to customize your Pumble profile
To set up a profile in a Pumble workspace, you’ll need to do the following:
- Click on your profile picture in the top right corner,
- Select the “My profile” tab,
- Click on the “Edit” option,
- Fill in the missing info or add more details about yourself, and
- Click on the “Save” button when you’re done.
Update your profile photo regularly, especially if you’re onboarding new teammates. A friendly, up-to-date photo helps everyone feel more connected.
Adjust your notifications
Effective communication doesn’t mean constant interruption. By customizing your notifications, you can stay in control of how and when you receive alerts, ensuring you’re aware of what matters most without being distracted by every message.
When notifications are set up correctly, you’ll always catch direct messages and important mentions while avoiding notification overload. This is especially useful for larger teams where message activity is high, or for users who split time between desktop and mobile apps.
Tailoring your notification preferences early on helps you build a balanced workflow. Instead of feeling pressured to respond instantly, you can focus deeply and return to Pumble when it makes sense for you.
How to adjust your notifications
You can set the notification preferences in the sidebar or from the channel/DM header.
To do so:
- Right click on the channel/DM in the sidebar or Click on the downward arrow next to the channel/DM name in its header.
- Choose Notification preferences.
Now, you can set the preferences in the Notifications modal.
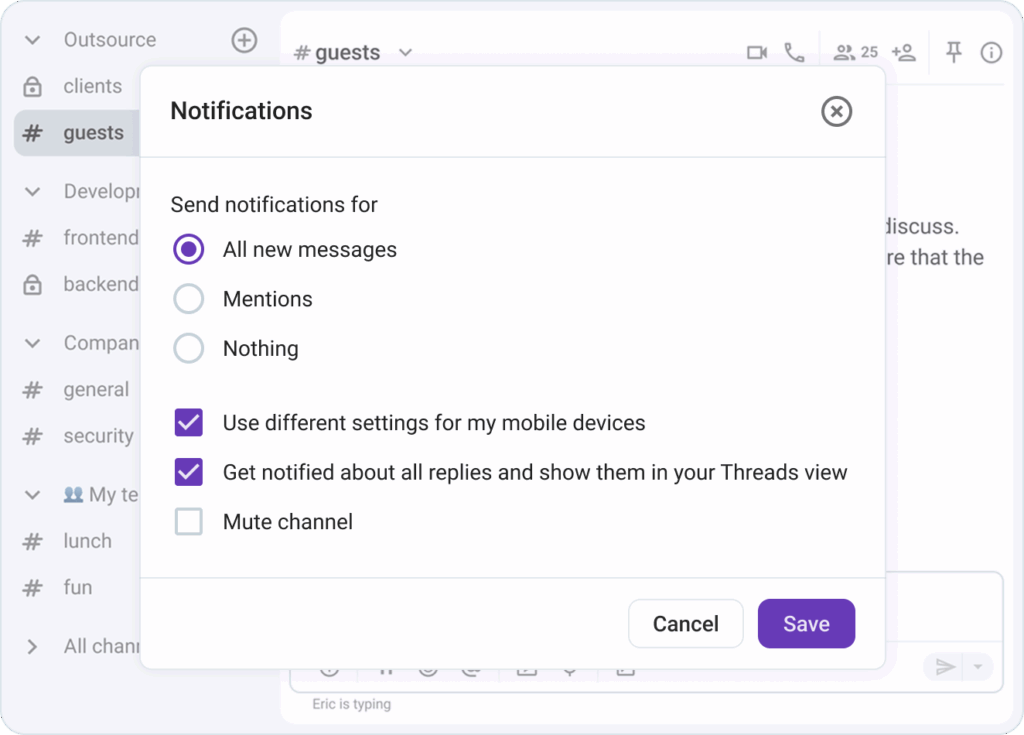
You can configure the notifications for:
- All new messages (default),
- Mentions (you’ll get notifications whenever you’re mentioned),
- Optionally check Also include @channel and @here to get these notifications as well,
- Use different settings for my mobile devices (check this box and then choose if you’d like to get push notification, or no notification on mobile), and
- Follow all threads with new replies in this channel/DM (you’ll get notifications for all new replies in threads for that channel/DM).
If you choose Mute channel/Mute DM, it will be reflected on both mobile and desktop/web clients.
Tip 5: Start your first call or share a file
So, once your workspace, channels, and notifications are all set up, it’s time to see Pumble by CAKE.com in action.
The best way to do that is by starting a call or sharing a file with your team. These two actions transform Pumble from a simple chat app into a real collaboration hub, a place where communication and work come together.
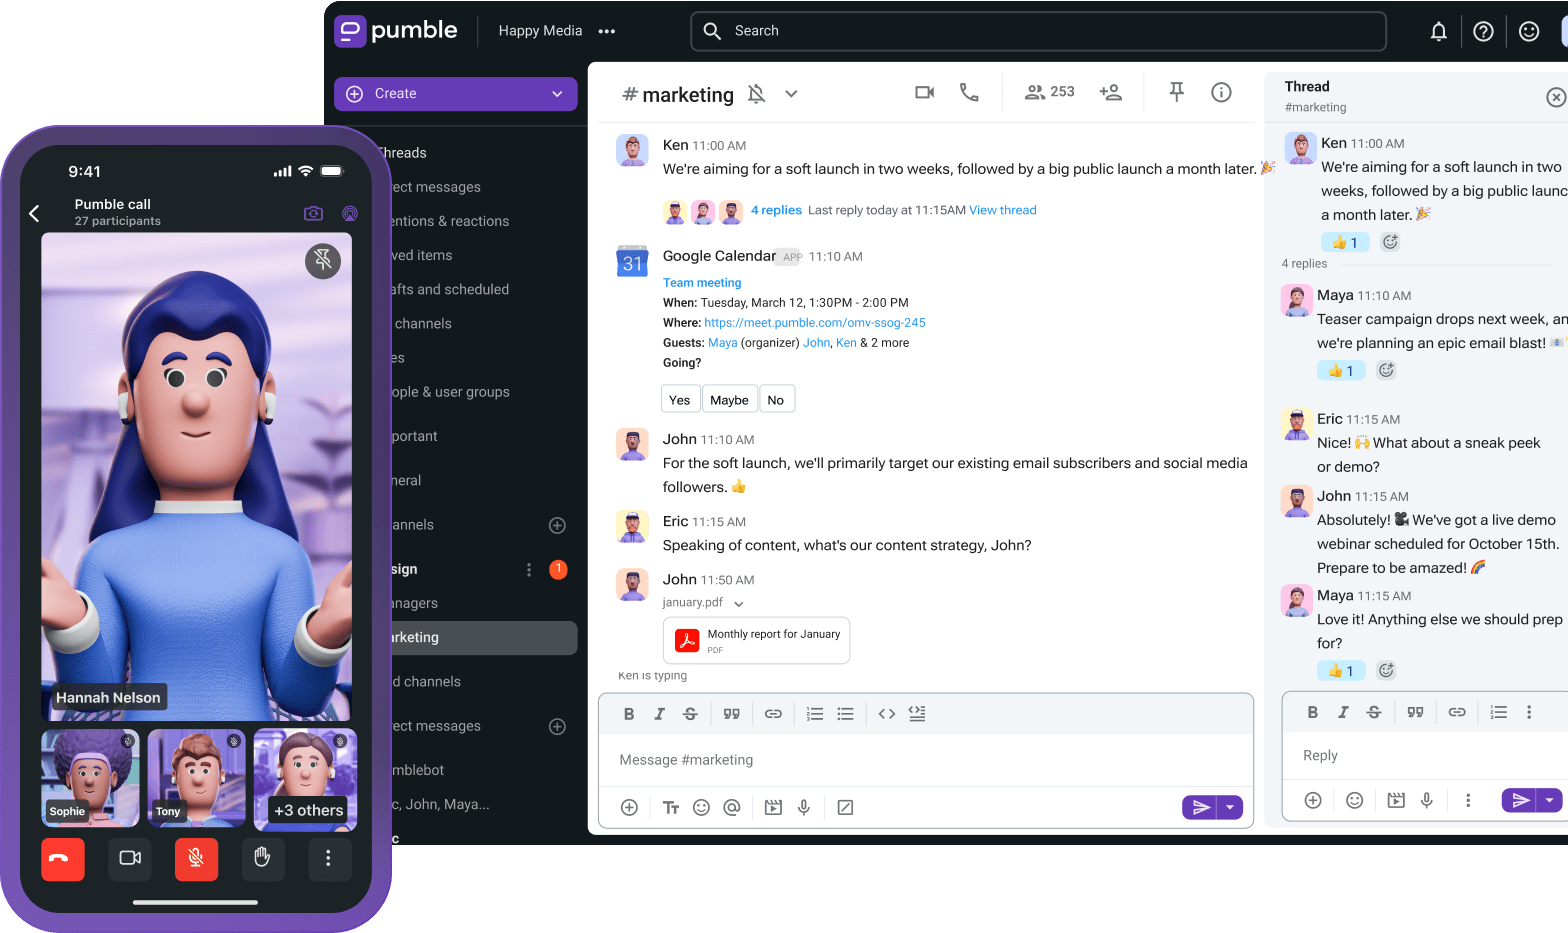
Video calls help you connect face-to-face, build stronger relationships, and make quick decisions without leaving your workspace.
File sharing, on the other hand, keeps all your important documents, screenshots, and updates right inside Pumble, making it easy for everyone to find and discuss them.
Together these features show how powerful Pumble can be as your all-in-one communication and collaboration platform.
Start your first call
When working remotely or across different offices, video and voice calls in Pumble bring back the spontaneity and connection of real-world teamwork. Instead of scheduling formal meetings in separate tools, you can instantly jump into a quick call with one click, keeping the conversation natural and productive.
Starting your first call helps your team feel more connected and comfortable using Pumble as their daily communication hub. It also reduces friction — you can discuss details, brainstorm ideas, or make decisions immediately, without switching to another platform.
Regular use of calls helps strengthen team culture, improve communication flow, and cut down on endless back and forth messaging.
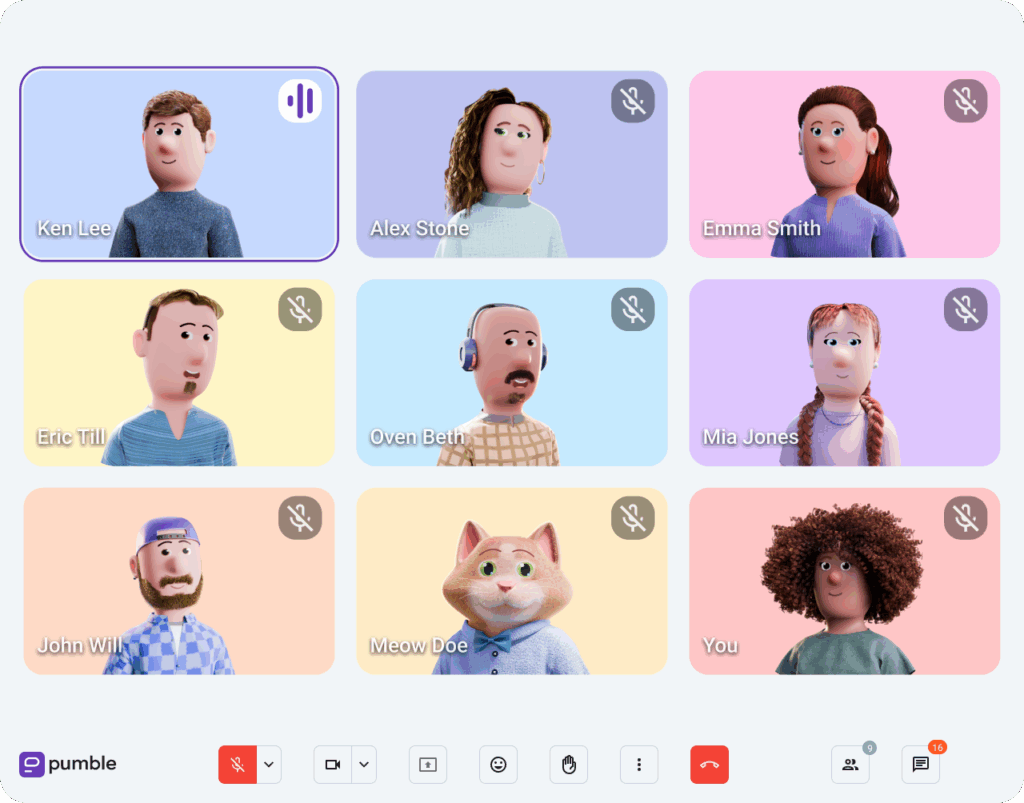
Here’s how to start a call in Pumble:
- Open a DM or a channel where you want to make a call,
- Click on the camera icon in the top right corner,
- Once the call begins, your teammates will see a modal to join.
Use calls for quick problem solving or one-on-one syncs. For larger discussion, create a dedicated meeting where everyone can join via call links.
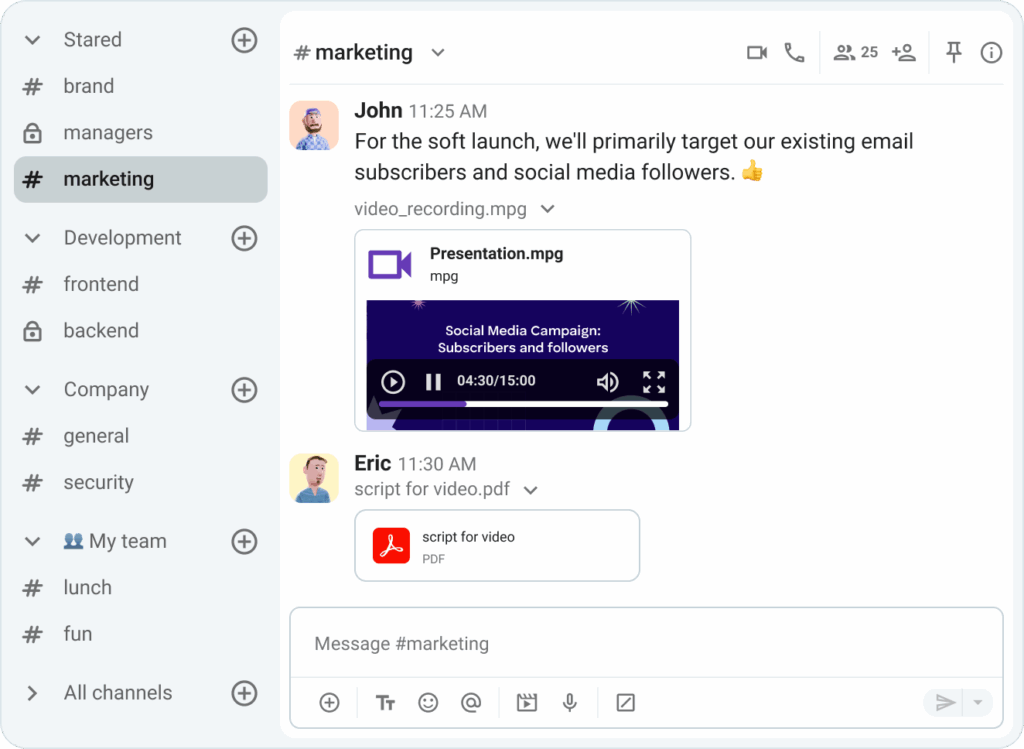
Share a file
Every team relies on sharing documents, images, or resources, and doing it directly in Pumble keeps your workflow seamless. Instead of switching between apps or digging through emails, you can upload files right where the conversation happens. When you share a file in Pumble, it’s automatically stored and searchable within your channel or direct message. That means no more losing track of attachments or searching multiple folders for the latest version.
File sharing also helps visualize progress. Whether it’s a project plan, a report, or a design mockup, sharing it in Pumble lets teammates react, comment, or start a thread to discuss improvements.
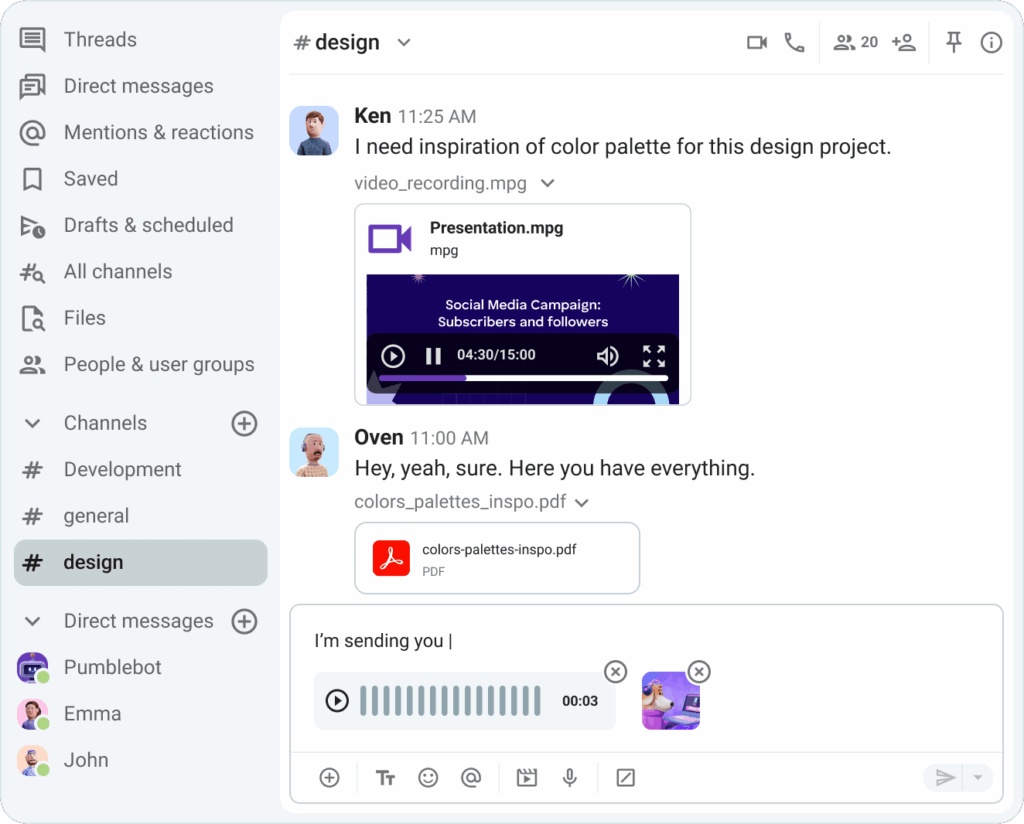
Sharing a file in Pumble is simple:
- Go to a channel or DM,
- Drag and drop your file directly into the message box, or click on the “Plus icon” and choose “Upload from your computer”,
- Add a short message or emoji reaction to give context or prompt feedback,
- Press “Enter” to send and your file will instantly appear in the chat.
What’s Next?
You’ve just taken your first big leap toward building a more connected, organized, and productive team.
With these 5 steps, you’re no longer just getting started in Pumble by CAKE.com — you’re already collaborating like a pro.
Your team now has a central hub for:
- Communication,
- Quick decision making, and
- Seamless teamwork.
But this is just the beginning. Pumble offers plenty of features designed to help you take your collaboration even further.
Ready to explore what’s next?
Here are some great next reads:
Team collaboration with Pumble — Learn how to use channels, mentions, and threads to strengthen teamwork and improve communication flow.
Guest access in Pumble — Discover how to collaborate securely with external partners, clients, or freelancers.
Pumble mobile app guide — Stay connected and productive from anywhere with Pumble for iOS and Android.
Pumble for startups — See how early-stage teams use Pumble to streamline operations and scale communication efficiently.
Every feature you explore will help your team communicate better and work smarter. So go ahead — invite a few more teammates, create your next project channel, or start a call to celebrate your first win together.
Welcome to your digital HQ with Pumble by CAKE.com, where great teamwork begins!
How we reviewed this post: Our writers & editors monitor the posts and update them when new information becomes available, to keep them fresh and relevant.