From creating your first channel to equipping your team with all the resources they need to communicate and collaborate better, this article will guide you through the five essential steps to get you up and running with Pumble.
You can run Pumble on your phone or computer. Mobile apps are available for both Android and iOS. On a computer, you can simply run Pumble in your web browser or download a desktop app — available for Windows, Linux, and MacOS.
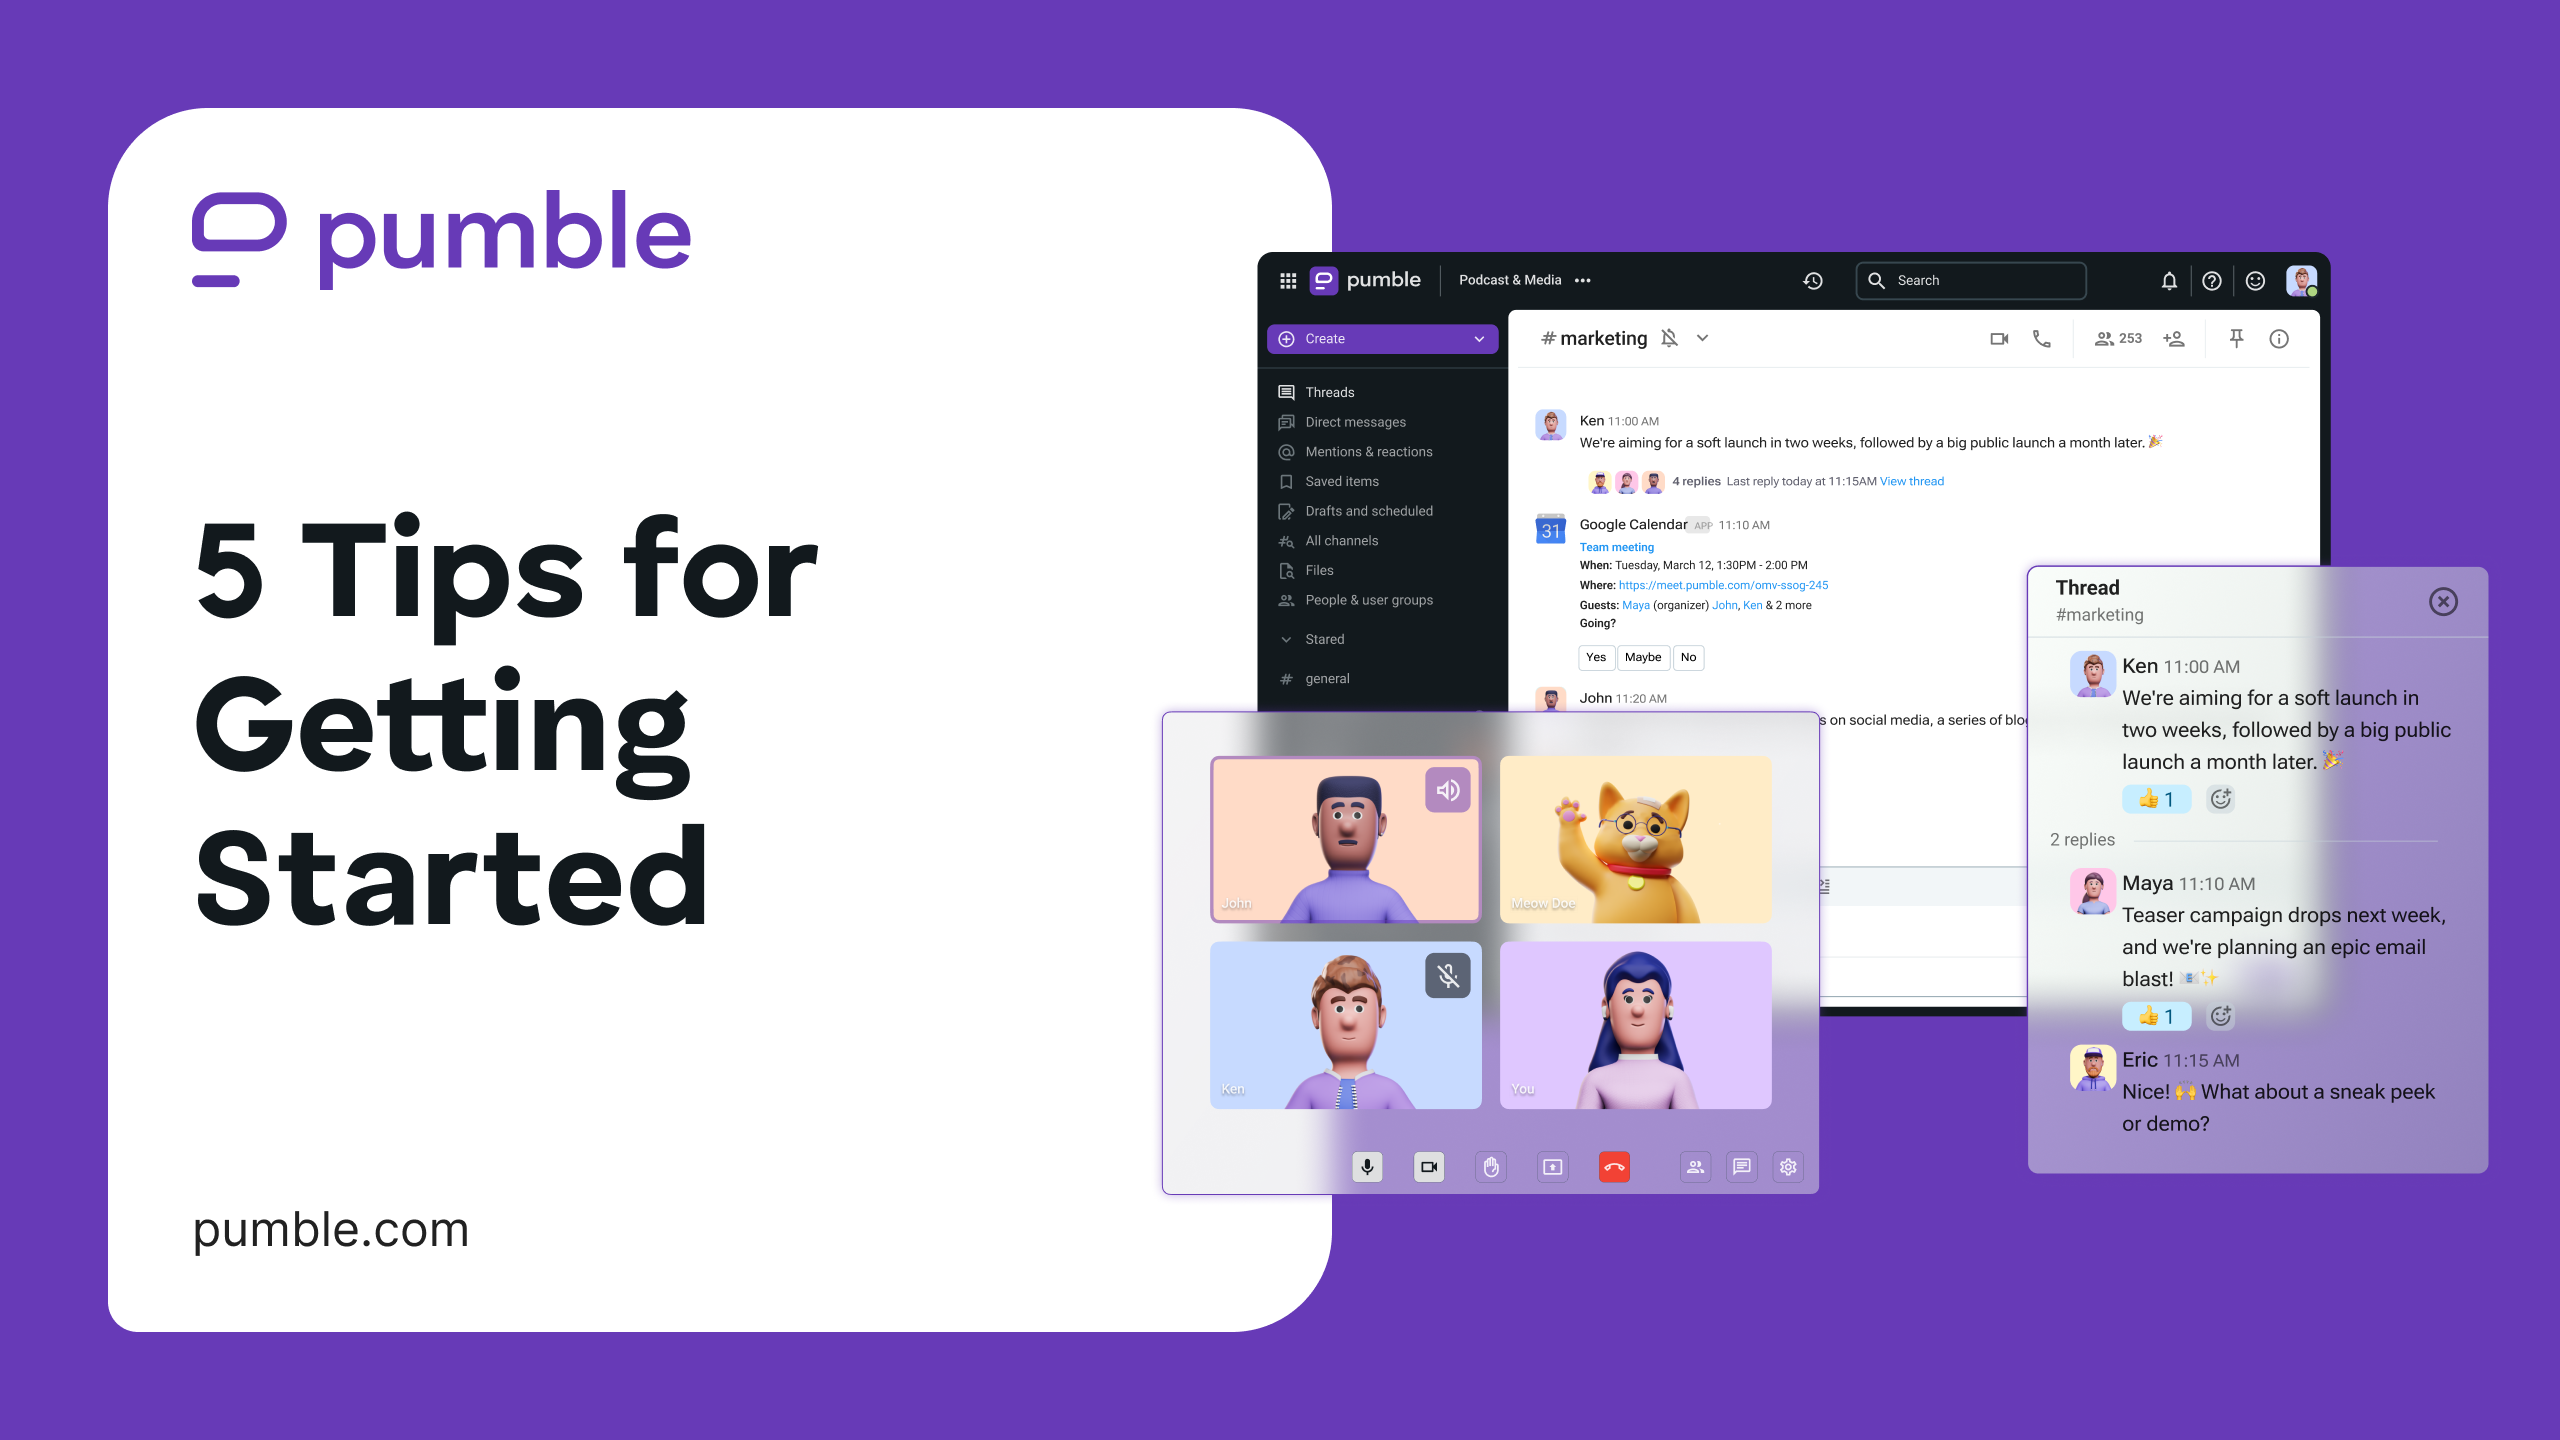
Whether you’re new to team collaboration tools or transitioning from another platform, these steps will help you make the most out of Pumble’s powerful features.
Let’s get started
Before we start with the tips, we have to explain a few of the Pumble basics — like the Pumble workspace is.
A Pumble workspace is your team’s virtual space. If you have joined one lately, this guideline will help you get started.
Make sure you have downloaded the desktop app, and you’re able to sign in to the workspace.
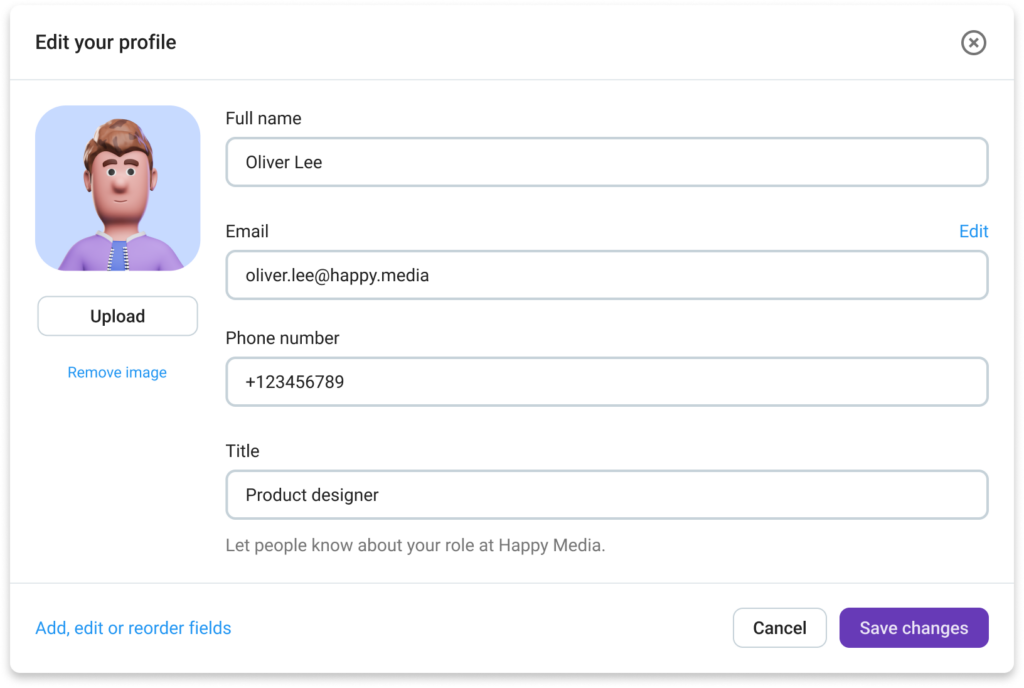
Once you’ve signed in, you — and every other team member — should set your profile starting with a profile photo and your position in the company. Having a complete profile will help your coworkers get to know you and vice versa.
How to set up a profile?
To set up a profile in a Pumble workspace, you’ll need to do the following:
- Click on your profile picture in the top right corner,
- Select the “My profile” button,
- Click on the “Edit” option,
- Fill in the missing info or add more details about yourself, and
- Click on the “Save changes” button when you’re done.
#1 Tip: Communicate with your team
Pumble works best if the entire team commits to sharing important information, updates, and files in specific Pumble channels.
Channels
Channels are a fundamental feature of Pumble. If you need to communicate with a group of teammates about a certain topic, just create a channel.
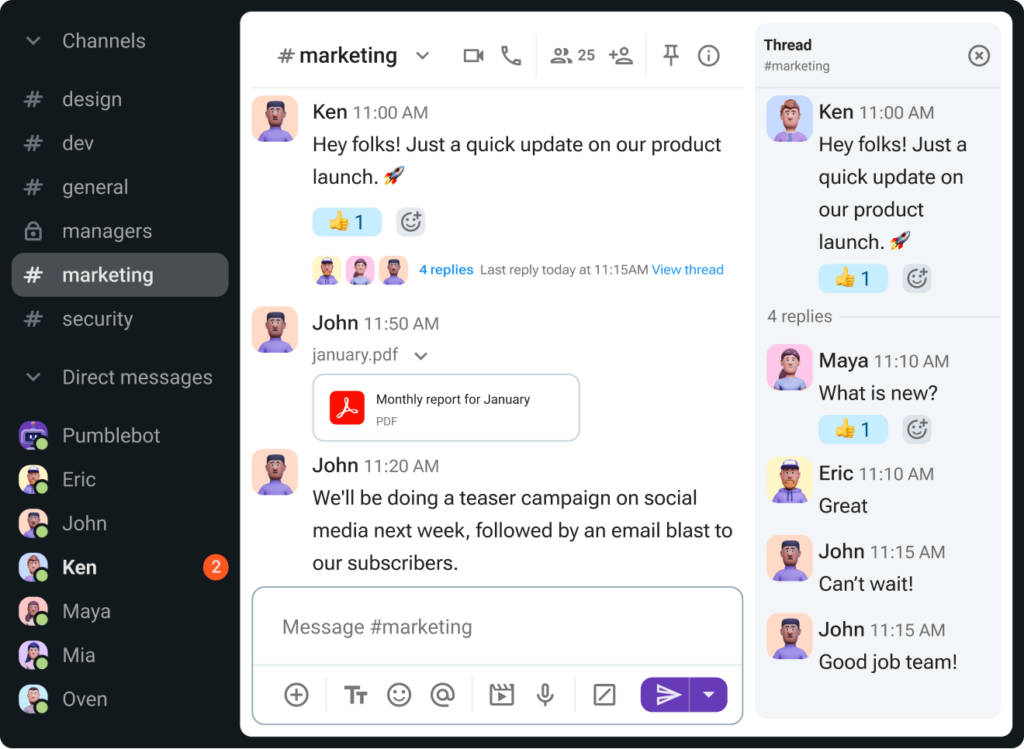
Instead of dispersing team discussions about a project or issue across a wide range of email topics, the channels give teams a single area for easy search and communication.
Here’s a video that goes deeper into why channels are a better avenue for communication and collaboration:
You can easily get someone’s attention in a Pumble channel with a message that includes an @mention of their name, as well as add some character to the message with an emoji or two, include an attachment or a link, and much more.
You can also change how your messages look. Highlight text and select [B] to bold or [I] to italicize the whole message or just a part of your text. Or, instead of typing, create a video or an audio message by recording a clip.
Public vs private channels
Channels are flexible spaces for all the people, tools, and files you need to get the work done.
When you want to communicate with your colleagues with full transparency and inclusivity, use public channels in your Pumble workspace. Any member of your workspace (except guests) can view and join a public channel, meaning everyone has access to the same shared information.
🎓 Pumble Pro Tip
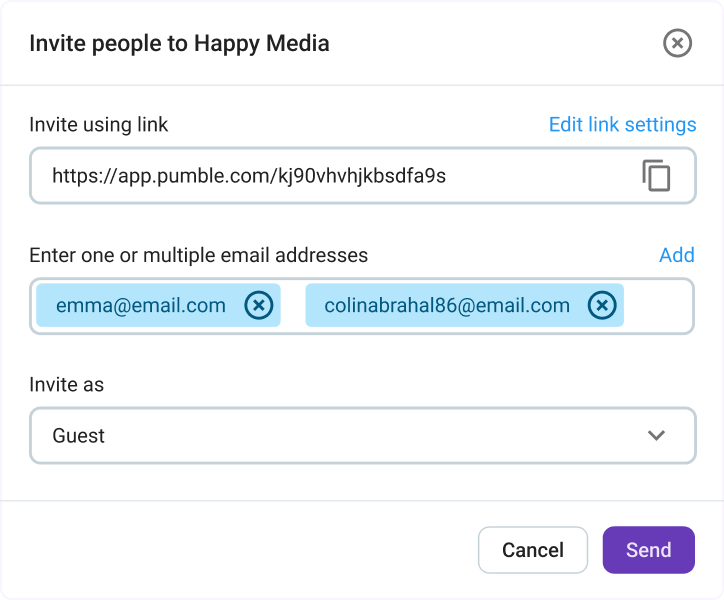
If you’ve been invited to a workspace as a guest, you can only send messages in channels you have access to, and DM people who are in the same channels as you.
For example, an organization may create public channels for #announcements or #system_issues. The rationale here is simple: all employees should be able to view important company information.
Each public channel serves a different purpose, so you can create as many channels as you want.
On the other hand, private Pumble channels are only visible to those invited to join them. You need to be invited by someone who is already a member of the channel. Content and messages in private channels will only show up in a search for members of that channel.
Discussions in #payroll_issues, #research, and #hr_staffing_plans are probably confidential, which means not everyone has access to that information — hence, those channels would probably be made private.
🎓 Pumble Pro Tip
Private channels can’t be changed to public after they’ve been created — but public channels can be switched to private.
Unlike public channels, private channels appear in users’ channel directories only if they are already members of these private channels. In other words, if you’re not a member, in theory, you wouldn’t know that certain private channels even exist.
🎓 Pumble Pro Tip
You can leave a public channel at any time and rejoin at your leisure. However, if you leave a private channel, an existing member will need to invite you back.
Direct messages
You can also send direct messages, or DMs, to one person or a group of people. This is great for impromptu chats or more private discussions with someone like your manager. For everything else, it’s better to use public channels, to ensure that everyone can see the same information and stay up to date.
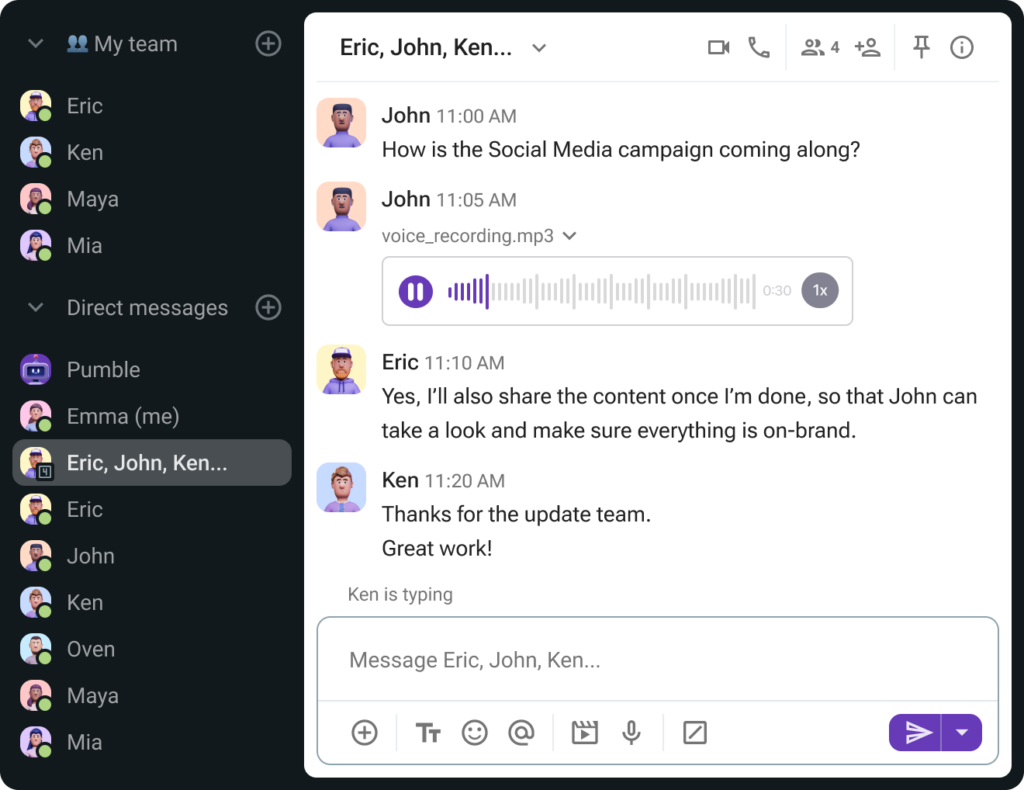
The main difference between group direct messages and private channels is that you can discuss any topic in group messages — no matter if it is marketing stuff, sales, or product.
When it comes to private channels, you usually discuss only one topic, associated with that channel.
Threads
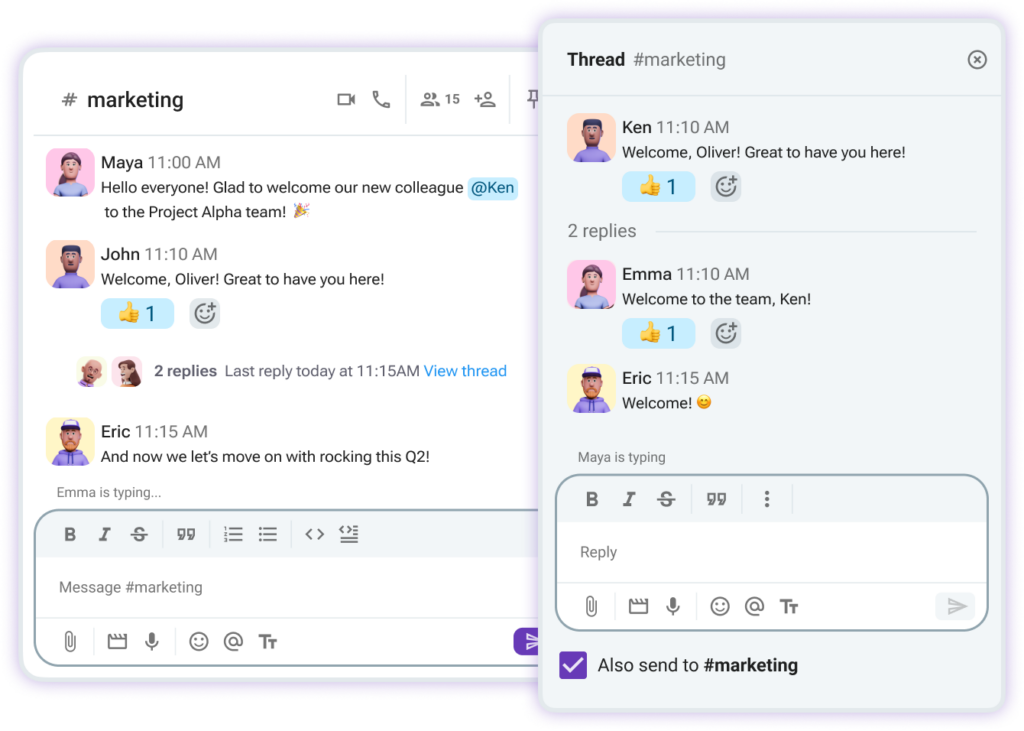
Within DMs and channels, threads help you organize conversations around certain messages.
They allow for focused and structured conversations and let you delve further into a topic without disturbing the channel by direct messaging the entire chat. Replies are linked to the original message which keeps the discussion structured.
Video conferencing
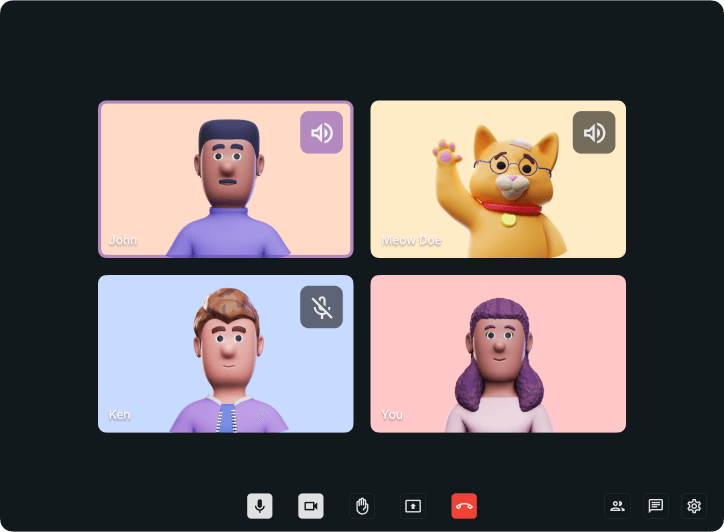
When you need to move your conversations into progressive meetings, video conferencing can lend a hand. Start a call to have a real-time voice or video conversation with someone in a DM or with an entire channel. All you have to do is click on the “Video call” or “Audio call” icon and you’re there.
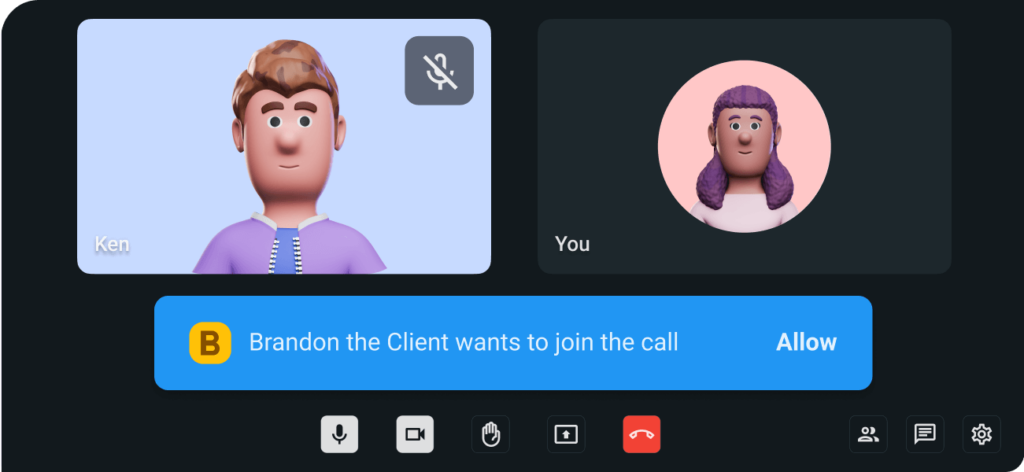
If you need to include some third parties who aren’t a part of your workspace, you can do that with external access to meetings. Send invites to your partners, and they can be with you on a call in a minute — simple as that. Third parties don’t have to have a Pumble account to join meetings, but if you want them involved in more than just a meeting or two, you can always invite them to be guests at your company’s workspace.
Hold all your meetings over Pumble
#2 Tip: Share files and search without limits
Pumble makes effective collaboration with your team seamless with a variety of powerful features.
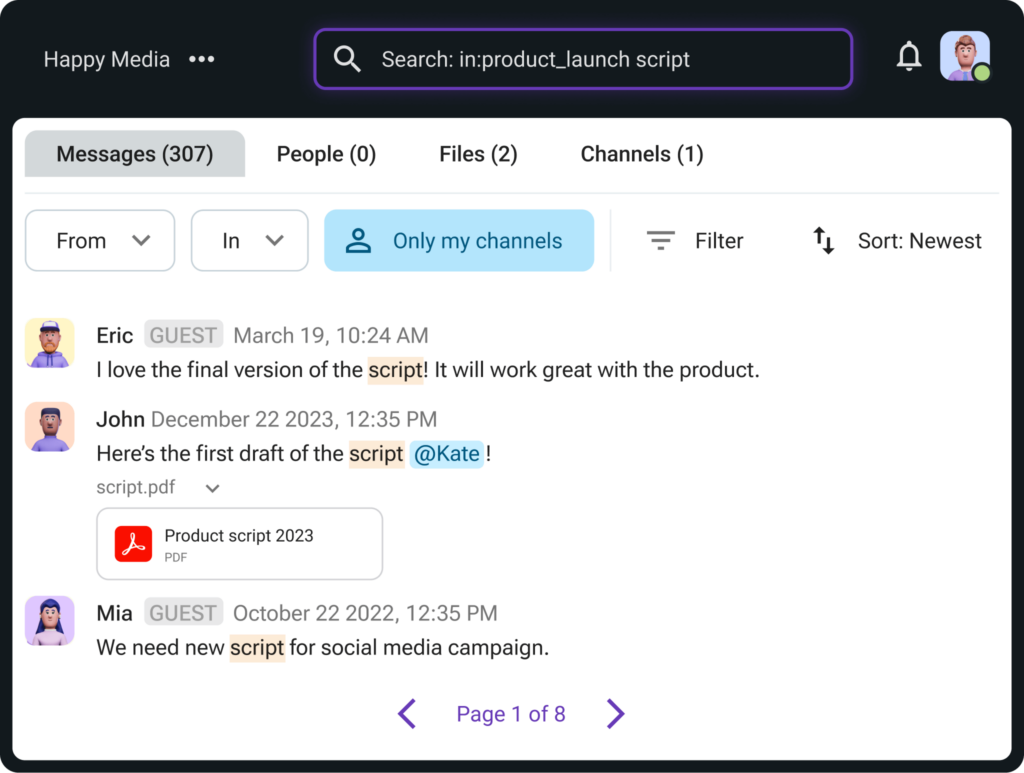
File sharing lets you quickly distribute important documents, images, and other resources, ensuring everyone can access the latest information. The Pumble unlimited search helps you find any past conversations and files, serving as a great time-saver and reducing redundant questions.
File sharing
You can share files, documents, photos, and videos from your computer, device, or a cloud storage service of choice, all without switching tabs or windows. From drag-and-drop to quickly adding documents from services such as Google Drive, sharing files in Pumble is as simple as typing and sending messages.
Unlimited search
Consider Pumble a treasure chest of all your team’s conversations and knowledge. You can easily sift through every channel and DM to locate information, documents, and answers using the unlimited search feature. You’re sure to find a few gems along the way!
#3 Tip: Customize your Pumble experience
Like a tidy conversation closet, you can sort everything in your Pumble sidebar with custom sections.
Customize sections
To start things off, you can assign a name and an emoji to your sections. After that, simply drag and drop channels, direct messages, and apps into your brand-new space, and then kick back and relax, knowing that everything is right where it should be.
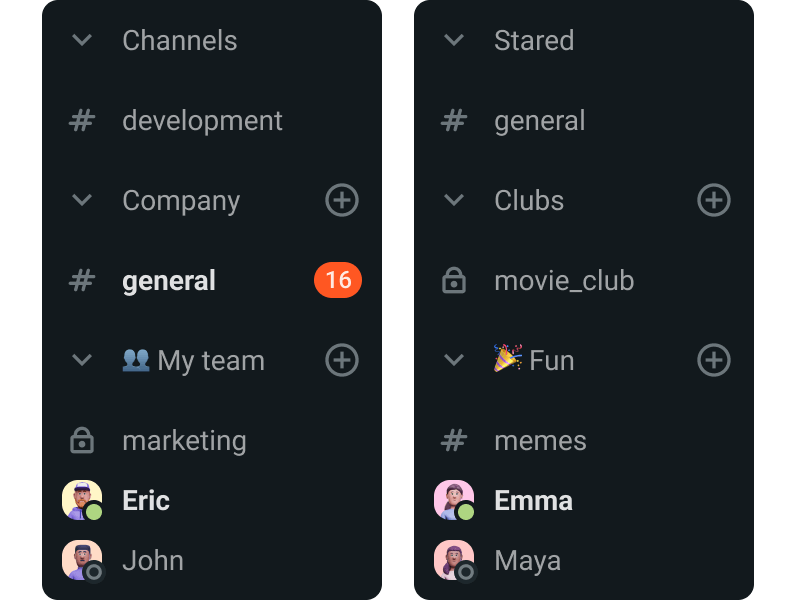
For example, you can create custom sections to organize projects and channels within your sidebar. Feel free to change these whenever the mood strikes! 🤓
Get notified when you want
It’s nice to stay up to date on all important details. But you probably don’t need to know every single thing going on in every channel in your team communication app.
Pumble’s default notification settings get you notified about new direct messages and mentions. So, if someone messages you directly or mentions you (or @channel/@here) in a channel you’ve joined, you’ll get a notification, and a big red badge will show up.
This may or may not work for you, depending on the situation. The key to mastering your notifications is to know what suits you best.
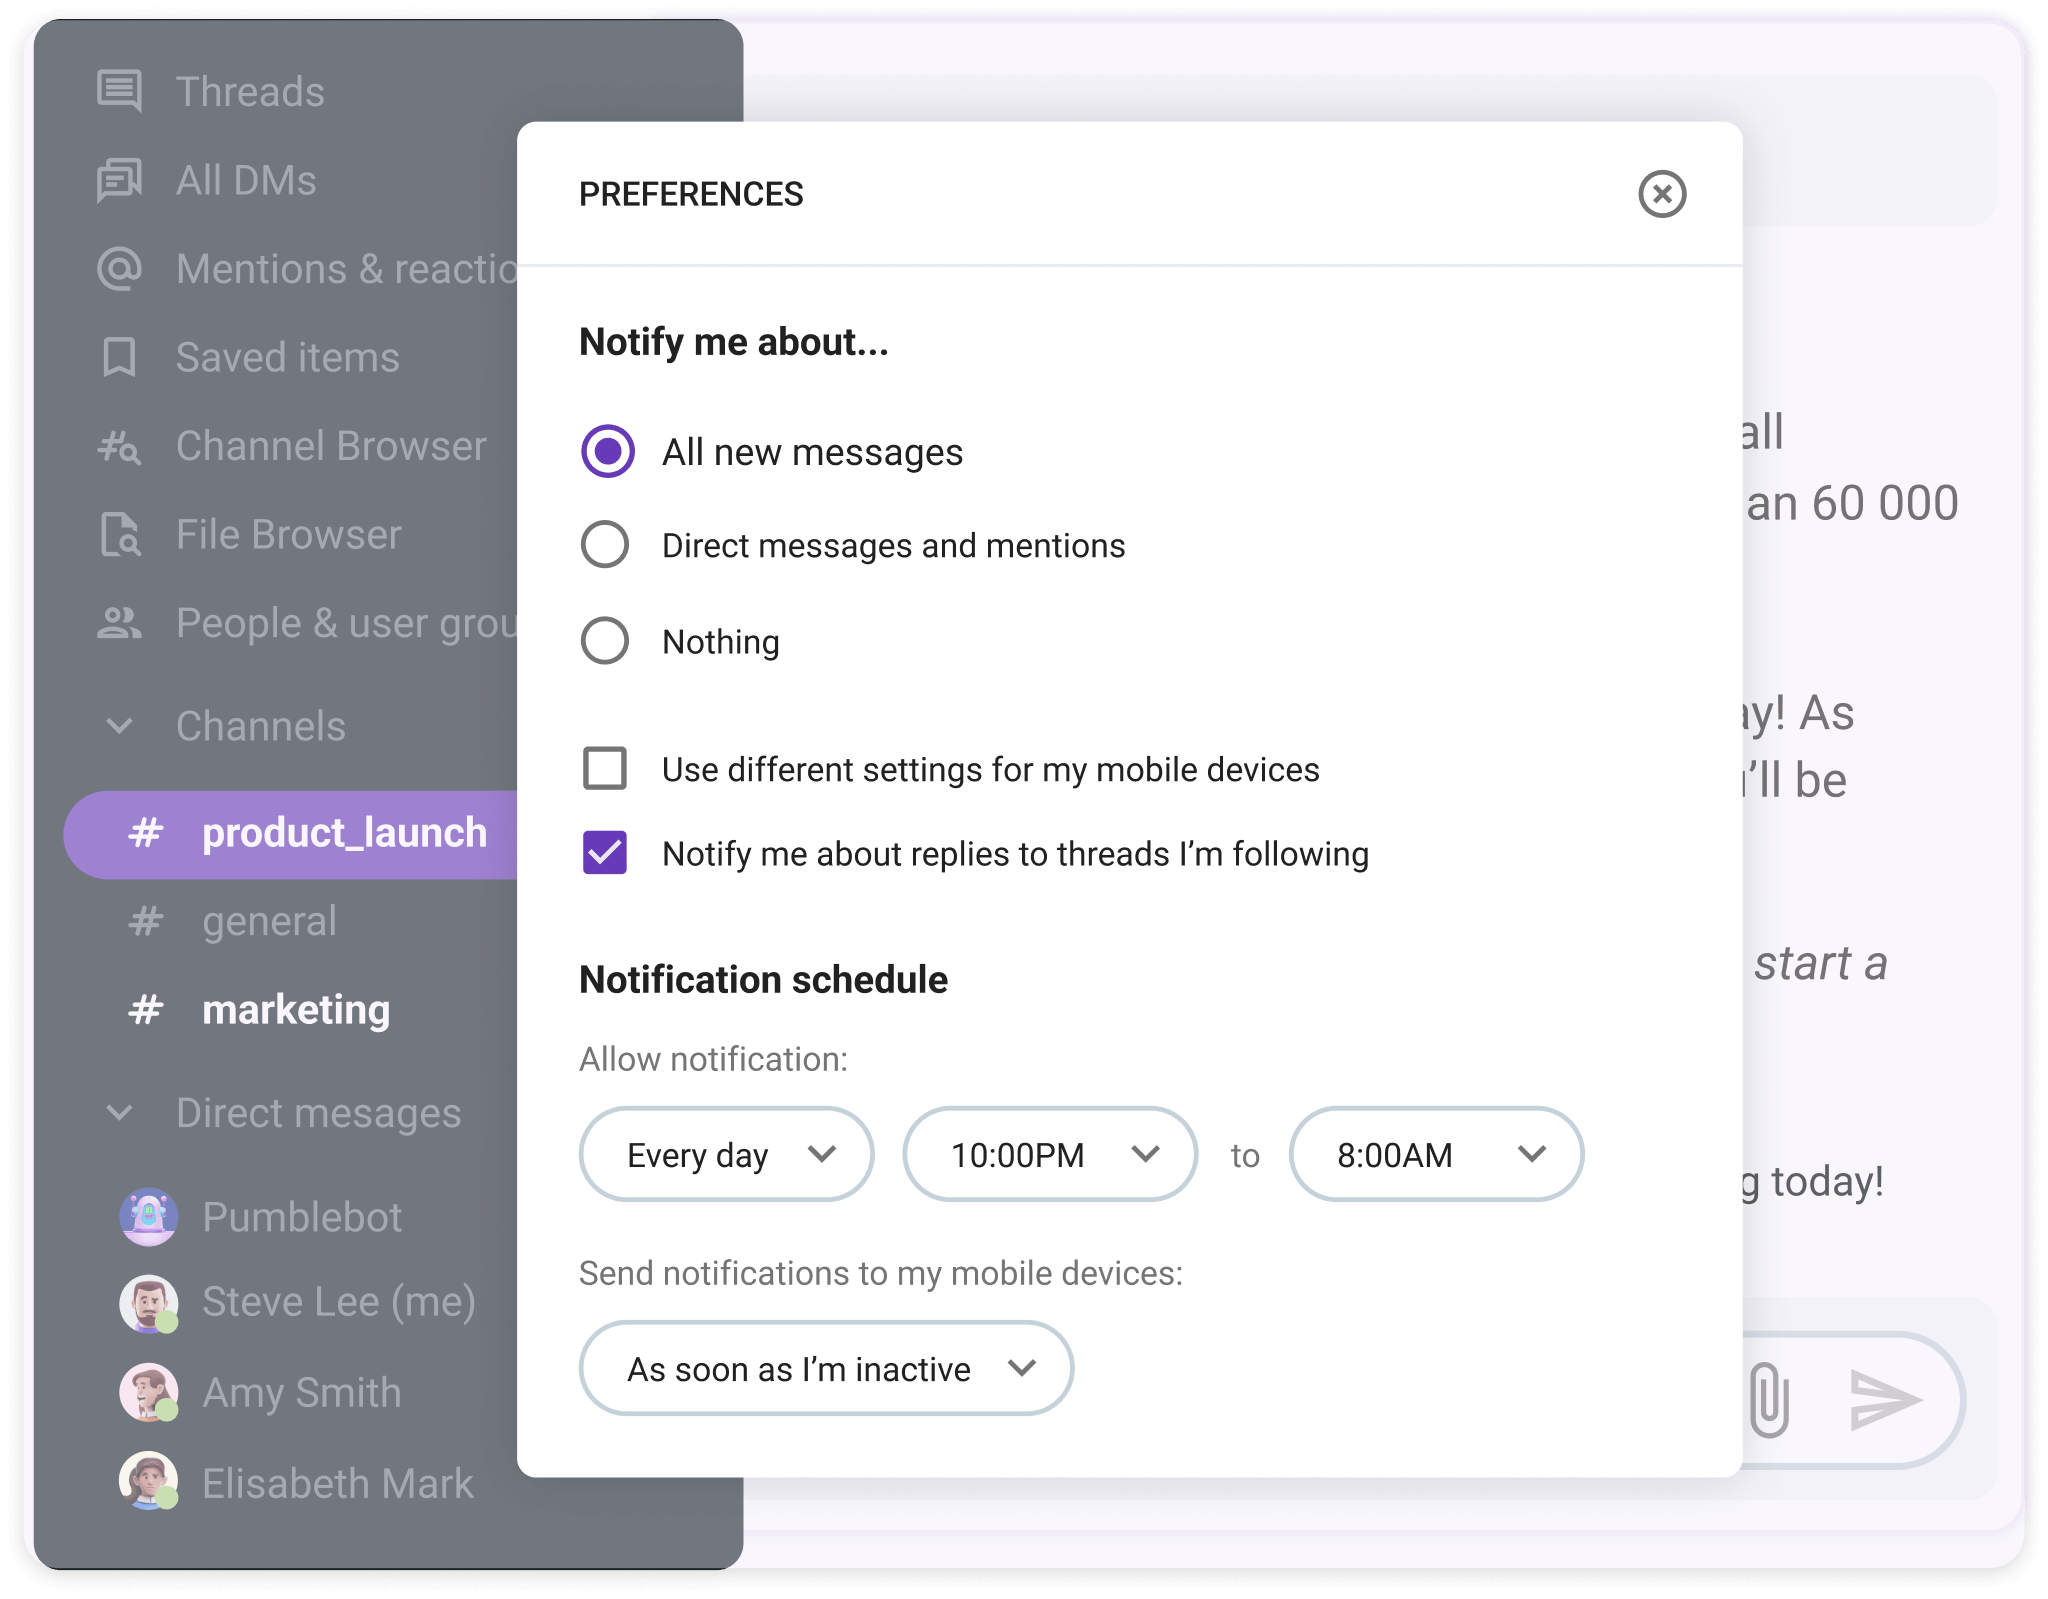
If the constant sound of notifications drains your focus, you may want to choose a less invasive sound. Alternatively, you can turn off sounds from notifications, or switch to the DND mode more often.
On the other hand, if you want to get more notifications, you can change your preferences to notify you about all new messages in conversations you’re a part of.
Conversely, you can mute channels that you want to be in but don’t follow closely. This is especially handy for channels that receive a high volume of messages or channels you visit only for specific requests.
Muted channels won’t appear bolded when there’s unread activity, letting you read through them at your own convenience. If someone mentions your username in the channels you’ve muted, though, don’t worry — you’ll still receive a red badge.
You can customize your notifications for each specific channel, too. So, you can, for example, mute all notifications from one channel but turn them on for all messages in another.
Set your current status
Whenever you step away from Pumble — to grab lunch, take a week off, or just focus on a task for a few hours — you can set a custom status to manage your coworkers’ expectations.
You can also use your status to share what you’re working on or whom your coworkers should contact in your absence.
Pumble comes with 5 default status options, including:
- 🗓 in a meeting,
- 🥗lunch break,
- 🏞️ on vacation,
- 🚟 commuting, or
- 🤒 out sick.
For anything else, you can create your own custom status. Maybe you want to let your team know you’re on deadline and will be slow to respond to messages. Or, that you stepped outside for a bit. Each status can be up to 100 characters long and feature an emoji of your choice.
#4 Tip: Connect Pumble with other apps
Pumble connects with other tools your organization uses, providing a more comprehensive experience for everyone and driving more value from your existing tech stack.
Check out the Pumble integration page to connect the tools you’re already using!
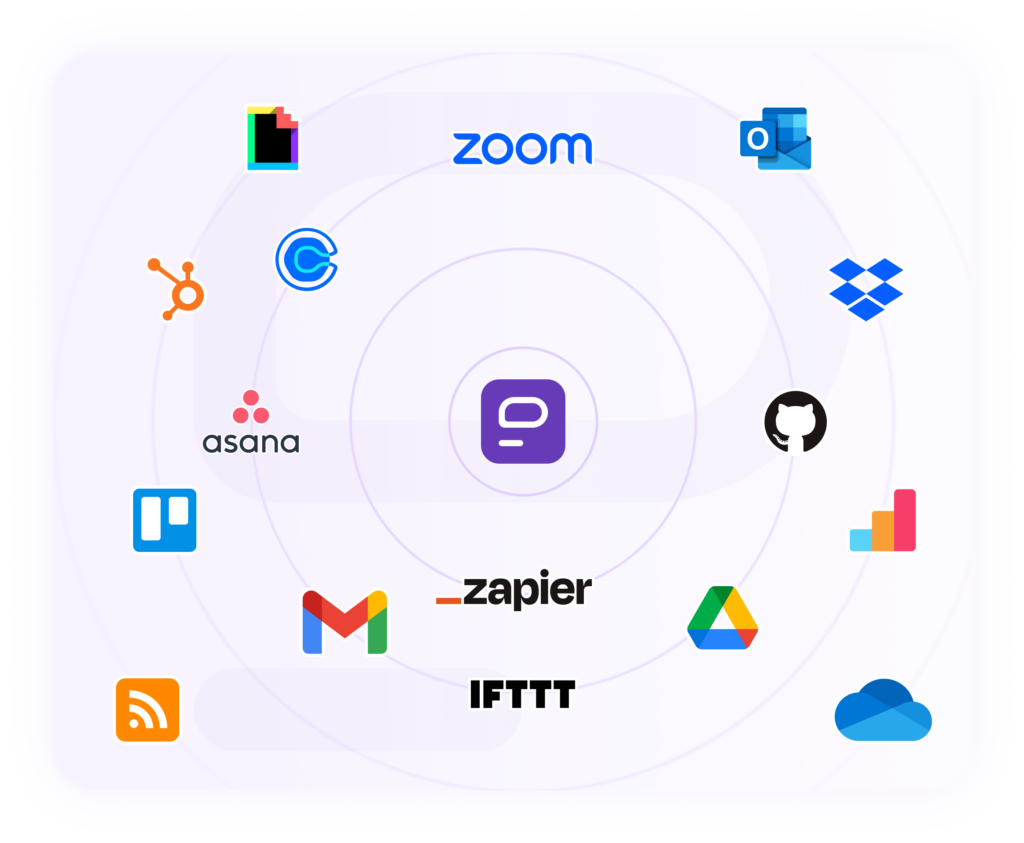
If you’re using a Free plan in Pumble, you can add up to 3 integrations for your workspace. In the Pro plan, Pumble gives you up to 10 integrations, while Business and Enterprise plans let you connect an unlimited number of integrations.
Connect with Zapier and get more than 3000 apps, use Google Calendar integration for your meetings and important events, or RSS for following news and info for your business. Or, you can build your own apps inside Pumble.
Pumble gives you everything in one digital HQ, the choice is yours!
#5 Tip: Don’t forget about messages
Reminders
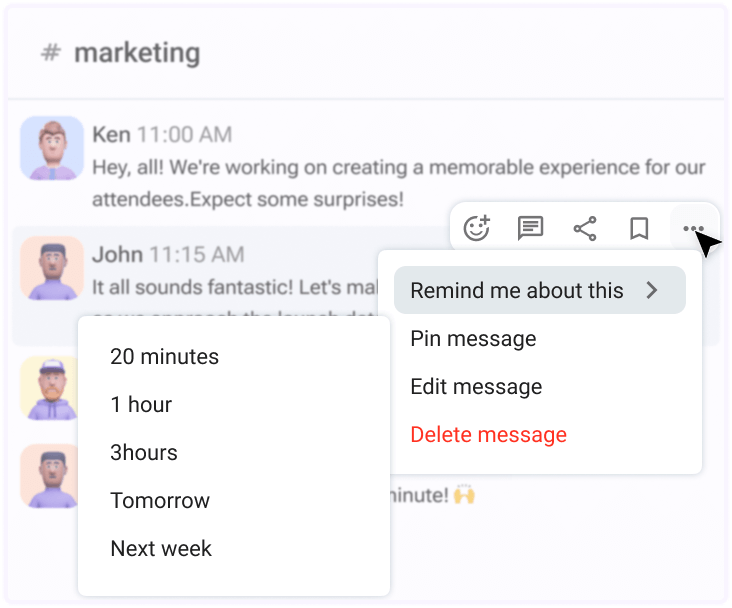
Ever needed a snooze button for your to-do list? Try Pumble reminders. Click the 3 dots icon […] on a message and ask to be reminded about that message later. When the time comes, Pumblebot will offer you a gentle nudge.
🎓 Pumble Pro Tip
Try this! In your own direct message, type the message, and then set a reminder for yourself to drink a glass of water in 30 minutes. Cheers!
Schedule a message
Craft your scheduled messages in advance and set the time when they should be sent. Then sit back and relax as the messages will be sent automatically. Plus, you can save any message as a template for future use. This will save you time and prevent you from typing the same message over and over.
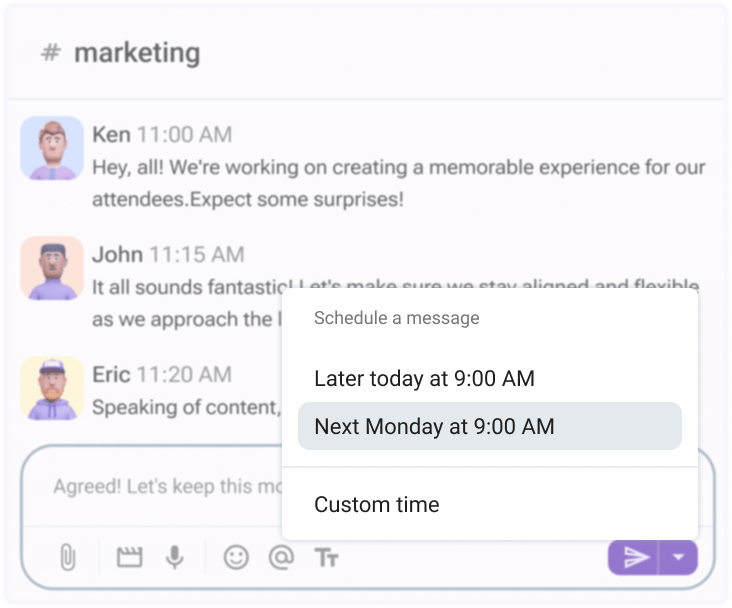
Schedule messages easily over Pumble
Draft messages
When you start writing a message but aren’t ready to send it yet, you can save it as a draft. This allows you to return to the message later, make edits, add attachments, or double-check everything before hitting the “send” button.
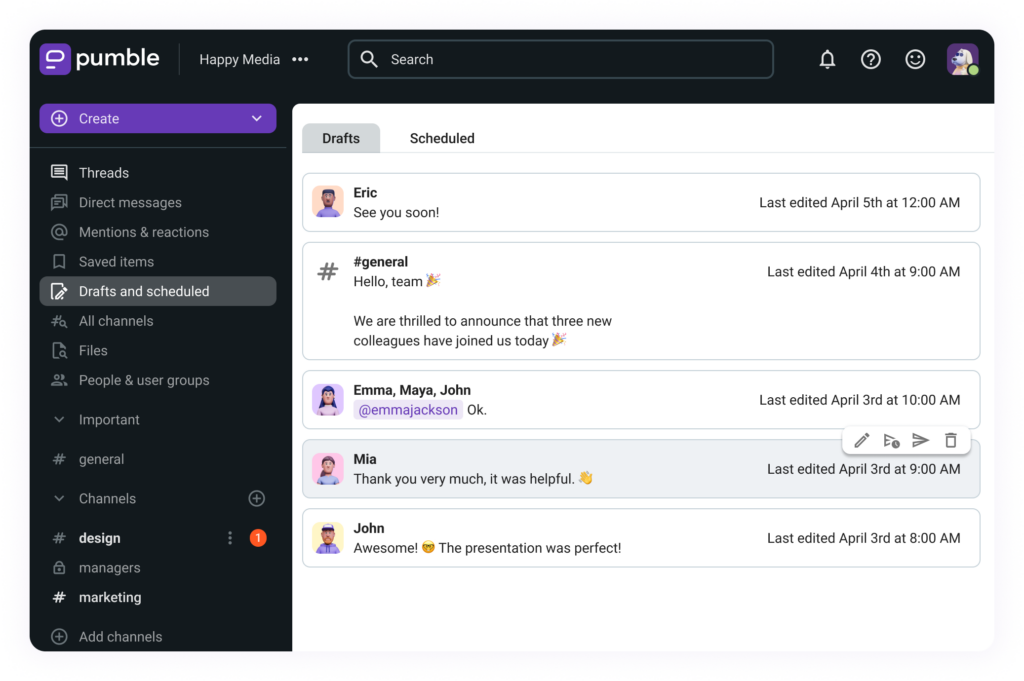
Master Pumble for enhanced productivity
When you’ve got a busy day ahead, finding ways to put your tools to work for you, can save you time, hassle, and headache.
Pumble goes above and beyond to give you options that make your life easier.
As you embark on your journey with Pumble, remember that efficiency is not just a goal; it’s a necessity.
The tips shared in this guide aren’t just suggestions; they’re keys to unlocking a smoother workflow for you and your team.
By incorporating them into your communication practices, you’re not only streamlining processes but also fostering a culture of collaboration and innovation within your organization.
How we reviewed this post: Our writers & editors monitor the posts and update them when new information becomes available, to keep them fresh and relevant.
